Mitre plane
thingiverse
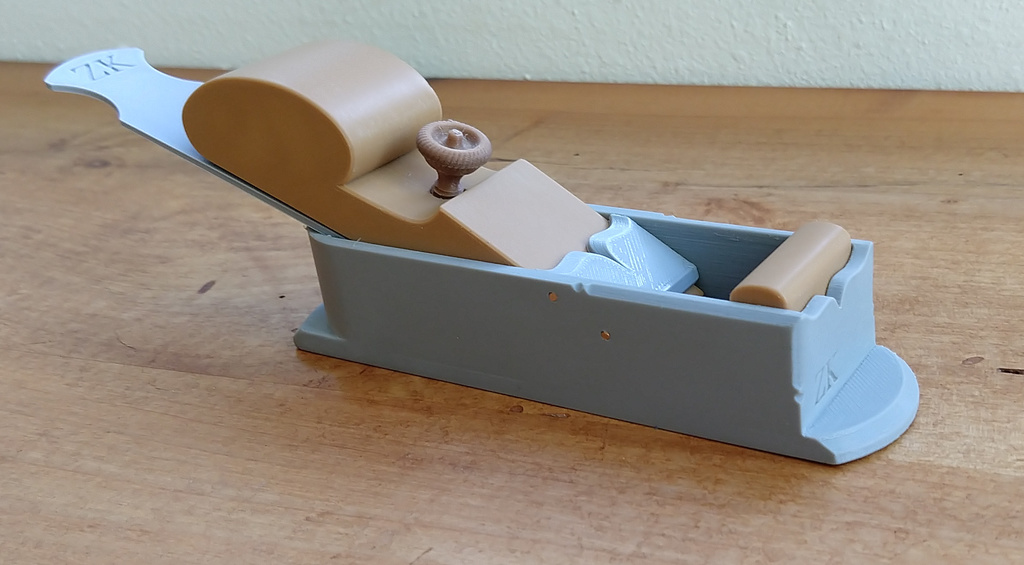
This is a model of a small (6 inch) woodworking mitre smoothing plane. The bed angle is 20 degrees, and the blade is sharpened to 30 degrees, resulting in a cutting angle of 50 degrees. The metal plane is made from steel with sides that are silver brazed on. Silicon bronze pins hold the sole in place during brazing, while the blade spine is welded on. The blade itself is made from a Stanley bench plane blade cut lengthwise. You can learn more about the process at https://zkprojectnotebook.wordpress.com/2012/10/05/how-i-make-small-mitre-planes-introduction/. Note: The planes shown in the photos have had an hour or so of sanding on the sides and lever cap. To assemble the plane, you will need: * 1/8" drills * A hand chuck to hold the drill for reaming holes without power * A 1/4"-20 tap (maybe) - I use a bolt to clean the thread * A 1/4"-20 die (probably not), but a nut will work * 1/8" rod, 1" long (I use welding rod) * 1/16” rod, 1/4" long (four pieces, welding rod) Printer settings: Defaults: * Layer height: 0.15mm * Infill: 15% * Support: None * Brim: None Use the following settings for each part: * mitreM1_blade.stl - Defaults * mitreM1_body.stl - Defaults * mitreM1_wedge_plate.stl - Defaults * mitreM1_bun.stl - 5% infill * mitreM1_cap_screw.stl - Add high detail above the thread using your slicer, and use a built-in brim and support. The support should only touch a single thread at three points. * mitreM1_lever.stl - Use support from the build plate only * mitreM1_wedge.stl - 5% infill and support everywhere Assembly: * Do any sanding of the sides now (optional). The other parts can be sanded later. * Machine the threads as needed. * Clean up the hole in the lever and wedge using a 1/8" drill in a hand vise. If you use power, do it slowly. * Cut the 1/8" rod long, file to length, and round over the ends. The lever notch faces down (towards the blade). * Press the rod through the wedge and lever. * Screw in the cap screw. * Run the 1/16" drill through the holes in the wedge plate and plane sides. Note: These are not through holes. * Cut the 1/16" rods long, file one end square, chamfered, and to length. Test fit before assembling (just press part way in to check alignment) or you will be printing new parts. Press flush with the sides. * Press the front bun into place. * Slide in the blade (logo up). * Slide in the wedge. * Very lightly tighten the screw. * Done Watch these videos for more information: https://youtu.be/8wO3bCo5dxk and https://youtu.be/HD8U8afRrCU.
With this file you will be able to print Mitre plane with your 3D printer. Click on the button and save the file on your computer to work, edit or customize your design. You can also find more 3D designs for printers on Mitre plane.