Mk 2 Orange Screamer
thingiverse
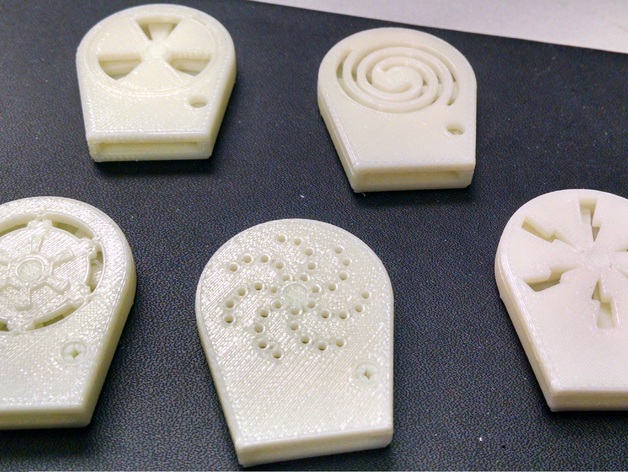
A good friend of mine discovered this little guy on thingiverse and decided that we should make a few modifications. The Mk 2 screamer has a much lower tolerance between the rotor and the base center peg to help reduce the "cordless drill" sound from the original. The increased center peg size also helps keep the Mk 2 lid attached to the base without needing to glue it. A pressure lock was also added to the lower peg of the Mk 2 to help lock the lid in place. Once the Mk 2 lid is mated to the Mk 2 base, they will be fixed to each-other permanently! During testing we found that removing the lid will break the lower peg system. Finally, and most interestingly, we've created 5 amazing designs for the Mk 2 lid! Let us know which one is your favorite in the comments, and feel free to leave suggestions for new lid ideas as it's entirely possible that we will create more lids down the road. **note: has not been tested on low end PLA machines Instructions Step 1: Choose your favorite lid (or if you're like us, choose ALL the lids!) Step 2: Print each part (base, rotor, lid) Step 3: If needed, sand the rotor and underside of the lid slightly to ensure smooth surface (less friction) for the rotor while moving Step 4: Insert rotor into base, insert base into lid, snap together Step 5: Play funky (annoying) whistle tunes!
With this file you will be able to print Mk 2 Orange Screamer with your 3D printer. Click on the button and save the file on your computer to work, edit or customize your design. You can also find more 3D designs for printers on Mk 2 Orange Screamer.