MK2 Heatbed for Vellemann K8400
thingiverse
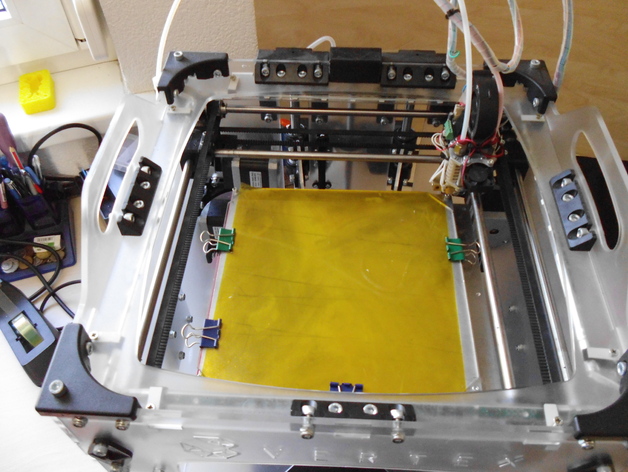
My K8400 Printer from Vellemann does good work, but eventhough using BuildTak, printing ABS is a challenge. So I decided to install a heatbed Material: MK2B Headbed 214x214mmhttp://www.ebay.de/itm/Heizbett-MK2A-12V-PCB-schwarz-heated-bed-platform-build-printing-bed-RepRap-3D-/ Glass Plate 214x214x3mm (extra) Aluminium Plate 214x214x3mm Thermistor 100 kOhm AWG14 power wires for heatbed 0.5m AWG18 wires for therminstor 0.5m heat shrink tube for isolating thermistor connections thermal grease 4 M3x15 screws with allen key head 4 compression springs ID 3mm , 10mm longhttp://www.ebay.de/itm/4x-Druckfeder-5-x-7-x-1-mm-14-mm-lang-RepRap-3D-Drucker-Heizbett-Extruder-/ Female dupont socket connector 1x4, 1x2 20 cm wide capton tapehttp://www.ebay.de/itm/200mm-Polyimide-Tape-Hitzebestandiges-Klebeband-Polyimid-Kapton-3D-Drucker-33m-/ Acetone 4 clipshttp://www.ebay.de/itm/4xMaulklamme-51x20mm-Klemmweite-foldback-clamp-Stahlklammer-bulldog-clip-schwarz- Instructions Solder the AWG14 power wire to the heatbed Solder the normal wire to the therminstor and isolate with a heat shrink tube. Attach the thermistor to the center of the heatbed and them firm with a U shaped soldered wire break off the 4 corners of the glass as a 2cm x 2cm triangle stick capton tape smoothely onto the glass and clean with acetone Unmount the Vertex Metal bed and remove the glass and the 4 holder clips Offset (by 12 mm) 2 holes of the heatbead pcb such as the new holes do not short together when electrically connected by screws. Look at the sketch for that Copy all 4 red holes (from sketch) of the heatbed onto the extra alu plate(4mm hole) Mount the other to holes of the headbed to the rear clip holes of the vertex metal bed firmly Now you can copy the offsetted heatbed hole positions to the vertex bed metalplate Create 2 M3 threded holes in the front of the vertex bed metalplate (2.5mm drill diameter) Sandwich the parts like: vertex bed, spring, heatbed, thermal grease, alu plate, 3mm shrink tube(insulator) , M3 screw install the whole sandwich onto the z-stage again Unplug and unmount the Z Endstop. Offset the Mounting holes of the Z Endstop down by 10 mm. Best practice is to draw a template onto cardboard and mount the cardboard temporarily onto the rear wall. Mount again the Z Endstop and make sure it does not collide with the Z Stage Feed the two cables though the hole in the bottom Cut the cables to correct length(make sure cables are long enough when z stage is in top position) and attach socket connectors Connect the Sockets to the mainboard to "Bed Heater" ( pinout is + + - -) and Bed Therm(pinout is + -) Put Glass onto extra metal plate and attach with clips Test heatbed regulation function Carefully level the new bed: Use screw on z stage, 3 vertex levelling screws from bottom, 4 allen key levelling screws on the top Test autohome and make sure, the hotend does not run into the clips nor into the heatbed Done The Mk2A BRD File was copied from http://reprap.org to match content. Its not actually used
With this file you will be able to print MK2 Heatbed for Vellemann K8400 with your 3D printer. Click on the button and save the file on your computer to work, edit or customize your design. You can also find more 3D designs for printers on MK2 Heatbed for Vellemann K8400.
