MK3 RPi + piTFT cover
prusaprinters
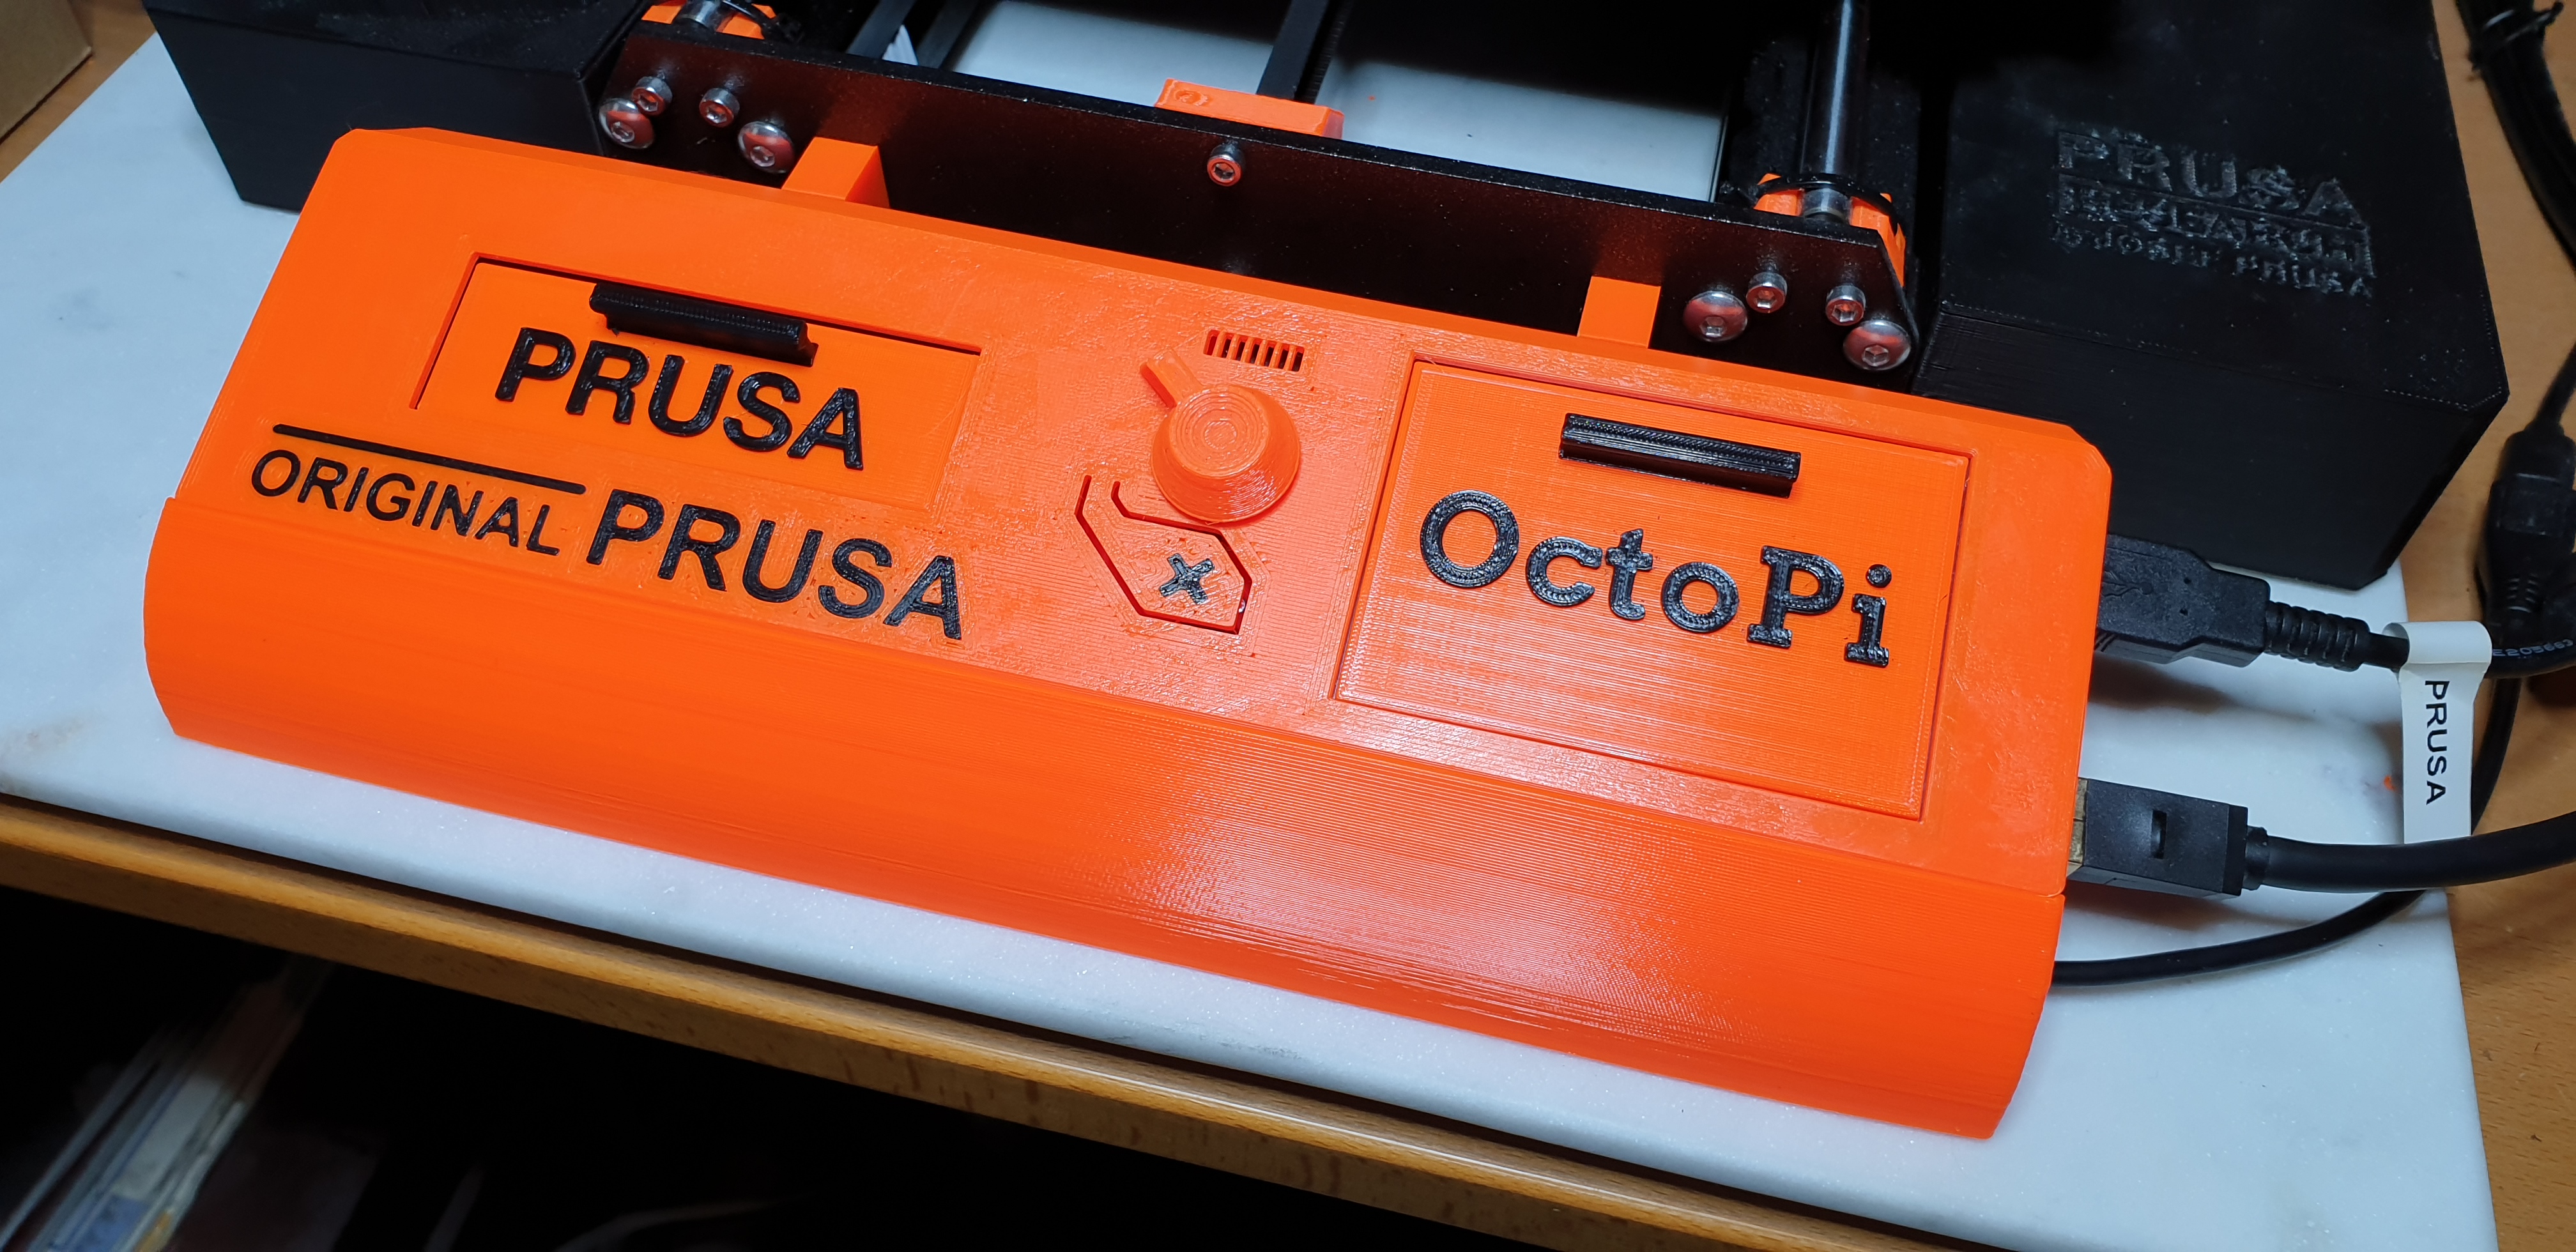
<p>This is an LCD cover for the Prusa MK3 with support for a <strong>Raspberry Pi 3b+</strong> with an <strong>Adafruit piTFT Plus 3.5"</strong> touchscreen (both under the cover).</p><p>It includes an additional cable protector to hide the power and camera cables and two screen covers to protect them from dust when not in use.</p><p>It's a remix from:</p><ul><li><a href="https://www.thingiverse.com/thing:3680646">MK3S Prusa Super Cover Remix - Centered and Tweaked (v7 open end cap) from FlyByTom</a></li><li><a href="https://www.thingiverse.com/thing:2407184">Light Blocking LCD Screen Cover for Original Prusa Mk2S by hopkinsju</a></li></ul><p>STEP files included.</p><p>Update 2021-12-05:</p><ul><li>Update of some links and procedures.</li></ul><p>Update 2020-01-08:</p><ul><li>Made it 4mm longer so the electronics have more space in between.</li><li>Slightly adjusted the position of some screw holes for the electronics.</li><li>Thickened the LCD side to avoid seeing the black part of the screen through the plastic.</li><li>Added printable letters for a multicolor cover.</li><li>Separated connectors from main cover body (so they can be adapted more easily to other printer frames).</li><li>Added small floor piece to the cable protector so it doesn't wiggle if it's over the air.</li><li>Increased height of screen cover handles for better grip.</li></ul><p>Update 2020-01-10:</p><ul><li>Added experimental Bear connectors. They will be hard to set up and not as sturdy. The space between them must be 109.85mm. Instructions are only for the regular ones. Please tell me if they work.</li></ul><h3>Print instructions</h3><ul><li><strong>Cover</strong>: print it as it loads, but rotate it also 35 degrees (so it fits the bed) and add support enforcers where necessary. Recommended at least 4 perimeters.</li><li><strong>Cable Protector</strong>: print it with the base on the bed with supports. And by that i mean align the bottom face with the bed using the "place on face" feature of PrusaSlicer. You will also need to angle it about 35 degrees.</li><li><strong>Connectors</strong>: print them laying down with the nut holes up. Recommended at least 3 perimeters.</li><li><strong>Screen covers</strong>: place them flat on the bed. No special settings except for the optional color change.</li></ul><p>I suggest setting also the infill and supports angles to 35 degrees so it matches the angle of the parts.</p><p>If you also want to print the letters on the cover you can use the MMU2 (or equivalent method since its only four filament changes).</p><h4><strong>Hardware</strong></h4><ul><li><a href="https://www.amzn.com/B07BFH96M3/">Raspberry Pi 3 model B+</a></li><li>Compatible MicroSD (i got a <a href="https://amzn.com/B06XWMQ81P">Sandisk Extreme 32Gb</a>)</li><li>Power adapter for the Rapberry (mine had a switch and came with <a href="https://www.amzn.com/B07BT65FT1">this box</a> which also had heatsinks).</li><li>MicroUSB short angled cable to connect the power adapter (i got <a href="https://www.amazon.es/gp/product/B071V8LYJC/">these</a> but <a href="https://amzn.com/B01C6031MA">these</a> might also work)</li><li><a href="https://www.adafruit.com/product/2441">Adafruit piTFT Plus 3.5" 480x320 touchscreen</a></li><li>Two M2x4mm screws to secure the touchscreen to the cover.</li><li>The two (or up to four) M3x10 screws from the original Prusa cover.</li><li>The four M3x12 screws from the original Prusa cover to attach to the printer frame. If you want to secure the cover to the connectors use instead two M3x16 screws in the bottom holes.</li><li>Optional: USB camera (i have a Logitech C920)</li><li>Optional: ethernet</li></ul><h4><strong>Software</strong></h4><ul><li><a href="https://octoprint.org/download/">OctoPi</a></li><li><a href="https://github.com/Z-Bolt/OctoScreen">OctoScreen</a></li><li><a href="https://plugins.octoprint.org/plugins/octolapse/">OctoLapse plugin</a> (if you want to do timelapses)</li></ul><h4><strong>Instructions</strong></h4><p>(photos show old version)</p><p>Install, configure, and test the Raspberry Pi, touchscreen and software before anything else. I assembled these steps based on the guides i followed.</p><p>1. Connect the PiTFT to the Pi</p><p>2. Install and Configure OctoPi. Follow the instructions form the <a href="https://github.com/guysoft/OctoPi">OctoPi website</a></p><blockquote><p>You might need to first update packages with this:</p><p><code>sudo apt-get update --allow-releaseinfo-change</code></p><p>Install Raspbian Desktop:</p><p><code>sudo /home/pi/scripts/install-desktop</code><br><code>sudo reboot</code></p><p>Install Dependencies:</p><p><code>sudo apt-get install xinit x11-xserver-utils xserver-xorg-input-evdev</code></p><p>Move 40-libinput.conf</p><p><code>sudo mv /usr/share/X11/xorg.conf.d/40-libinput.conf ~/</code></p><p>Install PiTFT Drivers. Following the <a href="https://learn.adafruit.com/adafruit-pitft-3-dot-5-touch-screen-for-raspberry-pi/easy-install-2">Easy Install</a> method that Adafruit supplies or:</p><p><code>cd ~</code><br><code>wget https://raw.githubusercontent.com/adafruit/Raspberry-Pi-Installer-Scripts/main/converted_shell_scripts/adafruit-pitft.sh</code><br><code>chmod +x adafruit-pitft.sh</code><br><code>sudo ./adafruit-pitft.sh</code></p><ul><li>For the 3.5″ PiTFT select #4</li><li>Rotation: select #1 (90 deg)</li><li>Would you like the console to appear on the PiTFT display? No</li></ul><p>Would you like the HDMI display to mirror to the PiTFT display? Yes</p><p>If you need to calibrate the touch screen follow <a href="https://learn.adafruit.com/adafruit-pitft-3-dot-5-touch-screen-for-raspberry-pi/touchscreen-install-and-calibrate">this Adafruit guide</a></p><p>Uninstall Lightdm window manager</p><p><code>sudo dpkg -r --force-depends lightdm</code></p><p>Install OctoScreen (make sure to update the package url and name for the last version for your Octopi release. Check <a href="https://github.com/Z-Bolt/OctoScreen/releases">here</a>)</p><p><code>cd ~</code><br><code>sudo apt-get install libgtk-3-0 xserver-xorg</code><br><code>wget https://github.com/Z-Bolt/OctoScreen/releases/download/v2.7.4/octoscreen_2.7.4_armhf.deb</code><br><code>sudo dpkg -i octoscreen_2.7.4_armhf.deb</code></p><p>Edit OctoScreen Configuration File</p><p><code>sudo vi /etc/octoscreen/config</code></p><p>Leave everything default except:</p><p><code>OCTOSCREEN_RESOLUTION=800x533</code></p><p>Edit Octopi resolution</p><p><code>sudo vi /boot/config.txt</code></p><p>Change the resolution in the last line to:</p><p><code>hdmi_cvt=800 533 60 1 0 0 0</code></p><p>Reboot & Test</p><p><code>sudo reboot</code></p><p>You will need to have the printer connected to the Pi and switched on to test OctoScreen.</p></blockquote><p>3. Completely disassemble the original cover (no need to separate the original screen from its attached board). You will need to cut the zip tie holding the ribbon cables, but you don't need to put a new one. Take note of the position of the two ribbon cables (i used post-it to mark them left and right) so you can attach them in the same positions afterwards.</p><p>4. Screw the touchscreen with two M2x4 screws (exterior side). Don't overtighten them.</p><figure class="image"><img src="https://media.prusaprinters.org/media/prints/6153/rich_content/ace283c1-772a-4971-bef0-cef1b48dc0ca/step3.jpg#%7B%22uuid%22%3A%22bdbcdbde-89b1-4489-8d16-51fec84e3a50%22%2C%22w%22%3A3381%2C%22h%22%3A1182%7D"></figure><p>5. Screw the original electronics with two (or more) M3x10 screws. Again, don't overtighten them.</p><figure class="image"><img src="https://media.prusaprinters.org/media/prints/6153/rich_content/bd920c9e-6bca-4558-8080-7fb0eb843111/step4.jpg#%7B%22uuid%22%3A%22f99d6561-864d-4d52-a1e6-e5c399227989%22%2C%22w%22%3A3250%2C%22h%22%3A1120%7D"></figure><p>6. Attach the Raspberry Pi to the touchscreen. Make sure it rests in the two small ledges because it will sag due to its weight.</p><figure class="image"><img src="https://media.prusaprinters.org/media/prints/6153/rich_content/06766a8d-006c-49ca-8c6d-a6fd661d57d8/step5.jpg#%7B%22uuid%22%3A%22bbe099d3-0b41-4791-bda2-1d5cb0dbb62b%22%2C%22w%22%3A3545%2C%22h%22%3A1222%7D"></figure><p>7. Reconnect the two ribbon cables.</p><figure class="image"><img src="https://media.prusaprinters.org/media/prints/6153/rich_content/179bb42d-ec98-41f2-8975-ce5acd1f4ffc/step6.jpg#%7B%22uuid%22%3A%221e970559-947a-4827-8939-0a5d1d630fdf%22%2C%22w%22%3A3572%2C%22h%22%3A1633%7D"></figure><p>8. Screw the connectors to the printer frame with four M3x12 screws. If you want to better secure the cover use two M3x16 screws in the bottom holes but screw them just up to the nut.</p><p>9. Slide the cover to the connectors. Complete screwing the two bottom screws if you used the M3x16.</p><p>10. Attach the printer USB cable to the raspberry, the USB camera if you use one, the ethernet if you use it, and the Pi power cable.</p><p>11. Attach the rounded cover.</p>
With this file you will be able to print MK3 RPi + piTFT cover with your 3D printer. Click on the button and save the file on your computer to work, edit or customize your design. You can also find more 3D designs for printers on MK3 RPi + piTFT cover.