MK3/S/+ Bed level dial gauge mount
prusaprinters
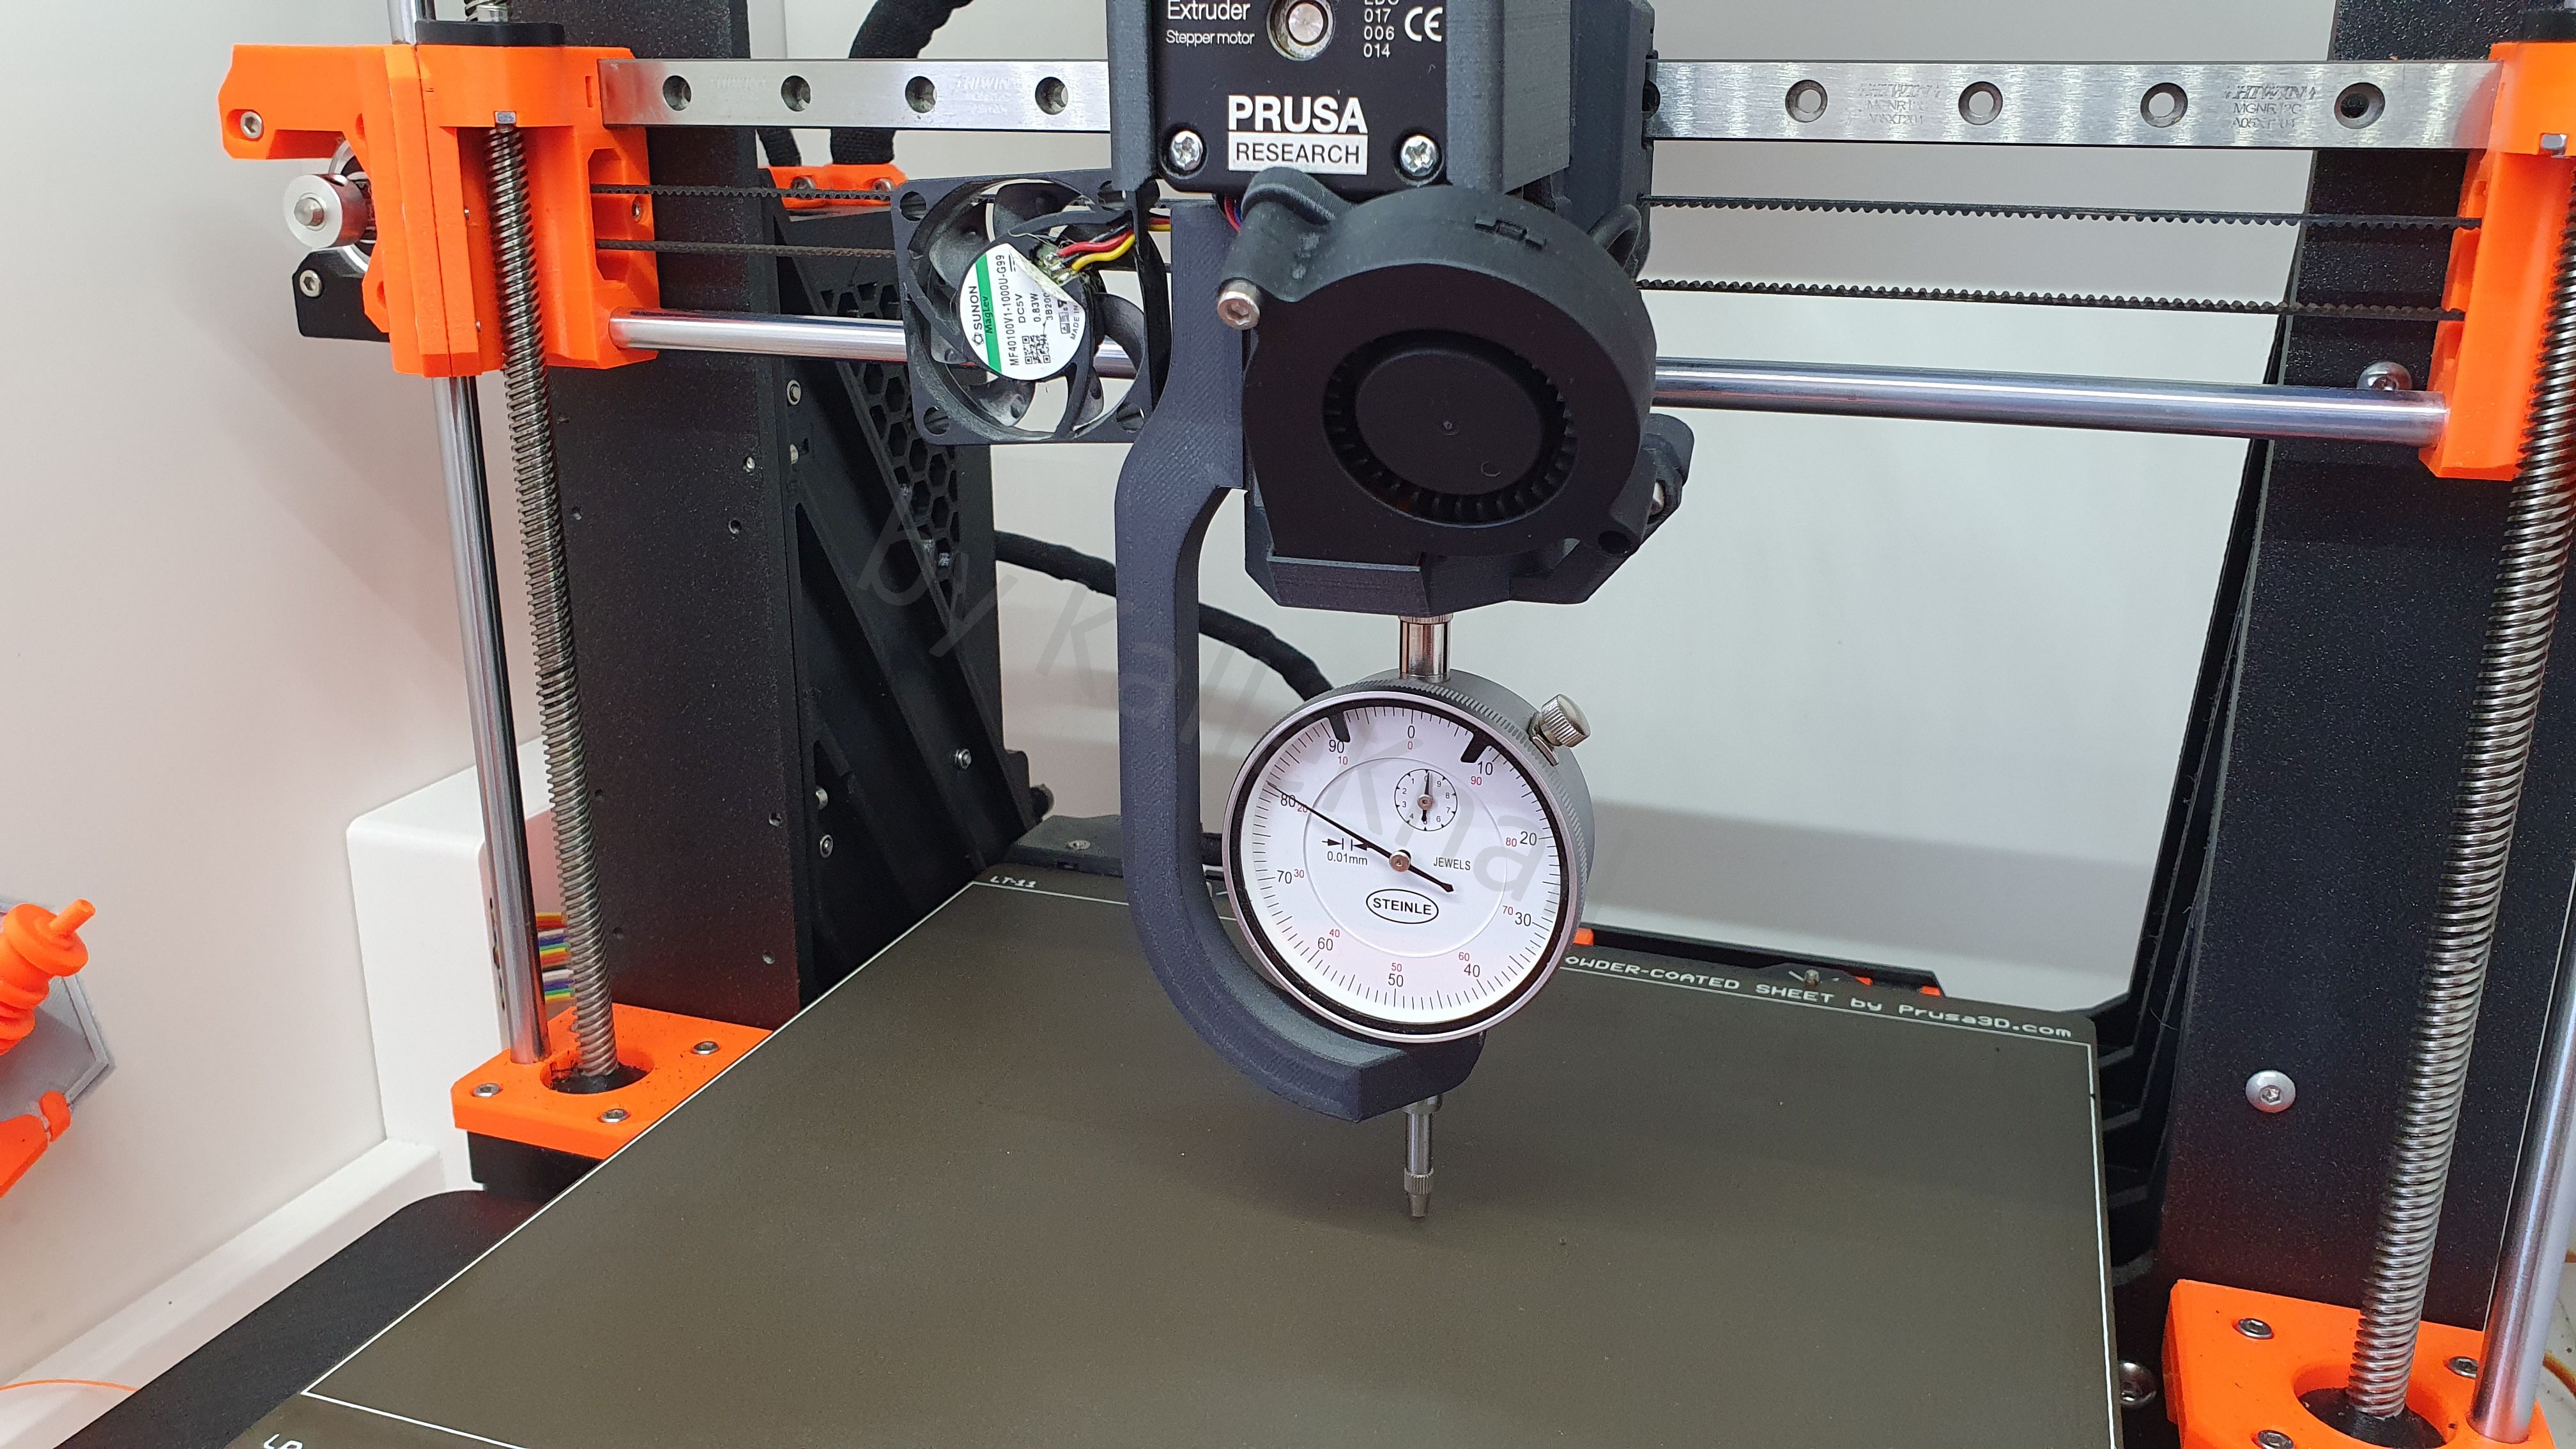
<p>I've designed my own dial gauge mount to level my modded bed (silicon mod/nyloc mod) manualy with my analog dial gauge. The shaft for the gauge has a size of 8mm. </p><p>My part is printed with Prusament PC Carbon Fiber black (like my Extruder :-) ) to make it stiff and more temperature resistant.</p><p>To Mount it to the extruder body, just remove your Hotend fan and use the fan screws to fasten it. Please do not over tighten the screws !</p><h4><br>Level process:<br> </h4><ol><li>Remove the Steel Sheet<br> </li><li>Heat up the Bed to 100° or your most used heatbed temperature.<br> </li><li>Use octoprint to Home X/Y Axis and move the gauge tip to the center ( <img class="image_resized" style="width:12.95%;" src="https://media.prusaprinters.org/media/prints/129693/rich_content/1e5aba0c-5141-48c2-b629-870be2ab87d5/100.png#%7B%22uuid%22%3A%22f75d9d8b-7050-4e25-9858-3b84e62a2202%22%2C%22w%22%3A212%2C%22h%22%3A40%7D"> X +100mm and Y +100mm). <br><br><strong>! DO NOT HOME Z-AXIS IF THE GAUGE IS MOUNTED !</strong><br><br><img src="https://media.prusaprinters.org/media/prints/129693/rich_content/9c52e713-c47e-4a9f-ace1-c95bd0e60c37/octo1.png#%7B%22uuid%22%3A%2287f71d31-03d9-45a6-a75a-86125cd3eb8c%22%2C%22w%22%3A1181%2C%22h%22%3A512%7D"><br> </li><li>Lower the tip to the heatbed and reset the gauge to zero. Please try to hit the conductor track - avoid the gap between the conductor track, the white lines and the Screws.<br><br><strong>! DO NOT MOVE THE EXTRUDER WITH LOWERED TIP !</strong><br><strong>! DO NOT CRASH INTO YOUR HEAT BED ! </strong><br> </li><li>Now move the tip up and move to the first corner ( <img class="image_resized" style="width:12.95%;" src="https://media.prusaprinters.org/media/prints/129693/rich_content/1e5aba0c-5141-48c2-b629-870be2ab87d5/100.png#%7B%22uuid%22%3A%22f75d9d8b-7050-4e25-9858-3b84e62a2202%22%2C%22w%22%3A212%2C%22h%22%3A40%7D"> +- 100mm). Lower the tip to got your meassure - use small steps <img class="image_resized" style="width:13.04%;" src="https://media.prusaprinters.org/media/prints/129693/rich_content/69c47727-cf13-4549-be29-bccd5e570191/1.png#%7B%22uuid%22%3A%227a8ec505-5e75-43cf-a444-c56daec591bf%22%2C%22w%22%3A213%2C%22h%22%3A40%7D"> !<br><br><strong>Please only take the measurement when the heating bed is actually heating up (red display on the heating bed flickers). The shrinkage and expansion falsifies the measured values.</strong><br> </li><li>Use your Allen key to lower or upper your Bed. <br><br><strong>Do not touch the Gauge or the Heatbed</strong><br> </li><li>Upper and lower you tip 5 times to get a valid meassure and check if it is repeatable.<br> </li><li>Repeat this for all corners 2-5 times.<br> </li><li>To Check the Result i recommend the OctoPrint Plugin <strong>Bed Visualizer.</strong><br><br><img class="image_resized" style="width:50%;" src="https://media.prusaprinters.org/media/prints/129693/rich_content/3f1ba04d-8eac-4beb-aa3f-8c40210fb04f/2022-02-05_14-46-05.png#%7B%22uuid%22%3A%228da3e71a-6ae8-4cf7-bd04-6cfde872f452%22%2C%22w%22%3A588%2C%22h%22%3A450%7D"><br>not the Best Result, but ok :-)<br> </li><li>It is might a good idea to check the Bed with applied Steel Sheet.<br> </li></ol><h4><br><br>Print Instruction</h4><p>Use ASA, PC or ABS if you take the meassuremant on heated heatbed. PETG and PLA could work too if you are fast.<br><br>Print it with many perimeter (5-6) and much infill 40-50%.<br> </p><h4>What you need</h4><p>You need a M3 x 14mm Screw and in my case a M3 nyloc nut (standard nut will work too)</p><p> </p>
With this file you will be able to print MK3/S/+ Bed level dial gauge mount with your 3D printer. Click on the button and save the file on your computer to work, edit or customize your design. You can also find more 3D designs for printers on MK3/S/+ Bed level dial gauge mount.