MK3S heat-bed cable cover with reduced 3mm height profile to allow clearance for extruder rear-mounted endoscope
prusaprinters
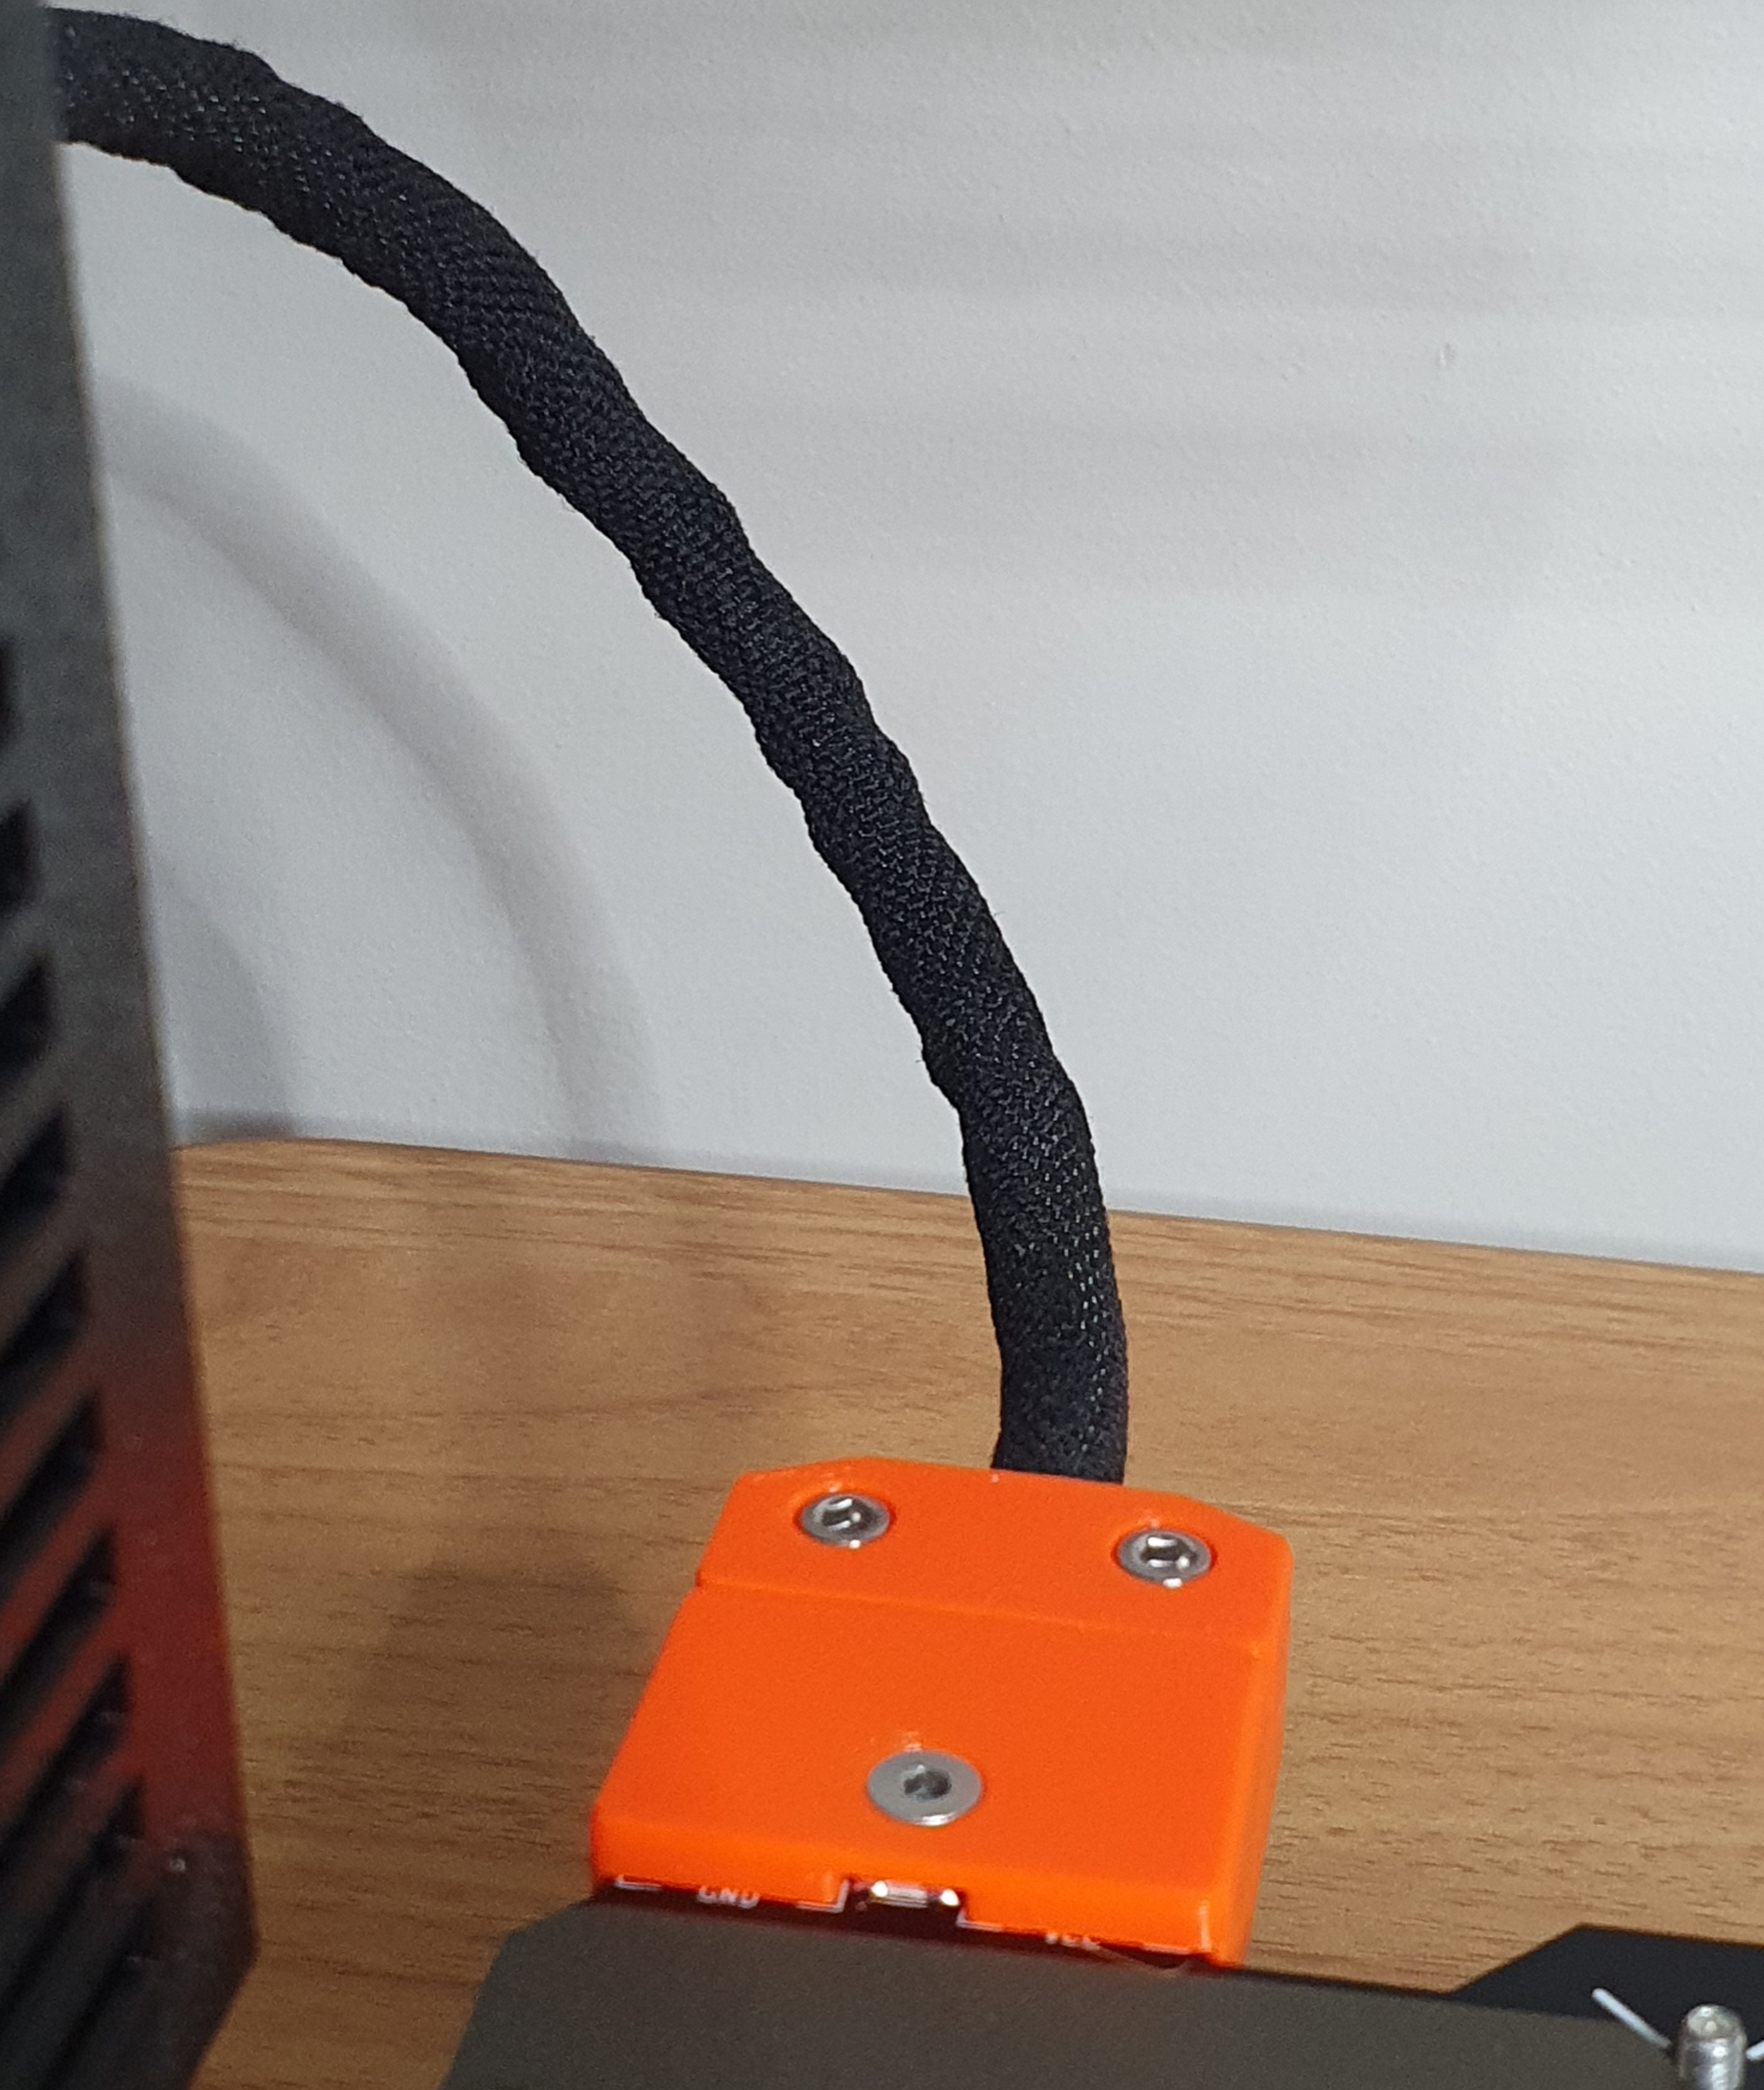
<p>In experimenting with mounting an endoscope camera on the rear of the MK3 extruder, I found the endoscope was crashing into the Prusa heat-bed cable cover assembly during mesh bed leveling.</p><p>The Prusa cover height appears to be 5mm, with the screw head protruding even higher.</p><p>I found a 4mm height profile cover on Thingverse that was made to solve my problem. It requires the heat-bed to be soldered and the heat-bed loom comes out at 90°, to address heat-bed loom issues encountered when the MK3 is placed close to the back of an enclosure.</p><p><a href="https://www.thingiverse.com/thing:3585029">https://www.thingiverse.com/thing:3585029</a></p><p>The minimal height target is actually 3mm, to match the height of the locating pins at the back of the heat-bed.</p><p>Searching Printables, I found more heat-bed cable covers, the majority of which were trying to solve problems with placing the MK3 close to the back of an enclosure.</p><p>After I made a soldered heat-bed cover, 90° like those covers, I found the extruder loom interfered with the heat-bed loom, especially during mesh bed levelling.</p><p>So I reverted to the original Prusa design as 90° isn’t necessary to solve the height problem.</p><p>The solution to the enclosure depth problem is to buy a Prusa MK3 enclosure </p><p>The low profile cover design requires the two screw-fixed connections to be converted to soldering.</p><p>I have seen examples of soldering to the MK52 heat-bed where the wire is simply placed on the pads and soldered. Doing that has problems. Firstly, the wires have a greater risk of accidentally breaking free of the heat-bed, damaging the heat-bed in the process. Secondly, the soldered connection presents a high height profile.</p><p>The low profile cover design requires the wires to be inserted from the underside of the heat-bed, up through the existing M3 holes. Experienced electronics people should have no issues with this. But I offer the following suggestions.</p><p>Care should be taken to ensure all strands of the stripped cable go up through the hole to avoid the risk of whisker-shorting underneath.</p><p>The stripped multi-strands should be splayed evenly around the connection pads on top, producing the lowest possible soldered height profile.</p><p>The cables should be stripped no more than 4mm so that they do not protrude over the edges of the connection pads when splayed. If any strands do, there is a risk of interference with fitting the cable cover and potentially shorting the 24V. </p><p>Double-check the correct polarity of the cables before soldering to avoid potential damage to the heat-bed when unsoldering and swapping the cables.</p><p>I’m a fan of easy-to-assemble designs. This one has three pieces, allowing the top and bottom pieces to be secured before touching the loom sheath. The strain relief has the same profile as the Prusa design.</p><p>The three M3 nuts can be re-used. But a new M3x12 countersunk screw is required. </p><p>Two of the existing M3x10 screws can be re-used to secure the strain relief after neatly placing the loom in the bottom piece.</p><p> </p>
With this file you will be able to print MK3S heat-bed cable cover with reduced 3mm height profile to allow clearance for extruder rear-mounted endoscope with your 3D printer. Click on the button and save the file on your computer to work, edit or customize your design. You can also find more 3D designs for printers on MK3S heat-bed cable cover with reduced 3mm height profile to allow clearance for extruder rear-mounted endoscope.