MK3S Pen Plotter Mod | Direct Attachment | Easy Fitting
prusaprinters
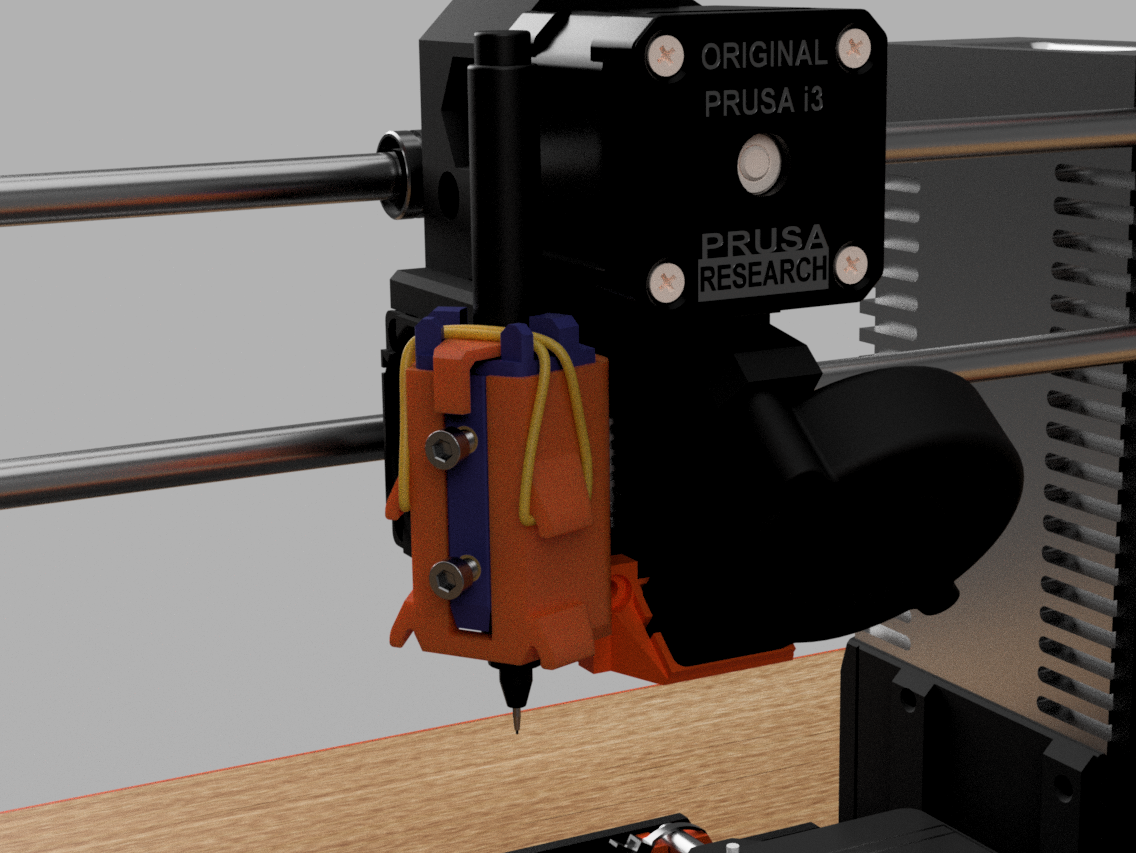
<p>This isn't quite a remix but a slight design change. I originally used Reven's Pen Plotter (https://www.prusaprinters.org/prints/63385-pen-plotter-attachment-for-prusa-mk3s) attachment as you'll see some similarities, so first to thank Reven for getting me into this and a bit of plotting! Though I found a few ways that it could be improved upon. <br>The key issue for me was that the pen fixing tube and the bracket are printed horizontally so they have to slide across one and another along the ridges of the layers... although the two parts didn't have much friction, it was noisy and not the best approach.</p><p>So all parts to this are printed laying down (apart from the clamp protector piece) so the sliding surfaces move on the direction of the print layers, with me?</p><p>This version fits in exactly the same way. Not intrusive, just whip the pen out before regular printing. The current design will accept pens 7-11mm in diameter, which is most pens tbh. If theres a demand for larger I may add an XL version. I also liked Reven's setup tool to make that process a little easier and have implemented something similar so you'll always have the pen at a standard height, it makes colour changes a doddle. </p><p><strong>Build List</strong><br>Some things you'll require:<br>A 24mm and 20mm M3 bolt (dig out the Prusa spares box) for fitting it. The longer bolt for the lower fixing. <br>2x 12mm M3 bolts - for the pen clamp<br>2x M3 insert nuts (optional)<br>Small elastic band</p><p><strong>Files and Slicing</strong><br>If you're printing on a Prusa I'd recommend using the Project File, sliced for a MK3S(+) all settings are dialled in. Just ensure your printer is in good shape and your pretty confident that the dimensional tolerance is accurate. Also that you are on the latest version (current 2.4.0 for the slicer and 3.10.0 printer).</p><p>If not, all files are supplied. Check the slicer screenshot for the orientation and use of supports, which is minimal. Do NOT go putting supports inside of the Outer or Inner pieces as it might have a big impact on its operation in use (and be a pain to remove). PLA at 2 perimeters and 10% of any infill (it doesn't particularly need it due to the geometry), 4 bottom and top layers, set the top layer pattern to concentric.</p><p><i>Note</i>, do check the first layer is perfect, any warping of the Outer piece will again have a big impact on its operation.</p><p>If you don't have M3 insert nuts (get some they're very usefull!) don't worry. Theres a alternative pen clamp piece to just use M3 bolts screwing into the plastic, that is in the complete project file with NO INSERTS in the title. Or on it's own its the Pen Clamp B.stl file.<br> </p><p>For more info on setup and calibration please download the Read Me text file. I'd highly recommend it ;)</p>
With this file you will be able to print MK3S Pen Plotter Mod | Direct Attachment | Easy Fitting with your 3D printer. Click on the button and save the file on your computer to work, edit or customize your design. You can also find more 3D designs for printers on MK3S Pen Plotter Mod | Direct Attachment | Easy Fitting.