MK3S+/Y-axis belt tensioner
prusaprinters
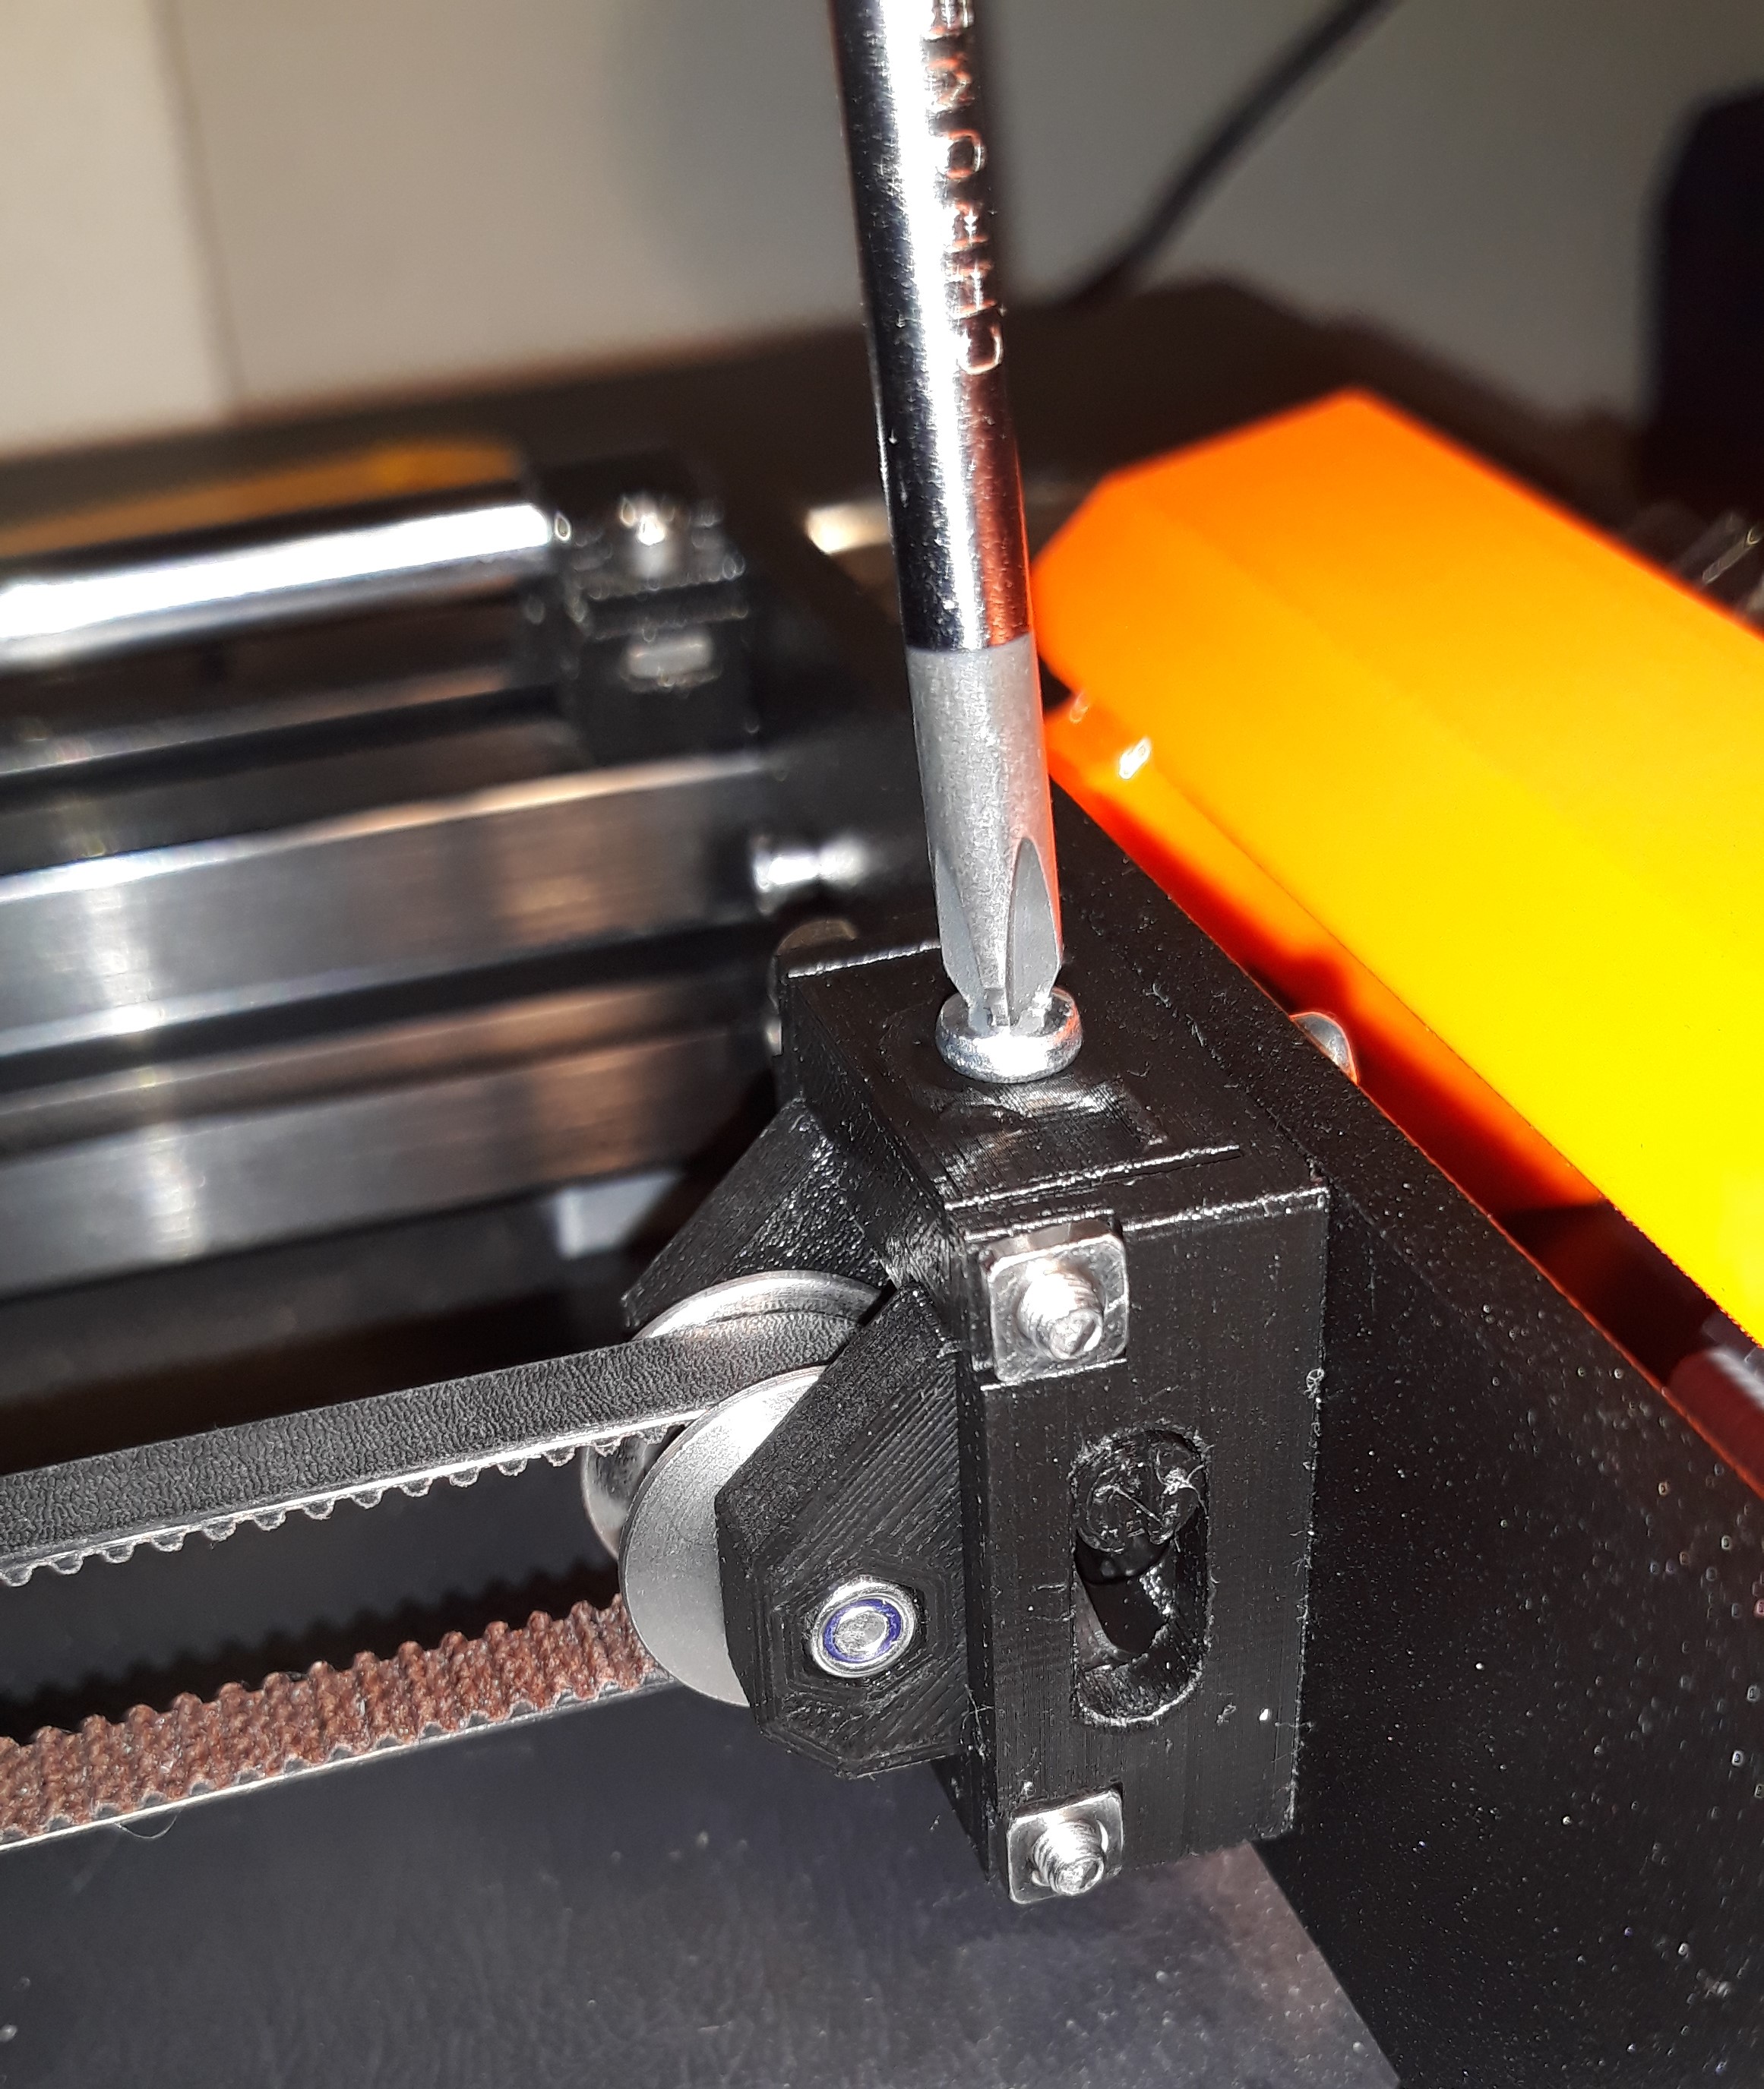
<p><strong>Y-axis belt tensioner </strong>(description and assembly instructions):</p><p><br><strong>1. What is it for?</strong><br>The original tensioning located under the printer's heat-bed is complemented by a<br>new return pulley bracket with built-in tensioner. It is tightened with one easily accessible<br>screw and after tensioning it is fixed with two screws (max. belt tension is 6 mm / 18 turn<br>screw, i.e. 0.33 mm / turn screw). It is advisable to check it with a Prusa tension meter.</p><p><br><strong>2. How to put it together?</strong><br>It consists of 6 pieces of printed and screwed parts (fig.):<br>● screw any long M3 screw into the hole of the PIN part to create a thread in it and<br>unscrew it again<br>● insert the BRACKET (right hand under the (+) mark and left hand BRACKET_mir<br>under the (-)) into the HOLDER so that it is oriented with the hexagonal recess<br>outwards<br>● insert the PIN from the opposite side into the groove of the HOLDER until it slides out<br>of the second groove through the BRACKET by approx. 8 mm<br>● insert the original M3x18 screw into the inserted BRACKET part into the hexagonal<br>recess and put on SPACER+PULLEY+SPACER on it and align the end of the screw<br>with it<br>● push the original self-locking nut M3 into the second BRACKET and slide the part<br>into the HOLDER (if you already have the belt connected, don't forget to put it on the<br>PULLEY before inserting the BRACKET!)<br>● the PIN and the screw M3x18 push through the second BRACKET, align the pulley<br>axis and tighten the screw<br>● insert the M3x40 full thread (!) screw into the HOLDER from the marked side (+) and<br>(-) and screw it into the PIN until the screw head rests on the HOLDER<br>● put the washer and a self-locking nut M3 on the end of the bolt and tighten slightly so<br>that the bolt and nut rotate together<br>● insert two M3x30 screws into the HOLDER and secure with square nuts<br>● set the HOLDER vertically with the (+) and (-) marks up and slide one square nut into<br>the bottom groove from the back of the HOLDER</p><p><br><strong>3. How to install it in the printer?</strong><br>● insert the first M3x8 screw from the outside into the upper hole in the front board of<br>the printer intended for mounting the original return pulley bracket (CAUTION - the<br>original M3x10 screws must be shortened by 2 mm or a new one must be used),<br>screw a square nut onto it and leave a clearance of 1,5-2 mm from the printer board<br>● slide the HOLDER into this gap on the nut and tighten the screw slightly<br>● insert the second M3x8 screw into the lower hole in the front board, align the<br>tensioner and tighten both screws</p><p> </p><p><strong>Napínák řemene osy Y (popis a návod k montáži):</strong></p><p><br><strong>1. K čemu to je?</strong><br>Původní napínák umístěný pod topnou podložkou tiskárny doplňuje nová konzola<br>vratné kladky s vestavěným napínáním. Řemen pak lze napnout jedním dobře přístupným<br>šroubem a po napnutí zajistit dvěma fixačními šrouby (max. napnutí řemene je 6 mm/18 ot.<br>šroubu, t.j. 0,33 mm/ot. šroubu). Napnutí je přitom vhodné kontrolovat měřičem tahu Průša.</p><p><br><strong>2. Jak to složit?</strong><br>Skládá se to ze 6 ks tištěných a sešroubovaných dílů (obr.):<br>● do otvoru dílu PIN zašroubuj libovolný šroub M3, aby se v něm vytvořil závit a<br>zase jej vyšroubuj<br>● do dílu HOLDER zasuň díl BRACKET (praváci pod značku (+) a leváci<br>BRACKET_mir pod značku (-)), aby byl orientován 6-hranným zahloubením<br>směrem ven<br>● PIN zasuň z opačné strany než BRACKET do boční drážky dílu HOLDER, až<br>se z druhé drážky vysune skrz BRACKET ven asi o 8 mm<br>● do zasunutého dílu BRACKET vlož původní šroub M3x18 hlavou do<br>6-hranného zahloubení a na něj navleč SPACER+PULLEY+SPACER a<br>zarovnej s ním konec šroubu<br>● do druhého dílu BRACKET zatlač původní samojistnou matici M3 a díl zasuň<br>do dílu HOLDER (pokud už máš spojený řemen, nezapomeň ho před<br>zasunutím dílu BRACKET nasadit na PULLEY!)<br>● šroub M3x18 i PIN prostrč i druhým dílem BRACKET, srovnej osu kladky a<br>šroub dotáhni<br>● šroub M3x40 (musí mít závit k hlavě!) zasuň do dílu HOLDER ze strany<br>značek (+) a (-) a zašroubuj do dílu PIN až hlava šroubu dosedne na<br>HOLDER<br>● na konec šroubu nasaď podložku a samojistnou matici a mírně dotáhni, aby<br>se šroub i matice otáčely společně<br>● zasuň dva šrouby M3x30 do dílu HOLDER a zajisti čtvercovými maticemi<br>● drž HOLDER svisle značkami (+) a (-) nahoru a ze zadní strany zasuň jednu<br>čtvercovou matici do spodní drážky</p><p><br><strong>3. Jak to nainstalovat do tiskárny?</strong><br>● do horního otvoru v přední desce tiskárny určeného pro uchycení původní<br>konzoly vratné kladky zasuň zvenčí první šroub M3x8 (POZOR-původní<br>šrouby M3x10 je nutné o 2 mm zkrátit nebo použít nové), na něj zevnitř<br>našroubuj čtvercovou matici a nechej vůli 1,5-2 mm od přední desky tiskárny<br>● do této mezery nasuň HOLDER na matici a šroub mírně dotáhni<br>● do spodního otvoru v přední desce vlož druhý šroub M3x8, srovnej napínák a<br>oba šrouby dotáhni</p>
With this file you will be able to print MK3S+/Y-axis belt tensioner with your 3D printer. Click on the button and save the file on your computer to work, edit or customize your design. You can also find more 3D designs for printers on MK3S+/Y-axis belt tensioner.