MMU2 Prusa Bear-BMG fusion REMIX
thingiverse
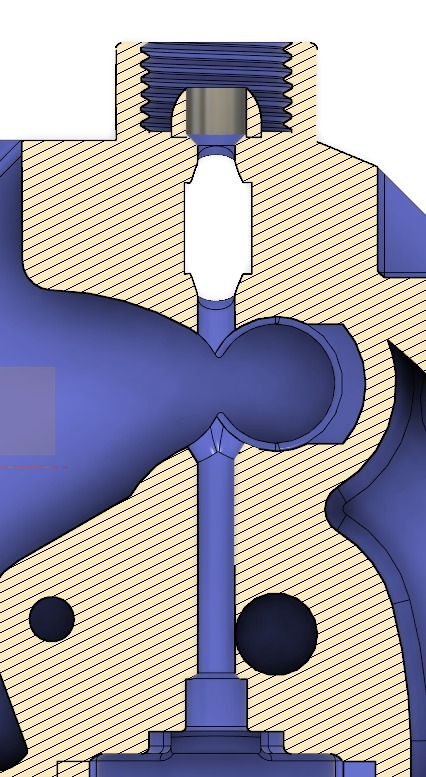
With the help of Marco, I modified his original design to be more MMU2 friendly. changes include: - Tapered the openings at the filament sensor and bondtech gears - Added PC4-M10 threading - Thickened the opening for the threading - Added a guide for the coupling. This uses these couplings from Amazon: https://www.amazon.com/gp/product/B01IB81IHG/?tag=tv-auto-20 They are pass through so the PTFE seats into the PTFE guide. If it is too tight use a 4MM drill bit or even an allen key to widen it (better tighter than loose). I was having a lot of issues with my design and other designs initially. The tips were too big and jamming at the PTFE tube! The trick for me was to use the original MK3/MMU2 heatbreak. I was using an E3D Titanium break and it has different tolerances. Also, for some reason I had been using 2mm inner diameter PTFE tubing at the hotend. I swapped it out for 1.85 ID tubing. After that I had no issues at all, the tips look great! I use Atomic filament and have supplied my tool-change properties. I printed: - 3 Color lizard. No jamming issues, but had one of my hubbed gears at the MMU2 unit loose. Fixed it and it finished with no issues. (.2mm height, Chris Warkocki's MMU2 Pretty PLA V1.2 profile, my tool-change and ramming settings) - Dark Souls knight with BVOH interface supports. (50% scale, .15mm height, Chris Warkocki's MMU2 Pretty PLA V1.2 profile, my tool-change and ramming settings). No tool-change issues. Approx 400 changes, even left it overnight while I slept for 7 hours. I would use other settings as the finish quality isn't the best using a .2mm profile with .15 height. Tips: - Make sure to have a very mechanically tuned unit. Watch Chris Warkocki's MMU2 troubleshooting video and correct any friction points. - Taper the PTFE tube at the hotend. - Calibrate the Filament lengths for the MMU2. - I had extra springs from the MMU1 unit so I did the filament carriage ballpoint pen trick. Helps with grinding and inconsistent feed lengths. - I printed the original BMG Bear by Marco and noticed the print quality after the upgrade was very good! I reprinted the whole extruder again with the upgrade and had better finish quality, tolerances, and stringing. I had to anyway as I was testing my design. If you can I recommend it. It really helped around the indirect sensor to have better dimensions and less stringing. - Print out better spool holders: https://www.thingiverse.com/thing:3113520 - And filament guides: https://www.thingiverse.com/thing:3094325 - I couldn't get the LDO 0.9 motor to work correctly. Too little torque on quick retractions. It was like it couldn't get immediately started so poles and small features were terrible. I swapped to a moons 1.8 pancake motor and it works great. - I do use upgraded fans, might be better for forming tips. Reason being is my other fans crapped out so I just got the LDO nozzle fan and Sunon Heatsink Fan. - I printed in Atomic PTFE Carbon Fiber Black. Great strength and weight. Also the finish looks awesome.
With this file you will be able to print MMU2 Prusa Bear-BMG fusion REMIX with your 3D printer. Click on the button and save the file on your computer to work, edit or customize your design. You can also find more 3D designs for printers on MMU2 Prusa Bear-BMG fusion REMIX.