MMU2 QD
prusaprinters
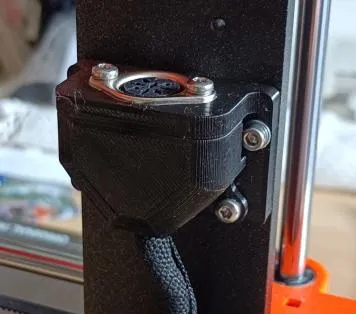
Ever had that desire to take your MMU and just chuck it out the window after especially long ruined print?Or just looking for quick way to disconnect the your MMU when it's not needed and/or you need to print delicate filaments that would jam in the long PTFE tubes? Well, Here it is small and lazy way to unplug the cable leading to MMU so removing it is easy and without risk of damaging the printer's harness by repeatedly pulling cables from MB enclosure.I was lazy and wanted rounded edges so supports will have to be used.This print is designed to use heat set threaded inserts!Materials needed: 4x short M3 heat set threaded inserts4x M3x5 screws2x M3x10 screws with washersfemale-to-panel 8-pin mini-DIN socketmale-to-cable 8-pin mini-DIN plugHow to prepare the cable harness:Open the motherboard box and gently pull the MMU cable as far as you can without pulling up the cloth sleeve. Then close the box again for now, this will give you just a little bit more cable length to work with. Now use the pair of M3x10 screws with washers to attach the plate to the printer using the horizontal pair of pre-tapped holes just above the motherboard enclosure and position the cable over the strain relief at the bottom of the plate and mark the cable (all 8 wires still wrapped in the cloth) about 1 centimeter above it, it should give you just enough slack to manipulate cables around when the connector will be in place later. Now you can peel back the cloth wrapping and start soldering.
With this file you will be able to print MMU2 QD with your 3D printer. Click on the button and save the file on your computer to work, edit or customize your design. You can also find more 3D designs for printers on MMU2 QD.