MMU2S Buffer (Part 2)
prusaprinters
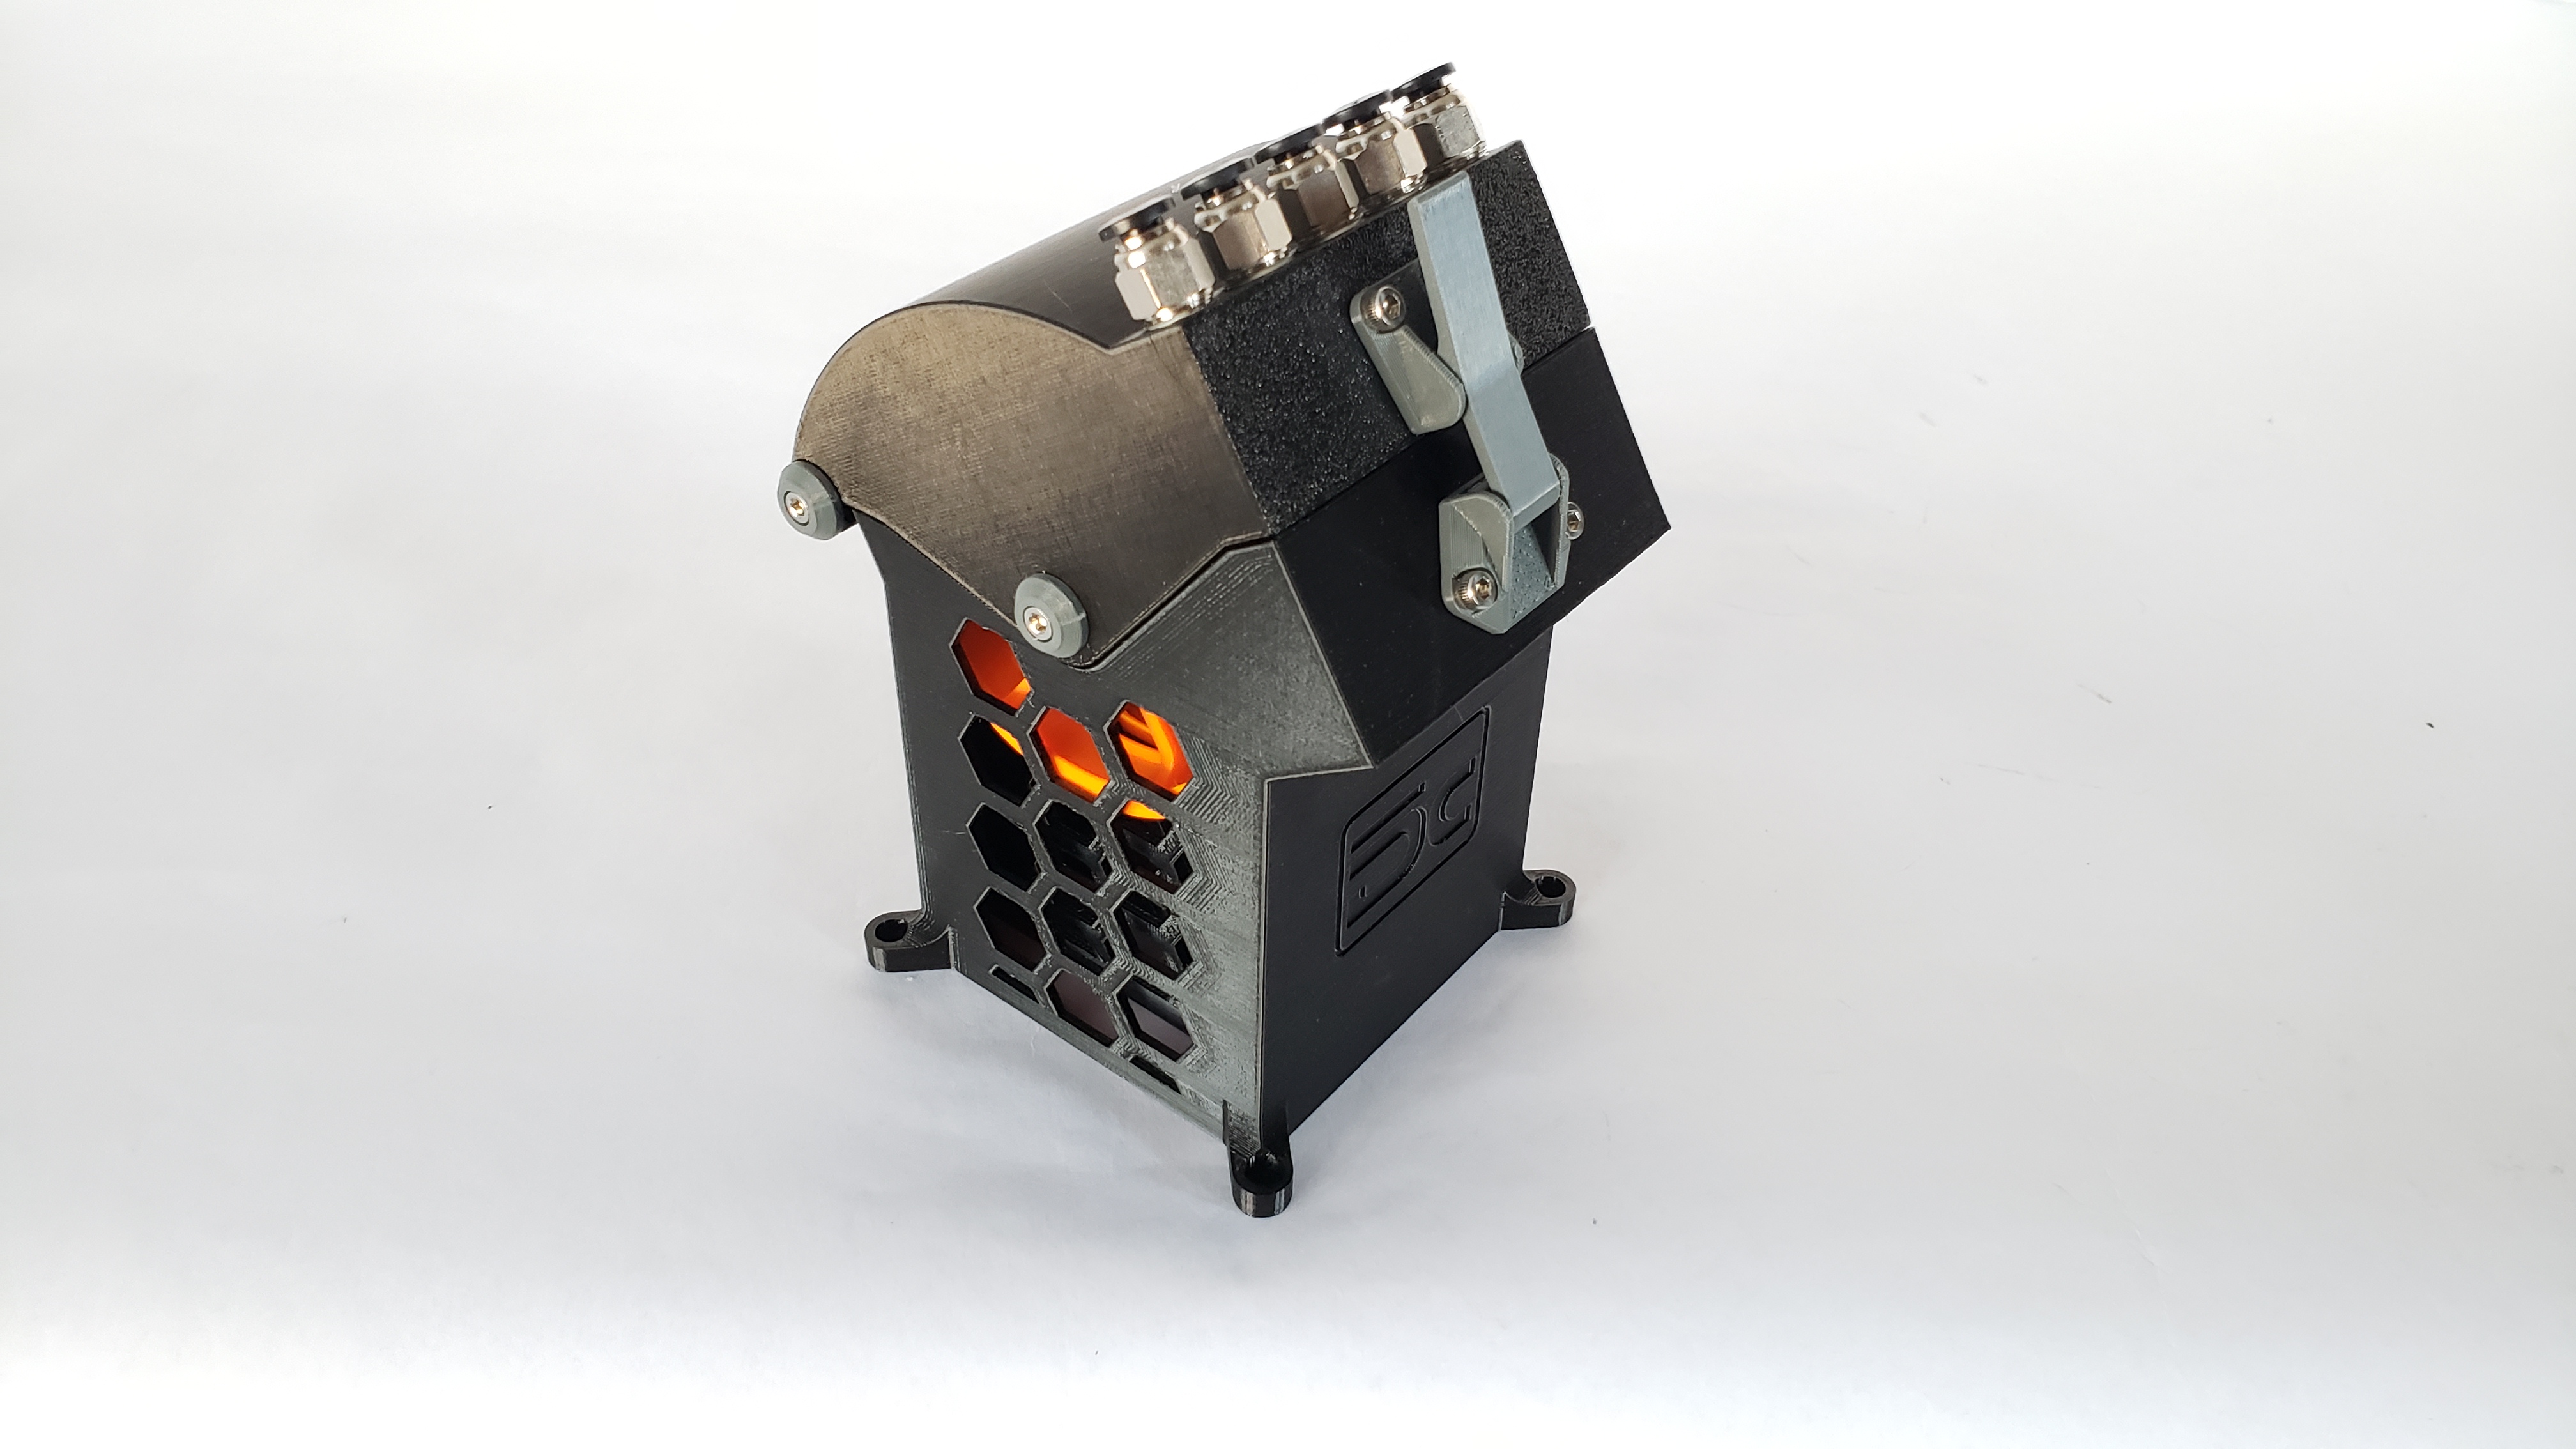
<p>Full disclosure, I did not originally post this part of the remix up because after hours of printing the top and middle section, meters of filament later, I was disappointed to find it had a little bit more drag in the buffering than my MMU2S liked, so, I am not currently using this version of the RMU. Others may still find that this design works with their setup, and I would like to hear your constructive comments.</p><p>Changes made:</p><ol><li>Designed a sleeker latch, similar to the purchasable RMU unit. You will require four (4) M3x6 socket head screws to mount this. To use this latch properly, you press below the catch when closing.</li><li>Added holes in the top section and middle section to accommodate the sleeker latch. I left the original holes in place if you really want to use the original latch.</li><li>The mid section is roughly 25mm taller than the original design because I am running a longer MMU2S to extruder PTFE tube path. It should still mount to your frame as intended but the top section will be 25mm higher than the original design. I am not running the buffer inside my Lack enclosure so this was not a concern for me.</li><li>Spindle has been included in this design to form the hinge between the top and middle section. It is the same one used for the spool and shaft project I posted. A flat spot along the spindle has been added for easier printing. You will require two (2) M3x6 socket head screws along with two (2) screw caps to affix the spindle in place.</li><li>Included re-designed screw caps which are the same as the ones used to affix the spool spindle. You will need to print two (2) of these. Not necessary to print if you choose to use the original caps.</li><li>I included a top-top design as I believe this provides the best filament path with the least amount of resistance during buffering. The filament should exit out the back ports at the hinge to the MMU2S. I did not print this 5-slot version but am testing a similar one on a single slot. If you print this top-top design please comment on how it performs.</li></ol><p>You can find the spool and shaft project here: <a href="https://www.prusaprinters.org/prints/113608-mmu2s-buffer-inspired-by-rmu-buffer-spool-and-shaf">https://www.prusaprinters.org/prints/113608-mmu2s-buffer-inspired-by-rmu-buffer-spool-and-shaf</a></p><p>Hardware needed:</p><ul><li>Ten (10) PC4-M10 PTFE fittings</li><li>Six (6) M3x6 socket head screws</li></ul><p>Some tolerances may be a little tight in the top and mid sections. You may need to clean the 4.2mm holes for the PTFE tubes to pass through with a proper sized drill bit. This also applies to the hole for the hinge section. Chase the hole with an 8mm drill bit or in your slicer, scale down the spindle included here, or use the original 7mm diameter spindle. I also had to chase the M10x1 threads with a tap as the top piece split on me when I tried to screw in the PC4-M10 fittings. You should not have to tap the rear holes on my top-top design as I added enough clearance in the threads.</p><p>All parts were printed with PETG and 0.4mm nozzle. Top and bottom are printed at 0.2mm layer quality with two (2) perimeters and 20% Cubic infill. Spindle was printed at 0.15mm layer height, 30% infill. Spacers and screw caps were printed at 0.20mm layer height and 30% infill.</p>
With this file you will be able to print MMU2S Buffer (Part 2) with your 3D printer. Click on the button and save the file on your computer to work, edit or customize your design. You can also find more 3D designs for printers on MMU2S Buffer (Part 2).