Mod Podge Image Transfer to 3D Printed Surface
thingiverse
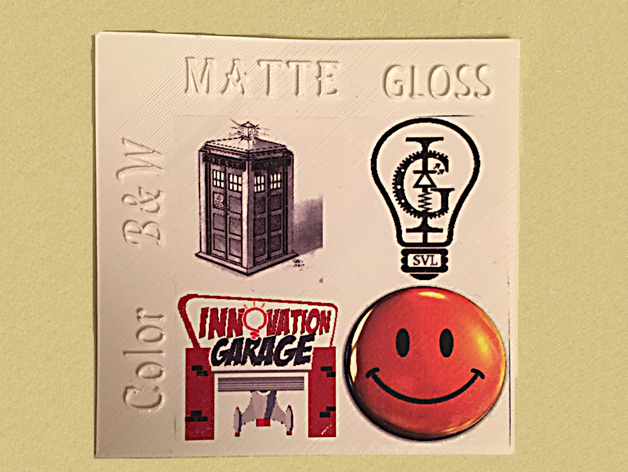
The other day, I picked up some small bottles of Matte and Gloss Mod Podge. While searching the internet for ideas on what to use it for, I came across multiple You-Tube videos using Mod Podge type items to transfer images to wood surfaces. Hmmmm - how about onto 3D printed surfaces... Not knowing if there was a difference between Gloss and Matte Mod Podge in performance, I decided to test both. First, I created a test bed for using both types of Mod Podge I purchased as well as identifying color and black & white. In the videos, they used laser printed images. So I picked 4 images, 2 color and 2 black & white, sized them to be 1.5" x 1.5", laid them out according to the test bed, and printed - made sure to mirror or flip the image before printing in the print set up. Following the same instructions on the videos, I smeared Mod Podge onto the test bed but aligned everything according to the column identifying the type of Mod Podge being used. Then I took the laser printed image and placed it image face down onto the Mod Podge and pressed it down, squeegeeing out any bubbles. The surface has to be smooth and relatively flat - cylindrical counts as flat but spherical does not. The test bed with the images were left to sit for over 24 hrs. The next day, using water, I gently rubbed at the wet paper. Carefully and lightly I kept rubbing until all the paper was gone. Then I let the test bed sit to dry. About 1 hour later, there as a milky film still on the transferred images. So I repeated the steps of carefully and lightly rubbing at the surface with wet fingers until the surface felt paper free. Again, waited until it dried. Repeated this 2 more times before I was sure that all paper had been rubbed away and only the image was left behind. In the videos they say to clear coat the images with either more mod podge, clear coat, varnish, etc. I opted not do anything with this experiment and will see how durable it is long term. As for Glossy vs. Matte? I could not really tell a difference. Some of my friends said they thought the glossy had better light/dark contrast. Soon I will repeat this experiment but instead of using laser printed images, I will use ink jet printed images. The implementation is limited by ones imagination. I am thinking intricate details that can be printed and added in small areas on print surfaces. If you do wind up using this technique, please share what you have made. Print Settings Printer Brand: Ultimaker Printer: Ultimaker 2 Rafts: Doesn't Matter Supports: Doesn't Matter Resolution: .2 Infill: 20% Notes: Went with default settings. Test bed is very thin
With this file you will be able to print Mod Podge Image Transfer to 3D Printed Surface with your 3D printer. Click on the button and save the file on your computer to work, edit or customize your design. You can also find more 3D designs for printers on Mod Podge Image Transfer to 3D Printed Surface.