Model railroad, Railway Platform
thingiverse
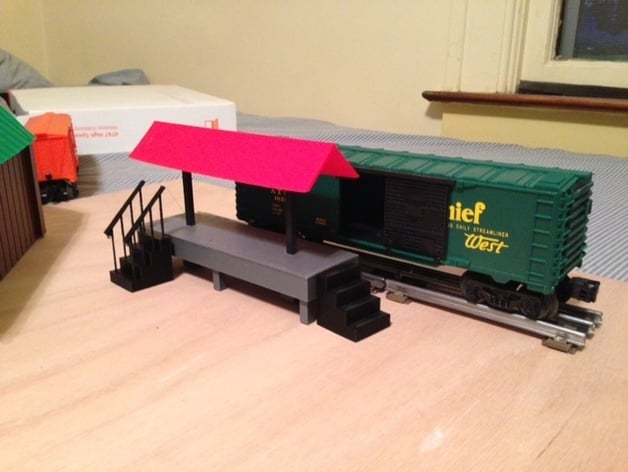
This simple model of an O-scale (O27) train railway platform features a platform, roof, roof support poles, and stairs. As built, the platform stands 32mm high with dimensions of 170mm in length and 50mm in width. It can be scaled to different heights for various other scales. For G scale (1:22.5), increase by approximately 200%; regular O-scale, scale by 113%; S, no scaling needed; HO, 65% to 70%; N, 40% to 50%; and Z, 40% to 45%. The STL files display overall heights of 106mm, widths of 50mm, and lengths of 170mm. Two designs are provided for the stairs - one with handrails and one without. Printed on a Makerbot Replicator2 at 100% scale, the design requires good adhesion between roof and build plate; otherwise, it's an easy build with no additional items needed.
With this file you will be able to print Model railroad, Railway Platform with your 3D printer. Click on the button and save the file on your computer to work, edit or customize your design. You can also find more 3D designs for printers on Model railroad, Railway Platform.