Modified RepRapPro Huxley Extruder
thingiverse
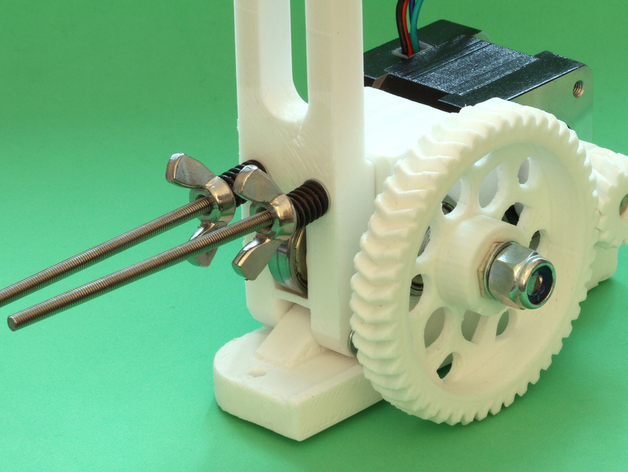
A modified RepRapPro Huxley extruder. Changes made include: - Herringbone Gear set - Thicker section on M6 block - 'Spacers' added to M6 block so it sits nicely on the threaded rod - Longer lever/handle added to idler - Long M3 threaded rods instead of set screws - Wing Nuts - Easier access to change filament or clean hobbed bolt Instructions Herringbone Gear Set The hole for the captive screw on the small gear has been moved using an offest parameter in the Gregs_Accessible_Wade_Herringbone_Gears_for_Huxley_Extruder.scad file. It was too close to the shaft hole. Print out the gear set at the highest quality you can manage. I used a layer height of 0.2mm. The herringbone teeth pattern is not forgiving and accuracy is important if they are to mesh correctly. After printing out the gears spend time using a file, sharp craft knife or sandpaper (or all three) to carefully clean up each tooth of the gears. The angle of the teeth make this a difficult process but it's very important otherwise your gears will bind. You can use the gear_spacer_jig to set the stepper motor shaft at the correct distance from the hobbed bolt. Slide it over the motor shaft and hobbed bolt before tightening the stepper motor screws. Make sure it sits squarely and then tighten the screws securing the stepper motor. Remove the jig. Fitting the gears is tricky as they will not slide past each other. Hold the gears togehter with their teeth meshed and slide them onto the shafts. Make sure they are meshed correctly. Once the gears are fitted spend time turning them and checking for any binding. Use your file/knife/sandpaper to adjust each tooth until they turn smoothly. M6 block and Idler lever/handle Print out the M6 block and Idler lever/handle. Fit the Idler to the M6 block using the pivot screw and check how far it opens remove the idler to adjust it. I used sandpaper/file to carefully round the ends of the idler. I also spent some time removing material around the area where the Idler pivots on the M6 block to increase the clearance. A large diameter drill bit is useful. Hold it in the 'corners' of the M6 block and turn it by hand to file away material. I also filed away a lot of the bridge section that spans the gap the bearing sit in. This allows the lever/handle to open further - be careful not to remove too much of the span as this may over weaken it. Spring compression rods I replaced the M3 x 45mm screws with long sections of M3 threaded rod. I glued the nuts into the recesses as I was fed up with them falling out each time I adjusted the spring compression. If your'e going to glue them then do so with the rod already screwed into them to make sure they are correctly aligned. I used M3 wing nuts to make adjustments easier without the need for tools. To allow the lever/handle to open more fully I used a drill bit at an angle to elongage the holes in the idler that the M3 rods go through. Thicker Tongue The original tongue that holds the Bowden tube end in the M6 block was quite loose and allowed the end to go in and out as the extruder retracted. I reduced this by changing the thickness of the tongue prongs. The tongue_thicker_prongs.scad file now has a parameter to allow you set the dimension of the prongs. After printing out the tongue I then incrementally filed away material to the point that it gave a very snug and fit - the brass Bowden tube end now doesn't move at all.
With this file you will be able to print Modified RepRapPro Huxley Extruder with your 3D printer. Click on the button and save the file on your computer to work, edit or customize your design. You can also find more 3D designs for printers on Modified RepRapPro Huxley Extruder.