Modifying an M8 Extruder Stepper for Bowden Use
thingiverse
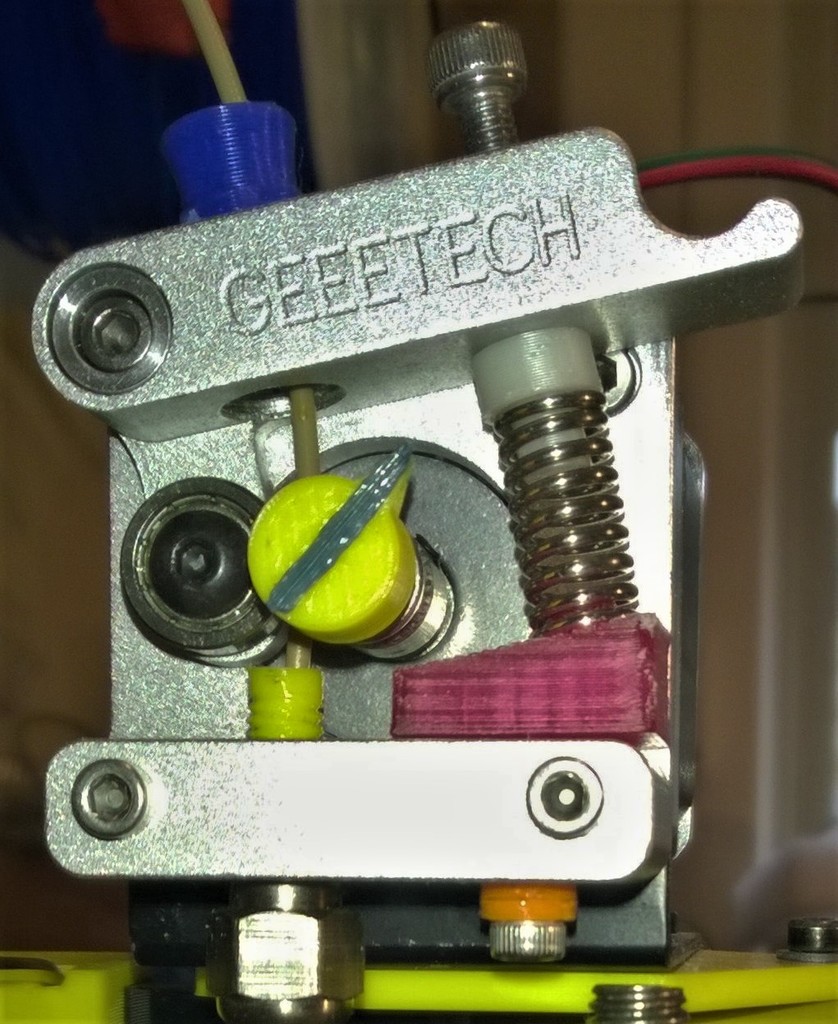
Update 6/3/19 - The original 2 mm hole at the bottom of the filament guide may be too small if you have to withdraw filament that has expanded just above the melt zone. I enlarged the hole with a 2.5 mm drill and it's now possible to withdraw the expanded end of the filament from the extruder without any issues. Update 2/24/19 - I added a filament guide that makes threading the filament below the drive gear easier. The new guide is designed for use with smaller hobbed gears, but can be adapted for larger diameters by filing it to fit before installing the spring. Be sure to check the clearance between the idler and drive gear, as well as the bottom hole diameter, before finalizing the installation. Update 2/21/19 - I added a base for the spring that removes the bend in the spring caused by setting on the lower shelf of the motor. The new base is held in place by the 3 mm screw at the bottom, which cold-threads into the plastic base. You may need to use a shorter screw or add washers to secure the stepper without penetrating the top surface of the print. When adapting the M8 Extruder stepper motor for a Bowden setup, it's not ideal without modifications. I learned this the hard way and came up with these changes, which are essential for good performance. If you experience occasional slippage (the ticking sound) and don't want to replace the gear, consider adding a spacer washer under the spring to compress it further and see if that helps. The necessary changes include: 1. Replacing the straight drive gear with a hobbed drive wheel to eliminate the ticking sound caused by gear slippage. 2. Swapping the idler wheel for one with a smooth outer surface, as the grooved wheel won't work with the hobbed gear. 3. Changing the "steps per MM" parameter in the firmware when switching to a new drive gear size. 4. Adding extra spacers around the spring if using a smaller MK8 drive gear to prevent slipping. 5. Using a printed inlet connector or removing the standard one on the load lever to provide a smooth and less restricted path for the filament. 6. Installing either of the two filament guides at the lower, filament exit hole of the stepper. 7. Thread the spring-base onto the screw in the lower shelf, making it easier to secure the spring while cold-threading the screw into the plastic. When choosing between the MK8 and MK7 drive gears, consider the increased force generated by the smaller MK8 gear without slipping or stalling the stepper. The article linked below provides a detailed discussion of stepper motor drive gears. https://airtripper.com/1676/3d-printer-extruder-filament-drive-gear-review-benchmark/ The grooved idler wheel needs to be replaced with a smooth one for the hobbed gear to work properly. Look for a standard bearing with a 12mm outer diameter and an inner diameter that fits the mounting screw on the loading lever. When changing the drive gear size, you'll also need to adjust the "steps per MM" parameter in the firmware. The default setting for the supplied gear is 95, but I've found the steps for the MK8 gear to be around 154 and the MK7 gear close to the same size as the original gear. If using the smaller MK8 drive gear, extra spacers will be needed around the spring to prevent slipping. The washers and plug between the tension adjust screw and the spring ensure adequate compression of the spring.
With this file you will be able to print Modifying an M8 Extruder Stepper for Bowden Use with your 3D printer. Click on the button and save the file on your computer to work, edit or customize your design. You can also find more 3D designs for printers on Modifying an M8 Extruder Stepper for Bowden Use.