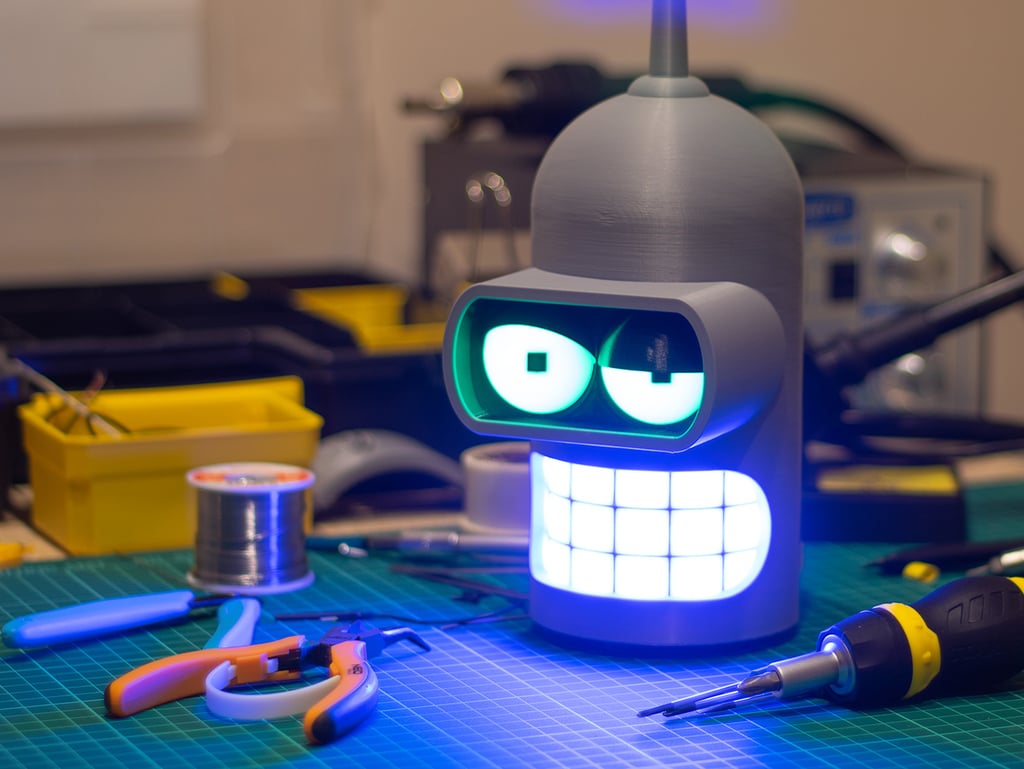
Modular Bender Head (Pi Zero Edition)
thingiverse
Raspberry Pi powered Bender head acting as a personal assistant, housing a speaker, LED strips for mouth and eyes, Pi Zero with an UPS shield. In action: https://www.youtube.com/watch?v=hk_zi0FvA-Q Code on GitHub: https://github.com/sindar/pRodriguezAssistant **List of parts used:** (i.e. how we did it, feel free to improvise. if you don't need any electronics inside, just skip this part) — Pi Zero — UPS shield for Zero, e.g. https://www.aliexpress.com/i/32961105269.html — RGB WS2812B LED strip, 5050 package with 60 LEDs/meter the whole audio part currently is a mess, so excuse that — small USB sound adapter with mic input (https://www.amazon.com/Sabrent-External-Adapter-Windows-AU-MMSA/dp/B00IRVQ0F8 or similar) and an OTG cable to connect it — audio amp from this type of speakers https://www.amazon.com/MANHATTAN-2600-Speaker-System-161435/dp/B005LW7V6M — attach bndr-feet to bndr-inner-bottom with 3 M3x6 — slide 18 bndr-tooth-x18 into 3 bndr-teeth-mount-x3, 6 teeth each — stack 3 bndr-teeth-mount-x3 into bndr-inner-bottom using matching pins/holes — attach bndr-inner-pimount to bndr-inner-bottom with 3 M3x6 *attach Pi Zero with UPS shield to the 2 mounting points on bndr-inner-pimount which replace 2 spacers between the boards* *glue 2 single LED strips to rectangular mounting points on bndr-visor-inner* — insert/glue bndr-pupil-x2 into bndr-eye-x2 from the inside — slide bndr-eye-x2 onto bndr-visor-inner, pins should go into the circles inside the eye so that it rotates left/right — place bndr-eyelid-left and bndr-eyelid-right over the eyes, with side pins going into the guides on bndr-visor-inner — place bndr-visor-front on top of eye assembly and secure it with 4 M3x6 from the back of bndr-visor-inner *attach the microswitch to bndr-antenna-base matching holes using M2 screws or glue* the top of the hand on the switch need to be bend inside so it doesn't catch on the antenna inserted and pushes down on the switch *insert 3.5mm socket into the hole in bndr-antenna-base from the top* *insert 3.5mm plug into bndr-antenna-stem from the bottom, so it mates with socket when inserted into bndr-antenna-base* *solder the mic to the wire from 3.5mm plug run through bndr-antenna-base* — insert bndr-antenna-base into bndr-head-shell and secure it with 2 M3x6 screws from the inside (need to break the overprinted holes) — insert bndr-antenna-stem into bndr-antenna-base and place bndr-antenna-top on top — slide bndr-inner-bottom into bndr-head-shell from the bottom using guides until that holes on the the side of the visor hole the shell line up with hole on bndr-inner-pimount — insert the visor assembly from the front and secure it to bndr-inner-pimount with 2 Mx10/12 through the angled side holes — slide bndr-visor-shell over the visor assembly — — — **Notes:** Included 123d/stp files are in "assembled" state, you can use that as a reference also. This is how we made it, it's a personal project, so it's ugly in places. I'm just putting this up here in case anyone wants to do this, or do this differently, or use it for something else. Or just print an overcomplicated Bender head, idk. Peace.
With this file you will be able to print Modular Bender Head (Pi Zero Edition) with your 3D printer. Click on the button and save the file on your computer to work, edit or customize your design. You can also find more 3D designs for printers on Modular Bender Head (Pi Zero Edition).
