Modular Mini Table Foot
prusaprinters
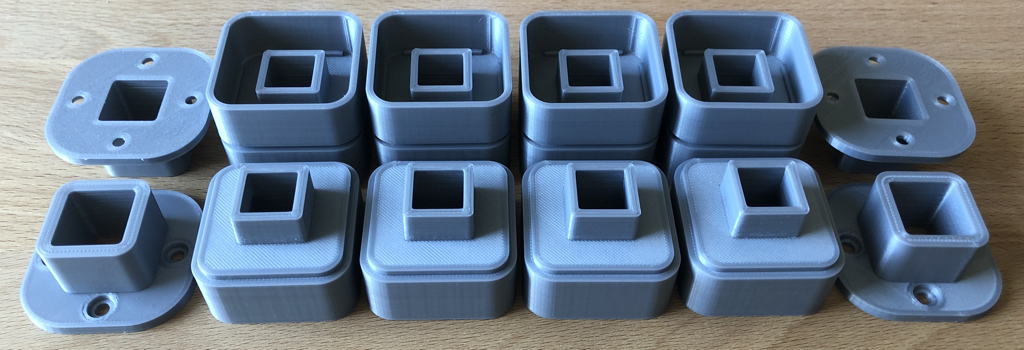
<p>This modular mini table foot consists of a mounting bracket and modules and allows you to use table feet with a height of 20mm, 40mm, 60mm, 80mm (and so on) by simply stacking the neccessary number of modules onto each other and onto one mounting bracket. Each module (including the mounting bracket) is 20mm high. So you would need to print 1 mounting bracket and 2 modules to produce one mini table foot with a height of 60mm.</p><p>I also added some other module shapes and sizes to the modular mini table foot:</p><p>These modules are also 20mm high and 40mm or 30mm in diameter.</p><p>The top modules with 40mm in diameter hide the connection to the mounting bracket. Together with the mounting bracket the height is 40mm.</p><p>You can combine those modules in more or less any way you like.</p><p>No glue neccessary - the modules will be kept in place by friction only.</p><p>Depending on the quality of your filament and your printer settings it might be quite hard to push the first module into the mounting bracket. In this case please pull the module out of the bracket and rotate it by 90° and try again. You might have to repeat this process several times.</p><p>Update 2019-02-19:</p><p>New mounting bracket added:</p><p>the larger and oval screw holes make the alignment of the bracket much easier, when fastening the screws - this is especially important, when you use modules, that are not round. The photos still show the older mounting brackets.</p><p>New modules added:</p><p>rounded corners with edges</p><p>Update 2019-03-09:</p><p>New modules added:</p><p>round 40mm with edges</p><h3>Print Settings</h3><p><strong>Printer Brand:</strong></p><p>Monoprice</p><p><strong>Printer: </strong></p><p>Select Mini</p><p><strong>Rafts:</strong></p><p>No</p><p><strong>Supports: </strong></p><p>No</p><p><strong>Resolution:</strong></p><p>0.175</p><p><strong>Infill: </strong></p><p>22%</p><p><strong>Filament:</strong> PLA</p><p><strong>Notes:</strong></p><p>The round reducing module should be printed with the smaller open side facing downwards - it will print without support.</p><p>The round bracket connector should be printed with the closed ring side facing downwards.</p><p>All other parts should be printed with the larger open side facing downwards. The parts are designed in a way, that support is not neccessary.</p><p>The mounting bracket should be printed with 100% infill for best possbile strenght und stability.</p><p>Quality setting: Normal (on a Monoprice Select Mini V2)</p><p>Printing temperature: 200° C</p><p>Print bed: 60° C</p><p>I always print the first layer with 205°/65° and with a speed of only 20mm/sec and I use hairspray to help the objects to perfectly stick to the printbed. This way I do not need to use any raft, skirt or brim.</p><p>I used Geeetech PLA transparent and silver for the photos, but you can just use any brand and color you like.</p>
With this file you will be able to print Modular Mini Table Foot with your 3D printer. Click on the button and save the file on your computer to work, edit or customize your design. You can also find more 3D designs for printers on Modular Mini Table Foot.