Modular Panel or Wall in limitless sizes
prusaprinters
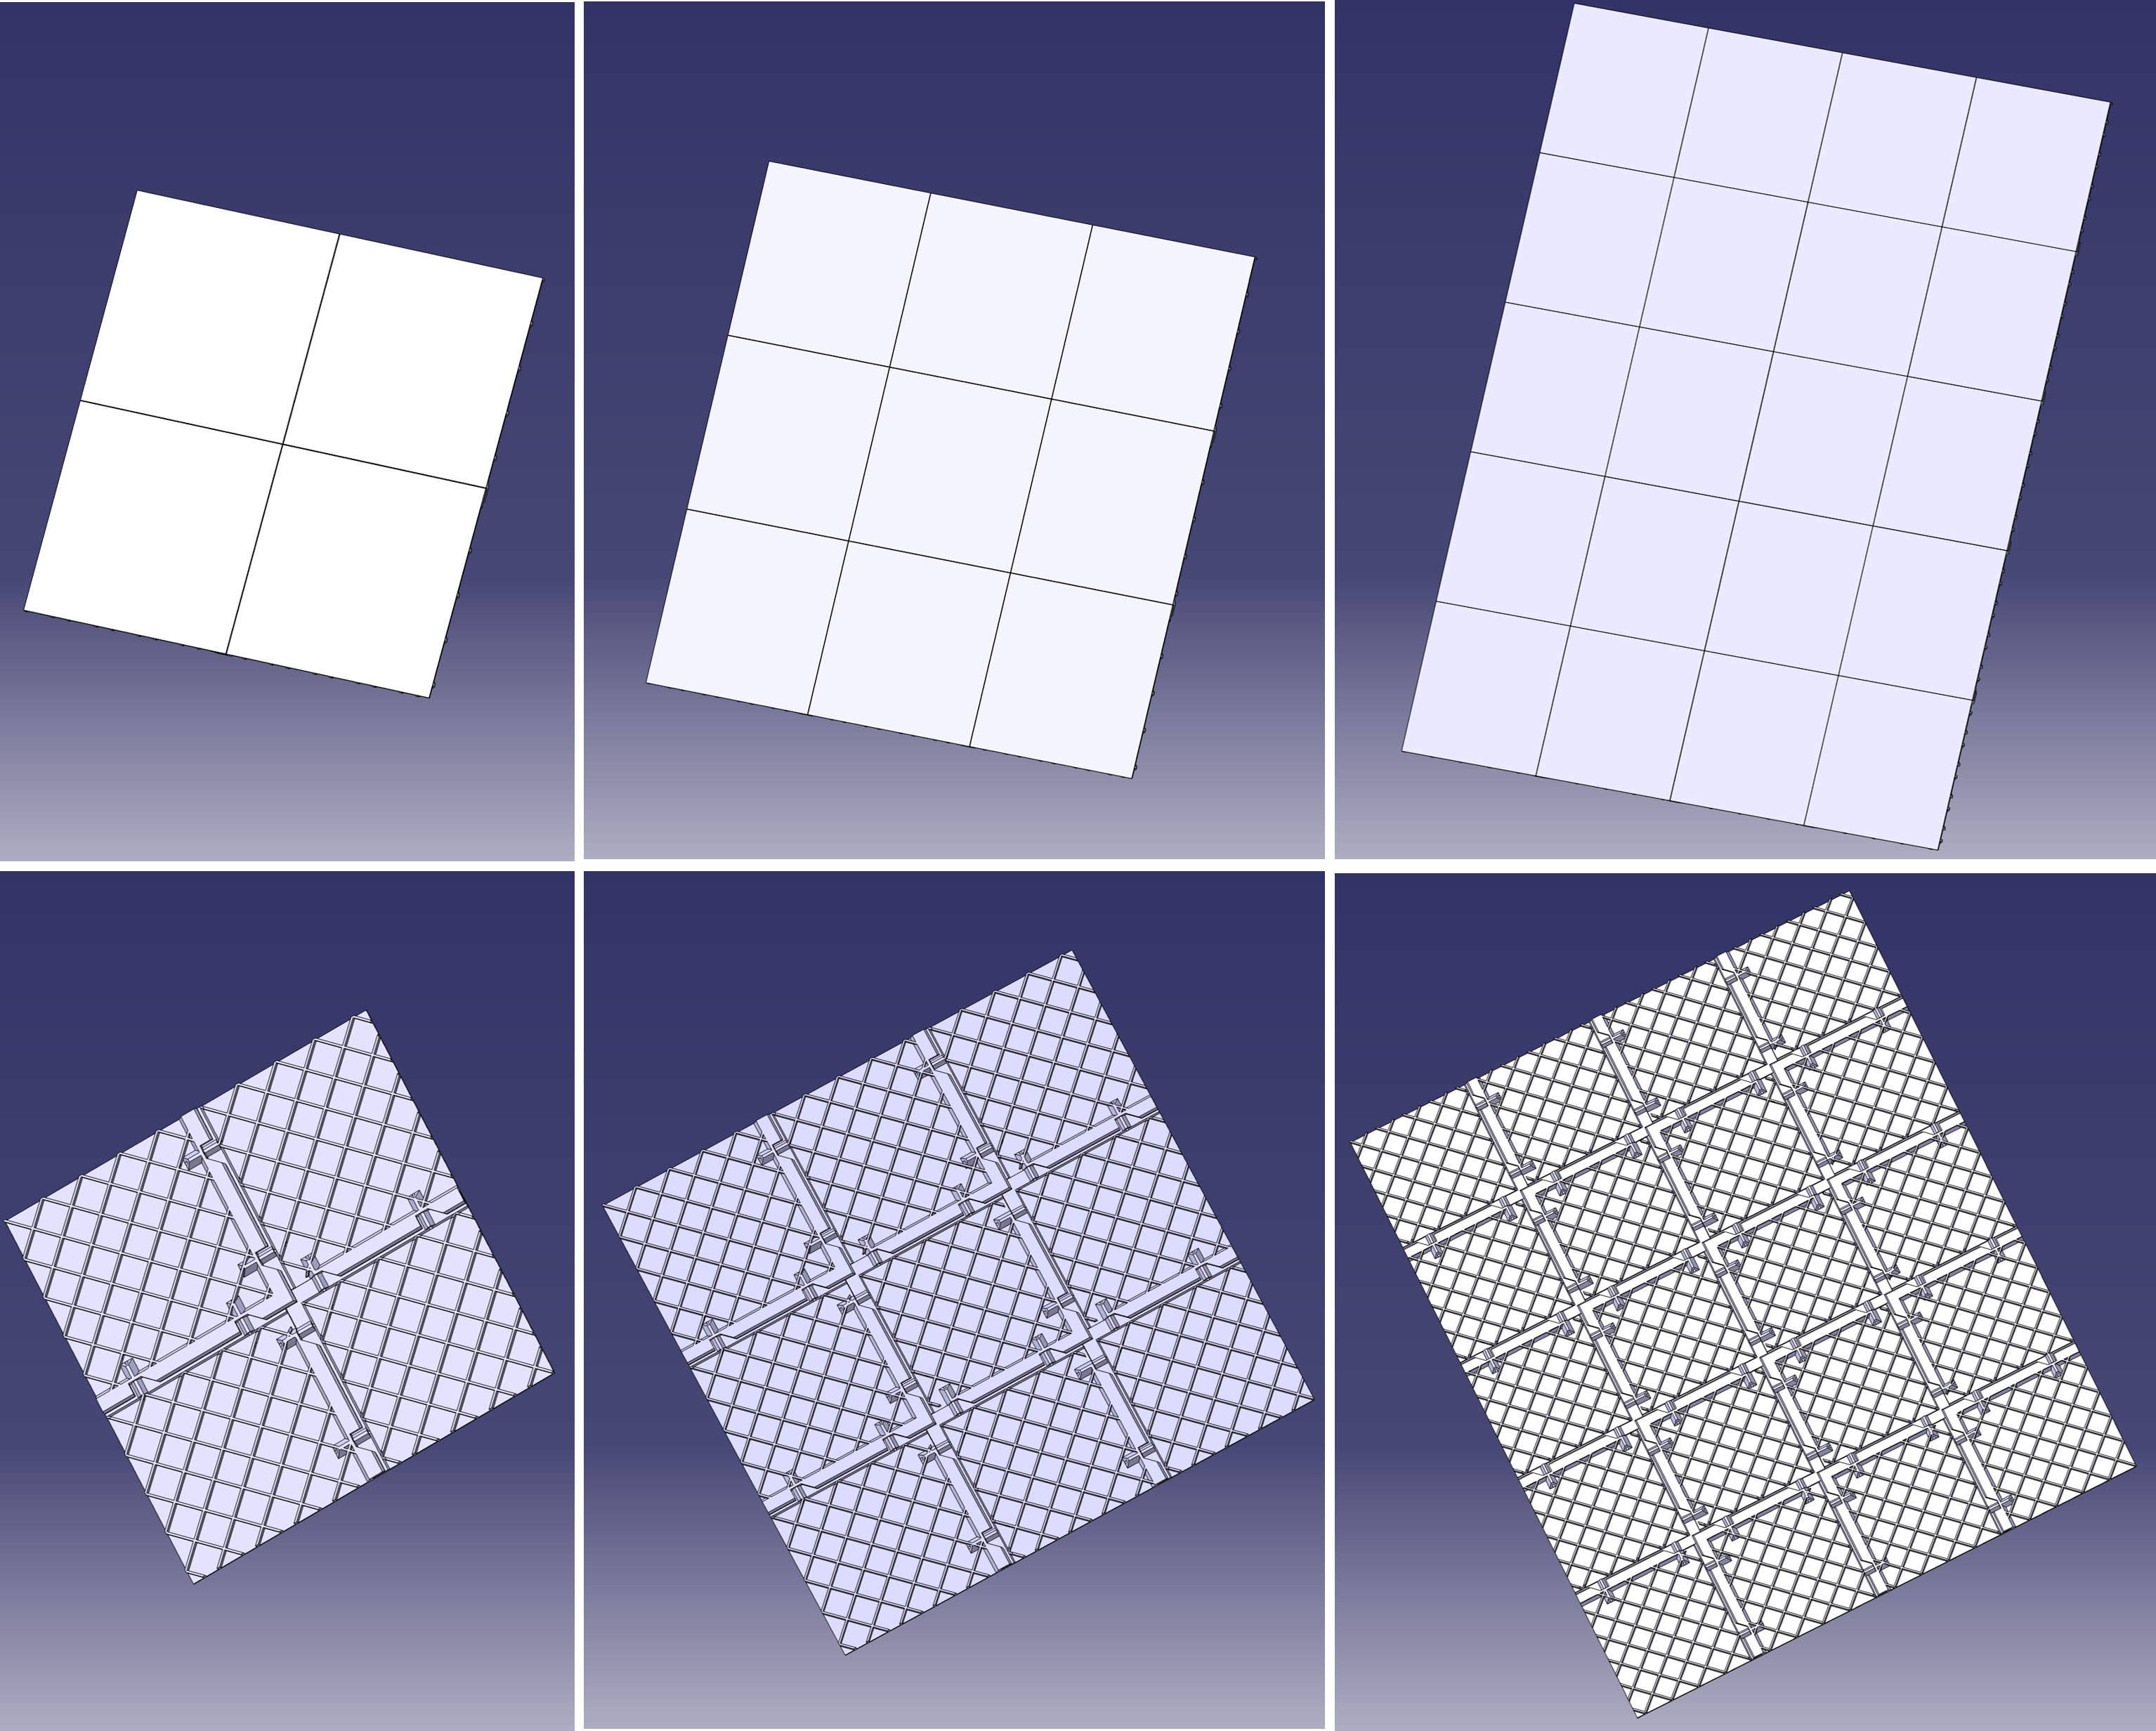
<p>This design is modular and allows to print panels/walls for projects that require them in a size beyond the print volume of conventional additive machines. </p><p>By adding additional middle and side segments, the size of the panel can be increased to an arbitrary multiple of a segment’s dimension in width or length. Theoretically, there is no limit to the maximum size of the panel. </p><p>The design aims to produce an assembly with minimal loss to the performance and characteristics of a solid panel. A hybrid joint combines adhesive bonding with press-fitting and allows for the force transmission, positioning, and assembly of the segments and can compensate for manufacturing tolerances.</p><p>This design serves as a simple example use-case of a universal method I developed. The idea is to use them for example for walls/furniture design, as a tabletop, shelf, tile, … etc.</p><p>Detailed information about the design method can be found in an open-access (free) publication I, together with my supervisors, published. I recommend taking a quick look at it to get a basic understanding of the design:</p><p><a href="https://www.researchgate.net/publication/357414602_Method_for_Segmentation_and_Hybrid_Joining_of_Additive_Manufactured_Segments_in_Prototyping_Using_the_Example_of_Trim_Parts">https://www.researchgate.net/publication/357414602_Method_for_Segmentation_and_Hybrid_Joining_of_Additive_Manufactured_Segments_in_Prototyping_Using_the_Example_of_Trim_Parts</a></p><h3><strong>General/Printing Information:</strong></h3><ul><li>The segments do not need supports and are designed to be printed standing upright. Therefore multiple segments at once can be placed in the printing volume. For each segment, two possible printing directions exist. Those are indicated in the picture below.</li><li>If you have problems with adhesion, I would recommend using a brim while printing.</li><li>For optimal strength a 100% infill or increasing the number of walls is recommended. If a segment turns out thicker than expected, I recommend reducing the infill to 90% so there is a bit of space in the middle of the walls to accommodate access material. </li><li>There are different versions of the segments which may get extended in the future.</li><li>The naming scheme is: <strong>Panel_A_B_C_D_E</strong><ul><li><strong>A:</strong> Length/Width of the top side of the segment. This means without the overlapping rabbet. The rabbet ads 12.5mm to each side (in example 187.5mm = 200mm overall length)</li><li><strong>B:</strong> Thickness of the panel at its thickest place (normally where the parts are overlapping)</li><li><strong>C:</strong> Thickness in the middle area of each segment (without the joining geometry or grid)</li><li><strong>D:</strong> To enable the compensation of printing tolerances, there is a nominal gap between every segment. This means, for example with a gap of 0.5mm, if the length of a segment is 0.5mm too long after printing, there should be no gap between the two segments. If one segment is 0.5mm too short, you can adjust the gap to 1mm to achieve the right dimensions for the overall panel. </li><li><strong>E:</strong> Grid/noGrid: Segments with an optional Grid that increases their general strength (see pictures)<br> </li></ul></li><li>Currently there are the following versions:<ul><li>187.5_6.5_3_0.5_noGrid: Basic Design without Grid</li><li>187.5_6.5_3_0.5_Grid: Design with Grid for increased strength</li><li>187.5_6.5_1.5_0.5_Grid: Design with Grid and reduced thickness for lightweight<br> </li></ul></li><li>Segments with the same length and width but varying middle-thickness or Grid/noGrid can be combined in a single panel. </li></ul><figure class="image image-style-align-center"><img src="https://media.prusaprinters.org/media/prints/125208/rich_content/34d8d244-26b8-4bff-9fcf-bea17fd626d2/printdirections.png#%7B%22uuid%22%3A%22b930c33b-d453-4a82-9663-afbcf0d422e7%22%2C%22w%22%3A1922%2C%22h%22%3A1904%7D"></figure><h3><strong>Assembly:</strong></h3><ul><li>For the assembly, please refer to section 6.3. of the publication linked above.</li><li>In this first version, the segments are designed to work with 3mm x 30mm dowel pins. </li><li>We used a reamer with a diameter of 2.98mm or 2.99mm to rework the holes for the dowel pins. This achieves the perfect press-fit. As a more convenient alternative, I would recommend a reamer with 3mm. Even more convenient would be to use a 3mm drill. This probably results in a bit of play between the segments until the adhesive is cured. A straight panel can be achieved by laying the panel on flat ground and weighting it with something until cured.</li><li>If the Grid structure is in the way during pressing of the pins, simply use pliers or cutters to remove the section of the rib that is interfering. </li><li>Regarding the adhesive, I would recommend a two-component PU-adhesive for the best strength on most materials including PLA and ABS. Epoxy would be my second recommendation, but I do not have experience with it on this design. The gap between the overlap is (currently) 0.5mm. Therefore, a viscous adhesive is required.</li></ul><h3><strong>Suggestions:</strong></h3><p>I would ask you to refer to the corresponding Reddit thread for suggestions. Alternatively, you can comment here. Then I can see which other versions (different segment size, different hole size for the pins, different thickness, …) are most relevant to you and I can update the post.</p><p><a href="https://www.reddit.com/r/3Dprinting/comments/seru3u/update_post_1_on_my_method_to_print_parts_larger/">Update Post 1 on my method to print parts larger than the build volume : 3Dprinting (reddit.com)</a></p><p>Source of the publisher of the paper and further information: <a href="https://doi.org/10.3390/designs6010002">https://doi.org/10.3390/designs6010002</a> </p>
With this file you will be able to print Modular Panel or Wall in limitless sizes with your 3D printer. Click on the button and save the file on your computer to work, edit or customize your design. You can also find more 3D designs for printers on Modular Panel or Wall in limitless sizes.
