Modular sideways pegboard rack (.step files included)
prusaprinters
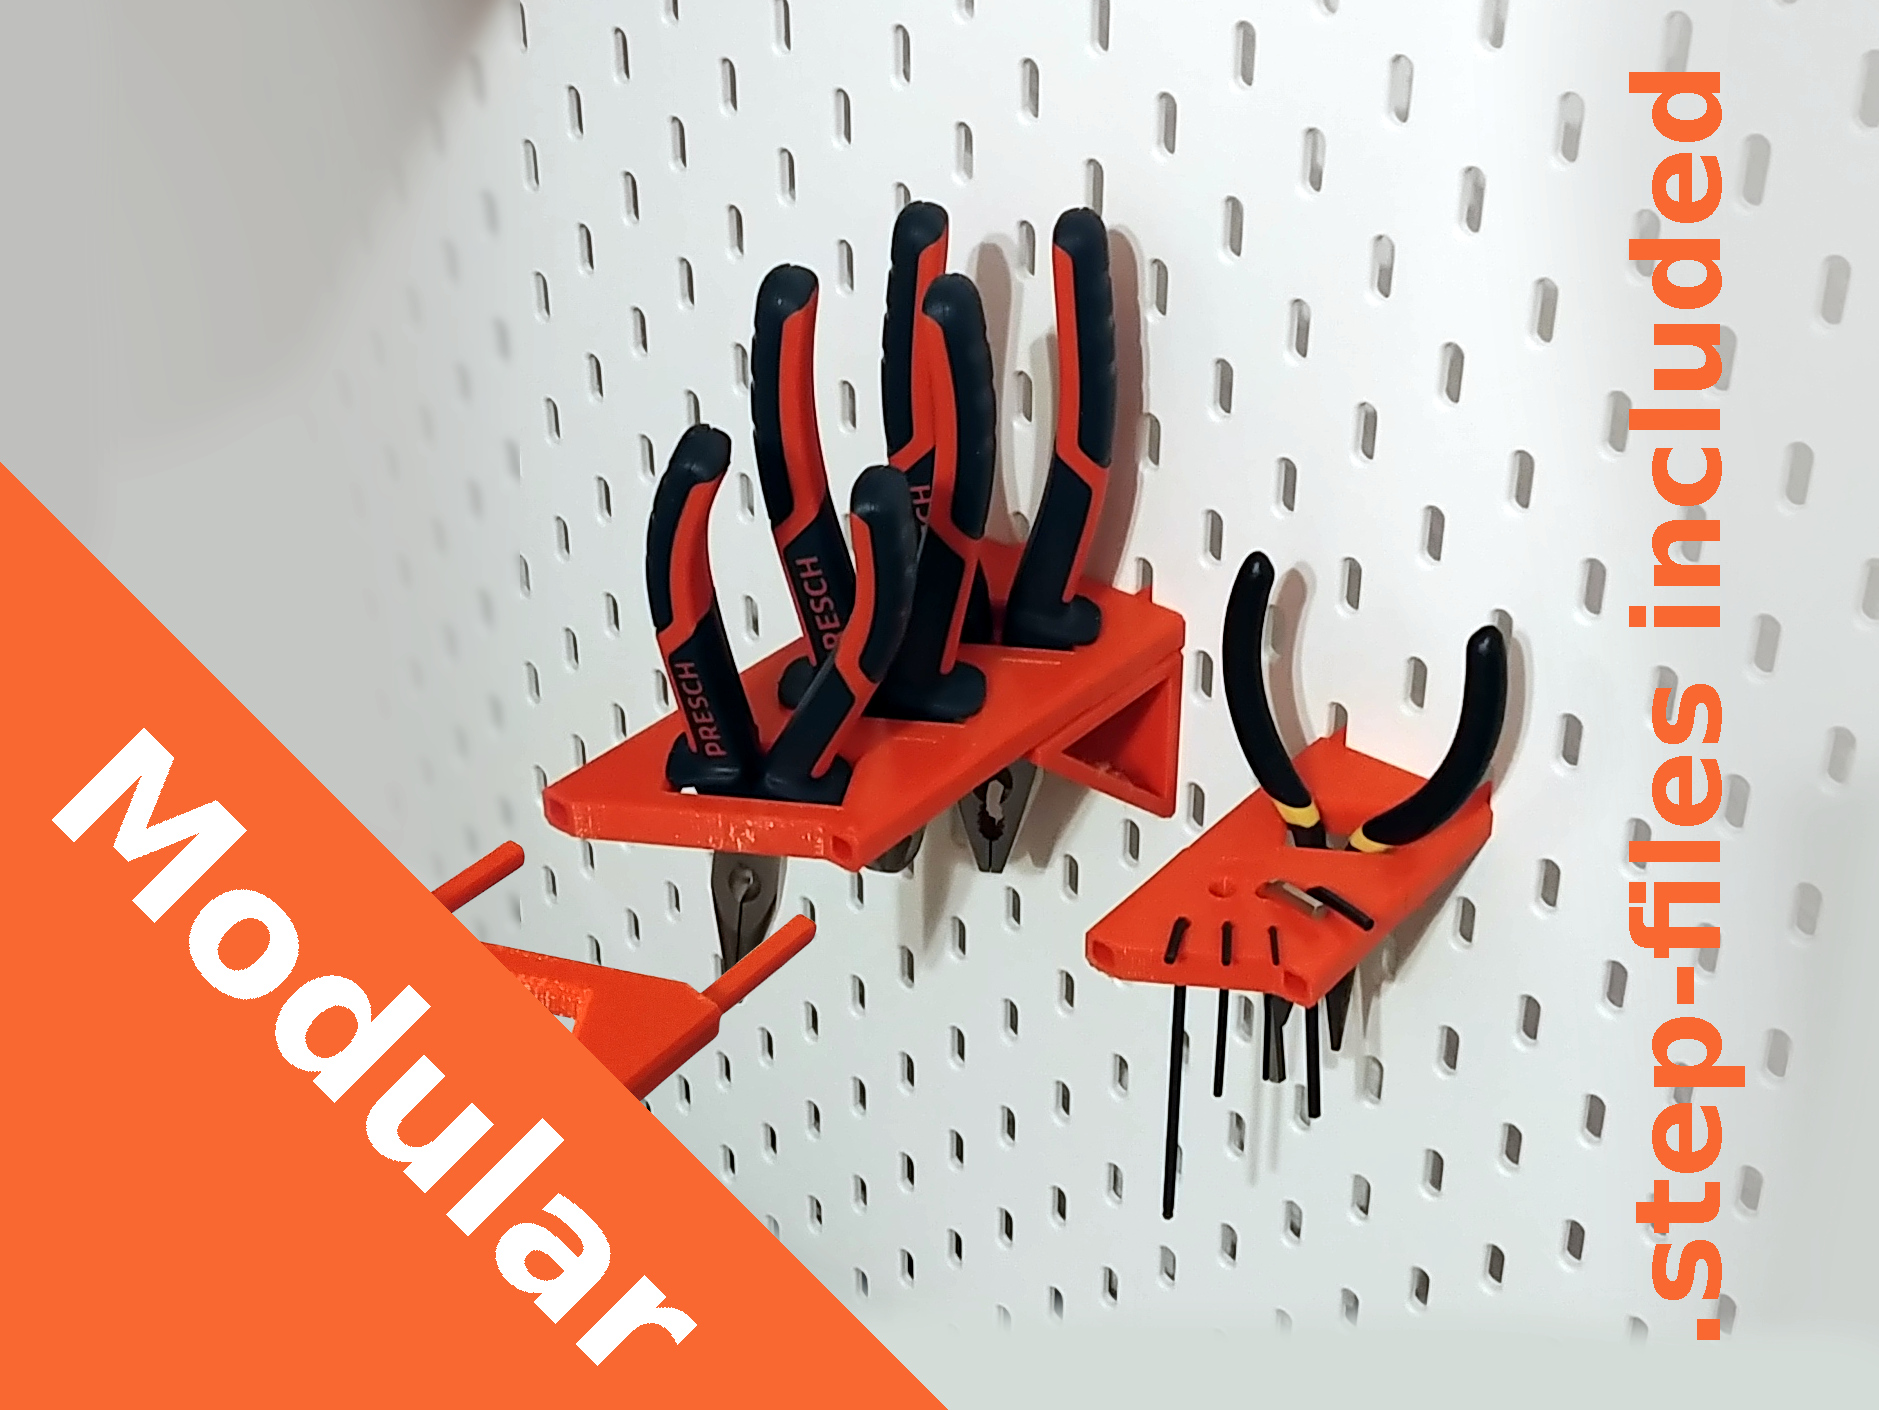
<h3>A modular rack for pegboards with sideways orientation to save space.</h3><p>You can add the individual holder parts based on your needs: one big hole to hang a pair of pliers in, many small holes for allen keys, a small slot for calipers, …</p><p> </p><h4>ADVICES FOR PRINTING:</h4><p>I uploaded mostly .step files so you have a better possibility to adapt parts for two reasons:</p><ol><li>Customization, obviously.<ul><li>As mentioned above, the modular design offers the freedom to combine holders for any kinds of things. To really have unlimited options, you need to be able to customize the parts to fit your very individual needs.</li></ul></li><li>Different Pegboards.<ul><li>“The nice thing about standards is that you have so many to choose from”</li><li>As the pegboard contest states, “unique solutions that still work with standard pegboards” are wanted. But what are standard pegboards anyway? Apart from just the topic of metric vs. imperial units, different manufacturers produce pegboards with different hole-to-hole distances, thicknesses, and so on. The product that comes closest to a standard (at least here on printables.com), is the Skadis series by Ikea.</li><li>To enable customization, I seperated the base of the starting parts (those you start a modular rack with) and the mounting of that starting part, so you can just take the base of the starting part and model the mounts yourself so they fit your pegboard</li><li>The mountings I do provide (with the “complete” and “counterpart” starting parts) are designed for Skadis boards as on the one hand I have one and on the other hand it seems to be the most common. Also <strong>the hole-to-hole distances that my files' naming is based on refer to Skadis</strong>.</li></ul></li></ol><p>As you can see, the holder parts have an angle. You might want to mount the parts facing either one way or the other (depending on how you add the mounting bits). However, for the holder parts that have sticks to plug them into other parts, <strong>the print orientation matters, as I specifically added space on the bottom side to get more tolerance when using supports (which are needed for the sticks). You can see the correct printing orientation on the screenshot from the slicer.</strong></p><p>When printing and using this modular rack system,<strong> please be reasonable with how far you extend it and how heavily you load it! It is 3D printed after all. Keep the leverage in mind, because the rack is mounted sideways! </strong>In addition,<strong> choose a relatively high amount of perimeters, high infill and orient the parts according to my instruction </strong>(when printing concerned parts)<strong> and always in a way that the force acts vertically on the layers, not parallel to them as they might detach from each other!</strong></p><p>Another note: With my prints, the way the sticks fit into the holes of the other part is very snug. So <strong>be aware that you might not be able to seperate the parts once they've mated</strong>. If you have difficulties mating the parts, you can carefully use a hammer and alternatingly hammer on both sides with reasonable force.</p><p> </p><p>Update: To prevent the modular rack from tilting when weight is added further arway from the board, I added hooks to the starter parts. This way, the starter parts are held straight by the support parts. If you already made some of these parts, glueing the starter part and the support part together where should solve the issue.</p>
With this file you will be able to print Modular sideways pegboard rack (.step files included) with your 3D printer. Click on the button and save the file on your computer to work, edit or customize your design. You can also find more 3D designs for printers on Modular sideways pegboard rack (.step files included).