Modular Wall-Mounted Magnetic Knife Strip
prusaprinters
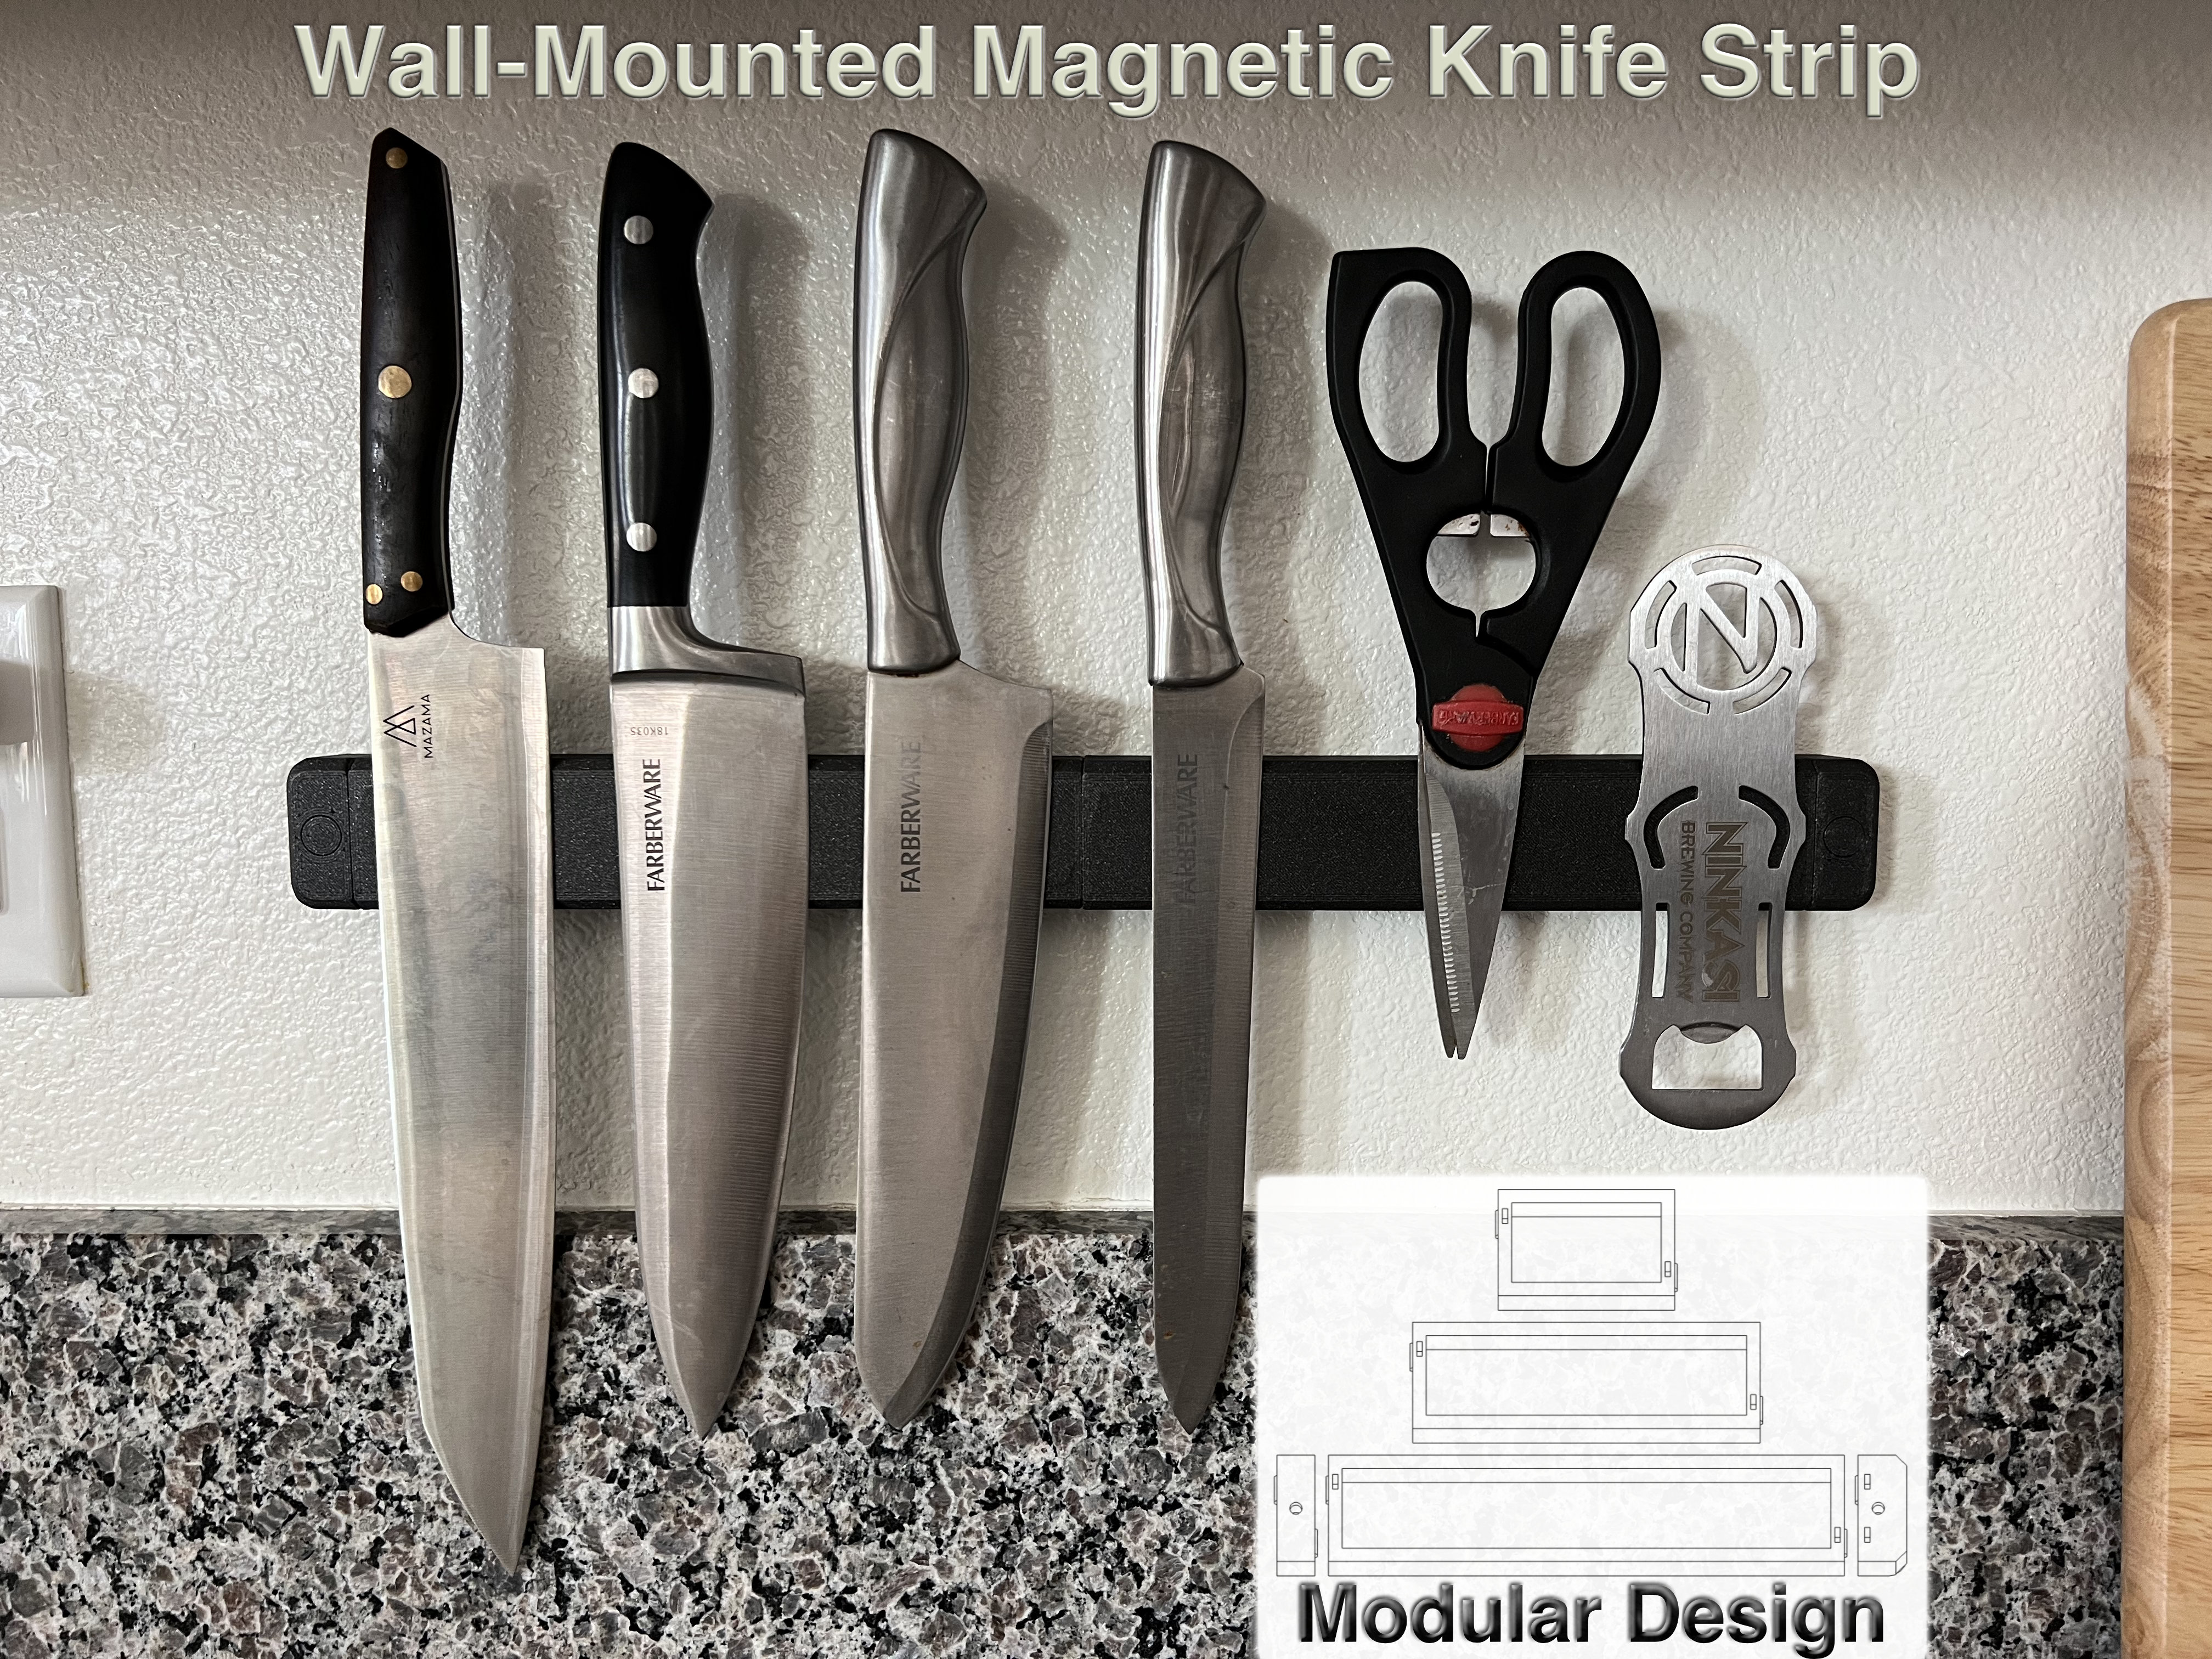
<p>A modular wall-mounted magnetic knife strip for organizing and storing kitchen knives. There are three different strip lengths, an end cap, a connector for mid-span support on really long sections, and decorative plugs to hide the mounting screw holes. There are also two different versions: standard and low-profile. The standard version should clear back-splashes up to 25mm deep. The low-profile version should be used if there's no need to clear a back-splash or something similar.</p><p> </p><h4>Hardware for Assembly and Installation:</h4><ul><li><a href="https://www.amazon.com/dp/B081V3PQCB?psc=1&ref=ppx_yo2ov_dt_b_product_details">60x10x3mm neodymium bar magnets</a> — 2x minimum, total will depend on your configuration.</li><li>M3x10mm screws (yellow) — 4x minimum, total will depend on your configuration</li><li>M3nS square nuts (green) — 4x minimum, total will depend on your configuration.</li><li>M3x25mm screws (blue) — 2x optional, use with connector between two strips.</li><li>#8 or M4 screws (orange) — 2x minimum, wood or sheet metal, depending on the material you are mounting the assembled knife strip on; total will depend on your configuration.</li><li>#8 or M4 drywall anchors (magenta, required if mounting to drywall) — 2x minimum, total will depend on your configuration.</li></ul><p>You will also need a ball-end 2.5mm hex wrench (red) for the M3 screws during assembly.</p><figure class="image"><img src="https://media.printables.com/media/prints/265118/rich_content/543d22e5-f33e-4046-adae-1d5e3b61740c/img_4202-4219_combined.jpg#%7B%22uuid%22%3A%22e0b377f2-20d0-4433-aaee-c3bcad68ab73%22%2C%22w%22%3A2560%2C%22h%22%3A960%7D"></figure><p> </p><h4>Print Recommendations:</h4><ul><li>Use your favorite material, provided it is of a rigid variety (I used PLA).</li><li>0.6mm nozzle at a 0.3mm layer height is preferred; 0.2mm layer height for a 0.4mm nozzle.</li><li>3 perimeters.</li><li>1.2mm top/bottom thickness.</li><li>10-20% infill, pick your favorite pattern.</li><li>A print pause is necessary at the appropriate layer so you can insert the magnets in the knife strip parts. For a 0.3mm layer height, the print pause will be at layer 4.10 (14). For a 0.2mm layer height, the pause will be at layer 4.00 (20).</li></ul><figure class="image"><img src="https://media.printables.com/media/prints/265118/rich_content/d7240062-e674-40f9-aac5-ad508ab4f432/img_4206_combined.jpg#%7B%22uuid%22%3A%22ad926071-d666-4b69-9ff6-32ca4559b1ce%22%2C%22w%22%3A2560%2C%22h%22%3A960%7D"></figure><p> </p><h4>Assembly:</h4><figure class="image image-style-align-right image_resized" style="width:50%;"><img src="https://media.printables.com/media/prints/265118/rich_content/2c27745c-06aa-4ad3-a3e2-110515a076f7/img_4204.jpeg#%7B%22uuid%22%3A%224cbc6968-e9da-488c-a6e5-e2682da4cf88%22%2C%22w%22%3A1280%2C%22h%22%3A960%7D"></figure><p> </p><ul><li>Insert an M3nS square nut into each of the knife strip pieces you have for your configuration. Make sure each nut is fully seated in its pocket and aligns with the hole in the part.</li></ul><p> </p><p> </p><p> </p><p> </p><figure class="image image-style-align-right image_resized" style="width:50%;"><img src="https://media.printables.com/media/prints/265118/rich_content/61d32b88-3a7a-4db1-8559-7a538a17fa02/img_4205.jpeg#%7B%22uuid%22%3A%229410c674-4e6c-4a95-b8a3-d93fed8e4ada%22%2C%22w%22%3A1280%2C%22h%22%3A960%7D"></figure><ul><li>Join the knife strip pieces together using two M3x10mm screws for each strip-to-strip connection. If you are using a connector piece, use you two M3x25mm screws (shown).</li><li>Use of the connector piece is recommended for longer configurations (longer than two of the “long” strips) for additional support; one additional mounting screw (and drywall anchor, if mounting to drywall) is required for each connector piece used.</li></ul><figure class="image image-style-align-right image_resized" style="width:50%;"><img src="https://media.printables.com/media/prints/265118/rich_content/a4921ab5-a1df-4372-90a9-428525f01fc9/img_4203.jpeg#%7B%22uuid%22%3A%227e55b593-1382-481f-88f7-e2a3853b416e%22%2C%22w%22%3A1280%2C%22h%22%3A960%7D"></figure><p> </p><ul><li>Insert two M3nS square nuts into each end cap. Make sure each nut is fully seated in its pocket and aligns with the hole in the part.</li></ul><p> </p><p> </p><p> </p><p> </p><p> </p><figure class="image image-style-align-right image_resized" style="width:50%;"><img src="https://media.printables.com/media/prints/265118/rich_content/d99a27d4-b437-4429-8df4-02fc002bf97c/img_4214.jpeg#%7B%22uuid%22%3A%22f8924802-8f34-4e72-a8ee-0c9c1e554356%22%2C%22w%22%3A1280%2C%22h%22%3A960%7D"></figure><p> </p><ul><li>Attach each end cap using two M3x10mm screws.</li></ul><p> </p><p> </p><p> </p><p> </p><p> </p><h5>Fully assembled example:</h5><figure class="image"><img src="https://media.printables.com/media/prints/265118/rich_content/ab07f1c5-542e-4014-823b-c89e19427fa5/img_4221-4222_combined.jpg#%7B%22uuid%22%3A%22c1cff55a-7999-4b2a-9be7-942c4549f5e7%22%2C%22w%22%3A2560%2C%22h%22%3A960%7D"></figure><p> </p><h4>Installation:</h4><p><strong>Note:</strong> For the installation example shown below, two “long” strip pieces were used with no connector. The installation of your configuration should be similar, however you will need to use additional drywall anchors or drill additional pilot holes for each connector piece you have chosen to use with your configuration.</p><figure class="image"><img src="https://media.printables.com/media/prints/265118/rich_content/cd739f43-4766-454e-9f09-80c0117a07fd/install1.jpg#%7B%22uuid%22%3A%22521a5f6e-4537-44ed-9fd0-813c07b257c5%22%2C%22w%22%3A2560%2C%22h%22%3A960%7D"></figure><p>Decide where you would like to mount the knife strip. If you want to be precise, use a measuring tape and mark the centerline height for the knife strip. Hold the knife strip against the wall and use one of the mounting screws to mark the location of the hole on your reference line. Install a drywall anchor at the marked location or drill a pilot hole for the mounting screw (if attaching to a wall stud or masonry, for example). Remove your reference mark before proceeding.</p><p> </p><figure class="image"><img src="https://media.printables.com/media/prints/265118/rich_content/c058db77-ac4a-428b-957a-a702c318693a/install2.jpg#%7B%22uuid%22%3A%223d167d54-59be-450b-b0a6-d50f7a656d97%22%2C%22w%22%3A2560%2C%22h%22%3A960%7D"></figure><p>Loosely attach the knife strip to the wall on one side using a mounting screw. Place a spirit level atop the knife strip and hold the knife strip level while using the other mounting screw to mark the location for the second hole. Install the second drywall anchor or drill a pilot hole.</p><p> </p><figure class="image"><img src="https://media.printables.com/media/prints/265118/rich_content/38dcbf38-af1b-4196-8475-c662d4896791/install3.jpg#%7B%22uuid%22%3A%22d99f377f-ae9a-491f-ad08-e14df9ad1d16%22%2C%22w%22%3A2560%2C%22h%22%3A960%7D"></figure><p>Mount the knife strip to the wall using the mounting screws. Do not over-tighten the mounting screws or you may accidentally damage the knife strip or the wall!</p><p> </p><figure class="image"><img src="https://media.printables.com/media/prints/265118/rich_content/625e79fa-a45d-4fa4-aad6-815c2ce79f40/install4.jpg#%7B%22uuid%22%3A%22bd44d53a-2f4a-4b86-891e-efcb8643f8bf%22%2C%22w%22%3A2560%2C%22h%22%3A960%7D"></figure><p>Install the decorative plugs in each of the mounting screw holes. Your Modular Wall-Mounted Magnetic Knife Strip is now ready to use!</p><p> </p><h4>Removal:</h4><p>Should you find the need to remove the knife strip from the wall at some point, you can do so by drilling a small hole in the decorative plugs and using a small hex wrench or similar item to pop them out of the mounting holes. The decorative plugs are designed to be sacrificial, so if you're going to reinstall the knife strip, just print some more plugs!</p><figure class="image"><img src="https://media.printables.com/media/prints/265118/rich_content/a8be9fdc-8aeb-4702-8c96-b95b5b97c517/plug-removal.gif#%7B%22uuid%22%3A%225eb0ae09-ec26-4a3d-bd5f-bf08796b408e%22%2C%22w%22%3A320%2C%22h%22%3A240%7D"></figure><p> </p><p>Check out the humorous remix of this design here: <a href="https://www.printables.com/model/265360-wall-mounted-magnetic-knife-strip-home-decor-spoof">Wall-Mounted Magnetic Knife Strip — Home Decor Spoof</a>.</p>
With this file you will be able to print Modular Wall-Mounted Magnetic Knife Strip with your 3D printer. Click on the button and save the file on your computer to work, edit or customize your design. You can also find more 3D designs for printers on Modular Wall-Mounted Magnetic Knife Strip.