Modular "Watch Band" EyeX Mount (for VESA & More)
prusaprinters
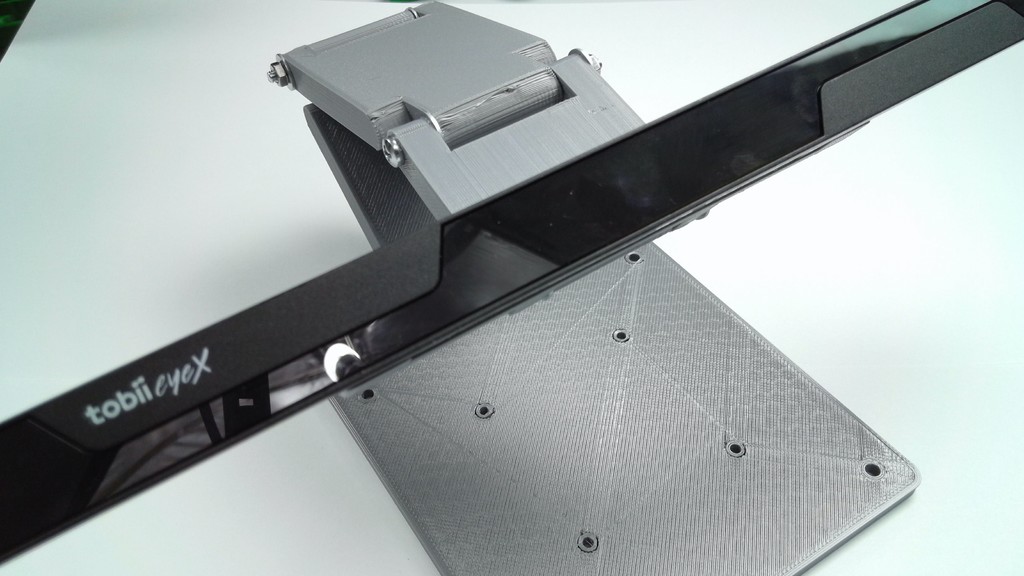
<p>IMPORTANT: This mount is now obsolete - you're welcome to use it, but we have a better one at <a href="https://www.thingiverse.com/thing:3060014">https://www.thingiverse.com/thing:3060014</a></p> <p>This mount holds a Tobii EyeX Eye Gaze camera directly under the monitor and maintains its orientation.</p> <p>Walk-through here: <a href="https://www.youtube.com/watch?v=lR-zV6_k1IM&feature=youtu.be">https://www.youtube.com/watch?v=lR-zV6_k1IM&feature=youtu.be</a></p> <p>Mounting an eye gaze device correctly is critical for those who use it to control their computer and to communicate. One challenge is that the monitor sometimes must be rotated to match the user's orientation (in a bed, power chair, etc.). Many mounts for eye gaze cameras will fail when rotated, or will remain parallel to the ground (which doesn't work).</p> <p>This mount uses a "Watch Band" linkage to allow the user to move the device while maintaining the critical orientations. The holes are 4mm in diameter, and a metric M4 x 70mm pan-head screw will work perfectly. You can follow our progress on this project at the ATMakers Facebook Group: <a href="https://www.facebook.com/groups/ATMakers/">https://www.facebook.com/groups/ATMakers/</a></p> <p>Here's a walk-through of it mounted. <a href="https://www.facebook.com/bill.binko/videos/1377778868931833/?permPage=1">https://www.facebook.com/bill.binko/videos/1377778868931833/?permPage=1</a></p> <p>This will be part of a larger Guide at the main ATMakers.org site and we will update this when it's ready.</p> <h3>Print Settings</h3> <p><strong>Printer Brand:</strong></p> <p>FlashForge</p> <p class="detail-setting printer"><strong>Printer: </strong> <div><p>Creator Pro</p></div> <p><strong>Rafts:</strong></p> <p>No</p> <p class="detail-setting supports"><strong>Supports: </strong> <div><p>Doesn't Matter</p></div> <p><strong>Resolution:</strong></p> <p>.30 mm</p> <p class="detail-setting infill"><strong>Infill: </strong> <div><p>20%</p></div> <p><strong>Notes:</strong></p> <p>Printing is pretty simple. Flat orientation w/supports for the screw holes is what I ended up with (we tried several with varying degrees of success - look at the pix). Whatever setup you have for flat parts w/holes will work.rnrnWe printed in PLA, but I intend to use PETG for the ones I'm sending to a user just to get the most strength. I will update when that's done.</p> <h3>Post-Printing</h3> <p><strong>Assembly</strong></p> <div><p>I used M4 x 70mm machine screws (Pan-Head - tapered heads will crack the PLA - see photos). Here's a link to the ones I bought at Lowes:rnhttps://www.lowes.com/pd/The-Hillman-Group-4-Count-4mm-to-0-7-x-60mm-Pan-Head-Zinc-Plated-Metric-Machine-Screws/999994912rnrnI used one washer inside the joint, but you may not need it. Friction of the threads should hold the weight of the device.</p></div> How I Designed This =================== <p>You can watch the ideation & initial prototype in this video. If you like it, join the group!rnrnhttps://www.facebook.com/groups/ATMakers/permalink/286819688396144/</p> </p></p></p> Category: Electronics
With this file you will be able to print Modular "Watch Band" EyeX Mount (for VESA & More) with your 3D printer. Click on the button and save the file on your computer to work, edit or customize your design. You can also find more 3D designs for printers on Modular "Watch Band" EyeX Mount (for VESA & More).