Mokujin Action Figure with Stand
thingiverse
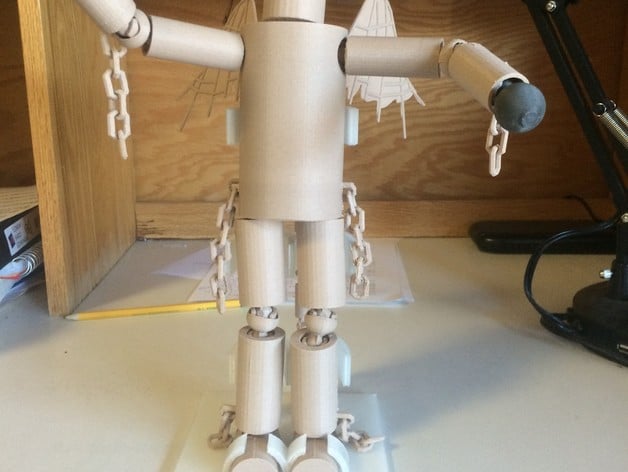
I loved the concept behind Serotonin's MOKUJIN, but I had some ideas to boost articulation and stability while retaining its cute and cartoony appearance. I also adored aaskedall's Articulated Codsworth and its beautiful ball-socket joints. So as my first large CAD project, I spent the last few months creating a new version of Mokujin with articulated joints. I designed the action figure to have 22 parts in total plus a stand, and all pieces were repaired in NetFabb. Some new pieces include wings and a tail (based on Mokujin's Roger Jr, Alex, Devil, Angel, and True Ogre forms), a removable stalk to allow a second color different from the head itself, joint connector pieces for extra movement in the elbows, knees, and wherever else you see fit, and a stand with the Tekken logo so that you can display your creation in all its glory without worrying that it will topple over and break. For extra realism, I decided to print the majority of the figure in Zen Toolworks Wood filament and the hands in Zen Toolworks Magnetic Iron filament which I intend to rust. The stand was printed in clear PLA. I recommend painting the Tekken logo on the stand to really make it pop. Hope you enjoy making your own giant Mokujin figurine! Print Settings Printer Brand: MakerBot Printer: MakerBot Replicator 2 Rafts: No Supports: Yes Resolution: 0.200 Infill: 20% Notes: I used a Rep 2 to print all the parts except the stand, which is too big. I used a DeltaMaker for the stand. If you choose to print the main body parts in wood filament as I did, be prepared for the socket joints to crack and maybe even break due to wood filament being less stable than something like PLA or ABS. If the joint cracks but does not snap off, it is still usable but will be much looser and will likely pop out if jostled slightly. Using the stand is vital in this case to ensure that the figure doesn't topple and break. If the joint breaks completely, print again. If you want to alter the size of the figurine, going too much smaller might cause problems in the joints not being able to attach correctly, especially with the wings as they already have small joints. If you want to go bigger, make sure that both the piece with the ball joint and the piece with the socket joint are increased in size so that you don't accidentally print one joint that doesn't fit into the other. Post-Printing Instructions Use a good amount of force to put the joints into place, but be careful and try to put the joints in straight before turning them. There is a chance that the ball joints could break off given enough force sideways. The wings are the hardest pieces to get into place without breaking. Hold the wing at the neck of the ball joint (where the joint connects to the thin wing itself) and roll the joint into the socket. How I Designed This Because I use a Surface Pro 3 as my computer, Microsoft 3D Builder for Win10 was the first CAD software I ever learned and mastered. The entirety of this project was completed in 3D Builder, and mostly involved stitching aaskedall's ball-socket joints to different primarily cylindrical or semi-cylindrical pieces. I ran a bunch of tests on the joints to see how the position of the socket (external, flush, or recessed) affects the movement of the part versus the aesthetic, as well as to see what size the hole that houses the socket joint must be to allow the socket to flex enough to receive the ball joint. Not too many fancy techniques used in this project (I'm still learning) outside of incorporating preexisting parts originally by aaskedall and Serotonin to new parts of my design. For the wings, I took a screenshot of winged Mokujin from a YouTube video, cut out the shape in Photoshop, and used the 3D capabilities of Photoshop to create an object from the cutout of the wing. I then just attached semi-cylinders in the proper places. As far as getting the Tekken logo onto the stand, 3D Builder embosses images by treating all black space as transparent and all white space as the part to be raised or lowered. I downloaded the logo from Wikipedia and airbrushed it in Gimp to get the correct parts white and black before bringing the new picture into 3D Builder. I'm amazed at how great the logo sliced despite the small details.
With this file you will be able to print Mokujin Action Figure with Stand with your 3D printer. Click on the button and save the file on your computer to work, edit or customize your design. You can also find more 3D designs for printers on Mokujin Action Figure with Stand.