Morse Code Mini Cootie Key (Sideswiper)
prusaprinters
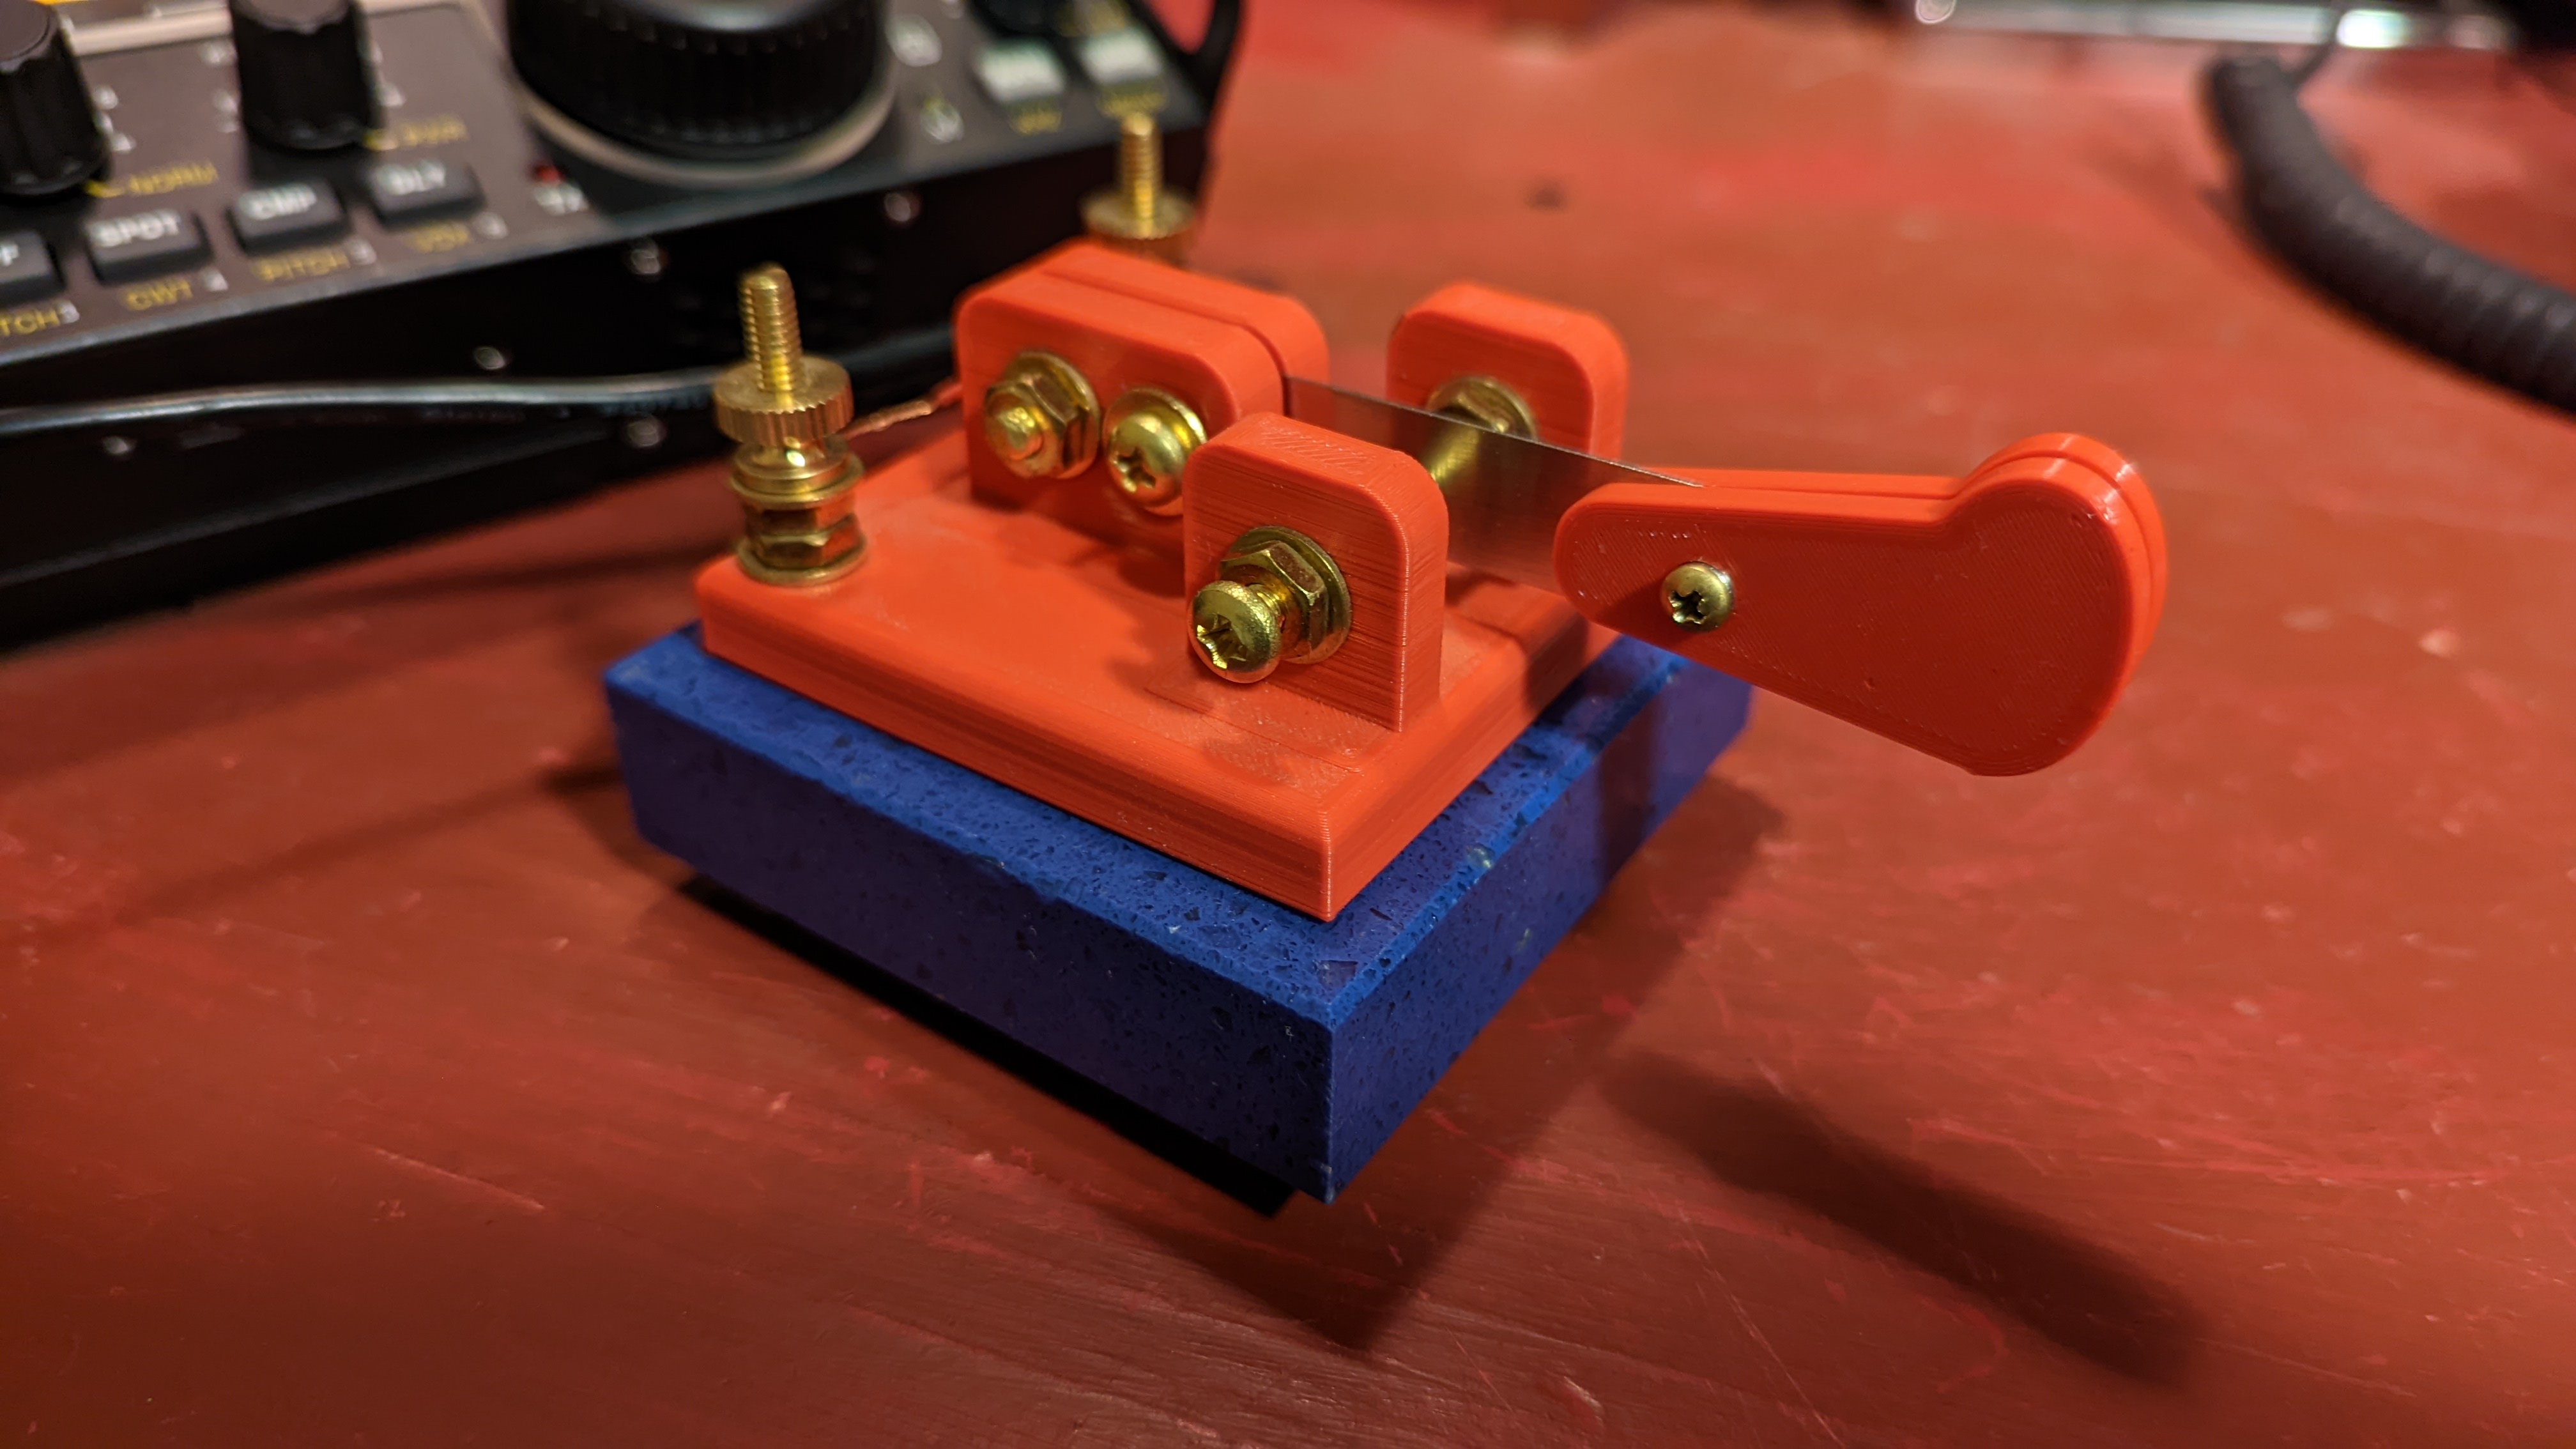
<p>This is my take on a compact Morse Code sideswiper key, (also called cootie keys.) Unlike the traditional telegraph key which uses an up-and-down motion, the sideswiper makes contact on either side of a flexible arm, making for much less hand and wrist fatigue.</p><p>This key uses a short length of hacksaw blade as the lever arm; this is a ham radio tradition for these kind of keys, which were often home-brewed out of inexpensive materials on hand. Alternatively, you can use a strip from a feeler gauge. This approach allows selecting the flexibility of the lever by which thickness you choose.</p><p><strong>What you will need</strong><br>A piece of hacksaw blade about 85mm long OR a steel strip from a feeler gauge.<br>Brass or stainless steel #8 hardware for assembly.<br>Brass or stainless steel #4 hardware to attach the finger pieces<br>about 2 feet of 20 or 22 ga solid wire</p><p><strong>Preparing the hacksaw blade </strong><br>Cut or break the blade to length (wear goggles!).<br>Sand off the paint on the blade. If you don't want to do the whole blade, make sure the portions where the supports and contacts are clean of paint.<br>You can use ScotchBrite to shine up the surface a bit after the paint is removed.<br>Finish the cut end with a file to remove sharp edges and burrs. (wear goggles!)</p><p><strong>Preparing a feeler gauge strip.</strong><br>Typically you can use the existing hole in the strip for one of the lever mounts. <br>You can use ScotchBrite to shine up the surface a bit.</p><p><strong>Drilling the Lever</strong><br>Measure 8mm from the left end of the lever, and drill an 11/64th hole (5mm) centered on the blade. Go slow, the steel blade is hard. Wear goggles!<br>Add a second centered hole 12mm to the right of the first. These holes are for the lever mounting.<br>Flip the lever end-to-end, drill a 3mm hole 11mm from the left end, for the mounting screw. </p><p><strong>Preparing the connecting wires.</strong><br>Break the shanks off of three #8 ring tongue terminals. <br>Strip the insulation off one piece of 20 - 22 ga wire, this is the wire that will be used to connect to the lever.<br>Solder the bare wire to one ring tongue, and two lengths of insulated 20 - 22 ga wire to the other two. See the photo.</p><p><strong>Assemble the pieces</strong><br>Poke the bare wire into the hole between the support pillars, slide the lever in as well, and use an awl to line up the holes. <br>Use the bolt, washers, and nut to secure the lever in both holes, and tighten securely.<br>Drop a wire with a ring tongue on it through each of the wire holes, on the base just inside the contact pillars.<br>Thread a nut all the way onto each of the contact bolts, and add a flat washer. Push the assembly through the contact holes and place the ring tongue over it on the inside of the pillar. Add a nut to secure the assembly. You can change the contact spacing by adjusting the nuts to give the right spacing when both nuts are tightened.<br>Attach the finger pieces to the end of the blade with the #4 screw, washers and nut.</p>
With this file you will be able to print Morse Code Mini Cootie Key (Sideswiper) with your 3D printer. Click on the button and save the file on your computer to work, edit or customize your design. You can also find more 3D designs for printers on Morse Code Mini Cootie Key (Sideswiper).