Mortar Bot v.2 CoreXY 3D Printer
thingiverse
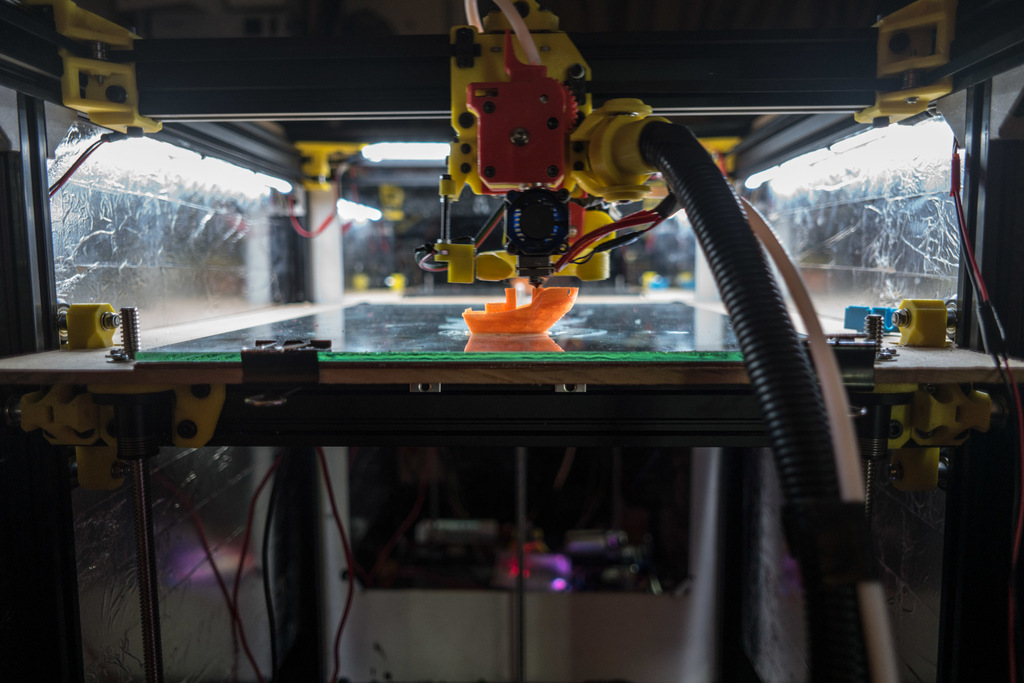
Human: Outdated; see here: M-bot v.1; https://www.thingiverse.com/thing:2386365/ M-bot v.3; https://www.thingiverse.com/thing:3134348 M-bot v.3.5; https://www.thingiverse.com/thing:3889891 THIS IS A FUNCTIONING PRINTER Current Status: BOM lists all required hardware, though it hasn't been double checked, and I haven't found reliable sources for everything yet. The printer is operating, within an enclosure, and printing both ABS and PLA at a high standard. I'm still to confirm whether or not this design will be compatible with the e3d toolchanger, but that is the intent. List of key design changes implemented from the M-Bot v1 (itself a D-Bot remix) - https://www.thingiverse.com/thing:2386365 1. Wider implementation of aluminum brackets, including the full replacement of some printed corners. 2. Mirror of the 3 leadscrew design to improve space efficiency 3. Addition of MGN-9 rails for Y axis. 4. Lengthening of Y axis, shortening of X axis to reduce weight of moving components. 5. Reduction of extrusion usage, increase of structural use of enclosure. 6. Usage of full sized delrin wheels on Z axis. 7. Bed base to act as enclosure floor. 8. Use of precut lengths from RobotDigg for almost all extrusions Features as designed: * 400x300mm heatbed. * 400mm build height. * Tight enclosure for heat retention. * Compatibility with e3d extruder and hot end options (v6, Volcano, Titan, Aero, Pitan) * Space for user's choice of electronics. * Rigid frame. * Light moving components. * Reduction in sources required for suppliers Printed Part descriptions (assumes D-bot knowledge): Recommended to print all in solid ABS, in an enclosure. PET-G would work as a substitute, but some tolerances may be off. Z Axis: * Two-wheel-carriage-portion-x2 - Part to be bolted to side of 2040 main Z extrusion * One-wheel-carriage-part-x2 - Part to be bolted to opposite side of 2040 main Z extrusion * Z-leadscrew-front-mount-x2 - Mounted next to One-wheel-carriage * Z-leadscrew-rear-mount - Mounted at end of 2040 T-bar ! Z-leadscrew parts available with either 4 bolts or 3 bolts for leadscrew nuts. XY Frame corners: * back-right-bearing-mount & back-left-bearing-mount - 2020 X extrusion at rear mounted on top. * front motor mounts require cut corners to fit Extruder: * Pitan parts adjusted to fit 5x14x5mm bearings for the hob, and a 4x13x4 grooved bearing on the lever, plus a new 5x14x5mm bearing on the motor shaft for the lever. * Optional Pitan body parts with holes for airflow. Suggested to mount with a 40mm fan for use in the enclosure. Electronics enclosures: * Duet Wifi enclosure, with one major cable hole, and holes for screw down terminals, USB, wifi antenna etc. Requires 12mm M3 stand offs, and stand offs of any length for mounting to aluminum sheet, as well as 5 M3 bolts, and a 40mm blower fan for cooling. * PSU cable cover, to protect from accidental exposure to live lines. Enclosure instructions / suggestions: * Cut MDF panels to size * Paint exterior * Line interior with aluminum tape * Drill holes for mounting on extrusions * Front panel requires cut corners to fit front motor mounts * Bed panel requires cuts for Z axis wheel carriage and extrusions * Roof panel requires gasket sealant such as silicone along contact points * Suggest installing a handle on the roof panel * Back enclosure corner should be installed over rear panel's top screw mounts as a guide for the roof panel * Consider mounting mirror on rear panel
With this file you will be able to print Mortar Bot v.2 CoreXY 3D Printer with your 3D printer. Click on the button and save the file on your computer to work, edit or customize your design. You can also find more 3D designs for printers on Mortar Bot v.2 CoreXY 3D Printer.