Motorized Functional Differential Gear System
thingiverse
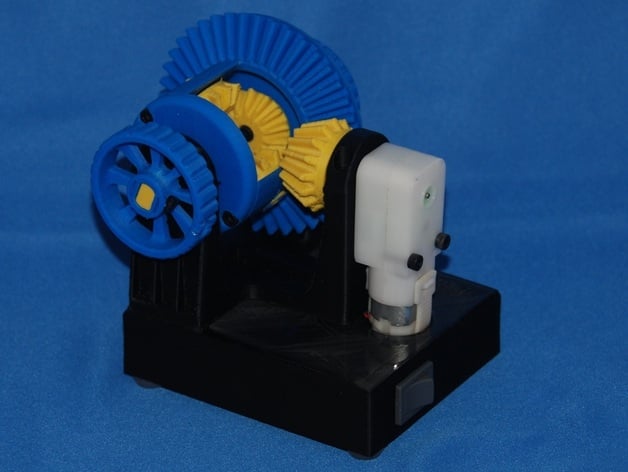
After making Thing-O-Fun's functional differential gear system and playing with it for a while I realized that this thing just had to be motorized. I had a Solarbotics GM9 gear motor lying around and it was a perfect fit. All that was needed was a modified input shaft to match up with the shaft on the gear motor and a base to hold the batteries and power switch. I included the scad file so that you can easily change the switch opening to fit your switch. Watch it in motion at http://youtu.be/bFceF0CeGFk Instructions Make the functional differential gear system (you can skip the shaft and one of the handles, as they are not needed with the motorized version. Print the base and the input shaft. Put the Input Shaft on the Input Pinion and assemble the gear system. Line up the GM9 shaft with the Input Shaft and hole it in place. Solder wires ~3 inches long onto the GM9 terminals. Drill two holes about 2.8mm into the stand, using the holes in the GM9 body as a guide. Use the M3x22 screws to mount the motor. Solvent weld the gear system to the base. Glue in the battery holder, install the switch, and hook it all up.
With this file you will be able to print Motorized Functional Differential Gear System with your 3D printer. Click on the button and save the file on your computer to work, edit or customize your design. You can also find more 3D designs for printers on Motorized Functional Differential Gear System.