Motorized Platform Jack
thingiverse
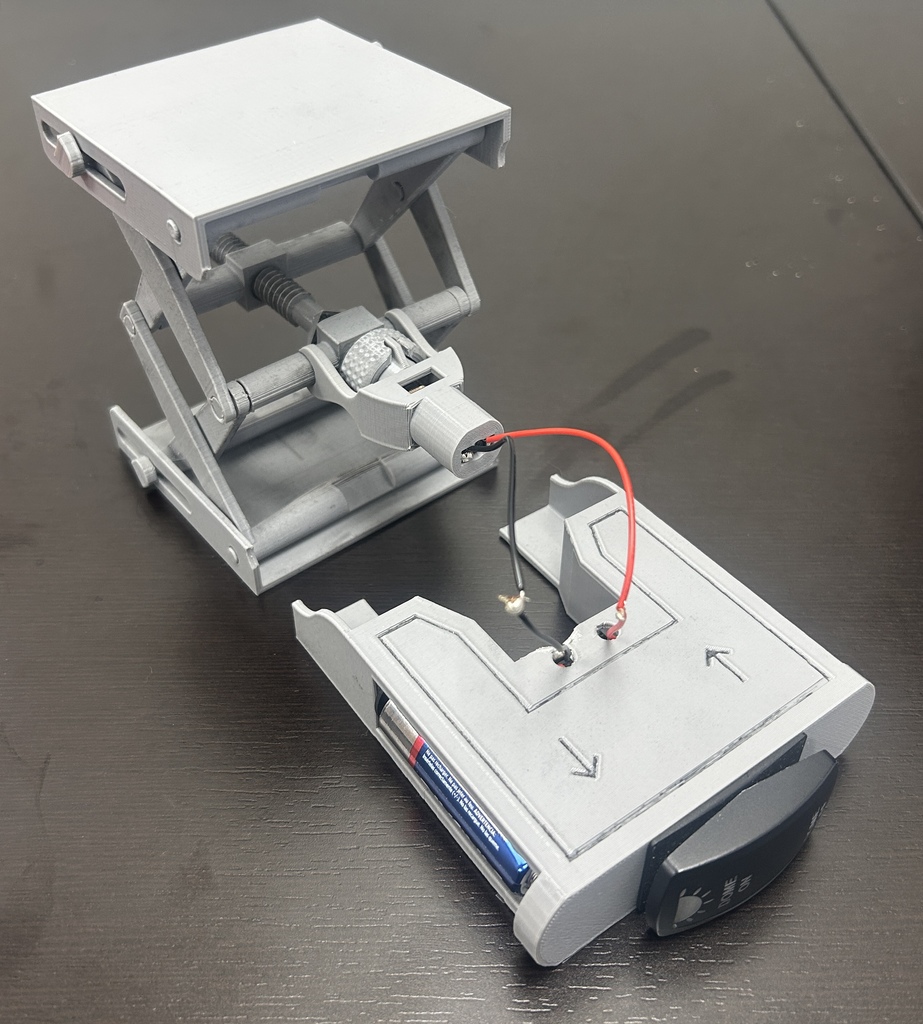
This is a remix of the "Platform Jack" to make it completely motorized. This is a fairly simple and cheap project with little prior knowledge of electronics needed. Video: https://youtube.com/shorts/DoBgDl5bbw8 You will need: AA battery housing(2x) Standard Carling Switch Small DC motor(I used the 50RPM which takes it about 30 seconds to fully extend and in my opinion it is a little slow. The higher RPM motors should fit this as well) https://www.amazon.com/gp/product/B082GNPTCS/ref=ppx_yo_dt_b_asin_title_o03_s00?ie=UTF8&th=1 20g wire Assembly: -Put the switch in the 'CONTROLS' Box and the motor in the 'motor mount' before you start connecting wires -On the switch, connect terminals 1 and 6 to one terminal of the motor and 3 and 4 to the other. Switch Diagram: 1 4 2 5 3 6 -Connect your batteries together in series and then to terminals 2 and 5 -Make sure to test the switch to make sure your motor is turning in the right directions. -Use a Dremel to make a slot in the knob of the 'Platform jack' to accept the 'shaft connector' -Put the 'shaft connector' on the motor and attach it to the knob on the 'Platform Jack' -Insert batteries *Powder graphite works great to help the screw move more freely* *All exposed wires should be covered*
With this file you will be able to print Motorized Platform Jack with your 3D printer. Click on the button and save the file on your computer to work, edit or customize your design. You can also find more 3D designs for printers on Motorized Platform Jack.