Motorized Rightward Pointing Arrow Illusion
thingiverse
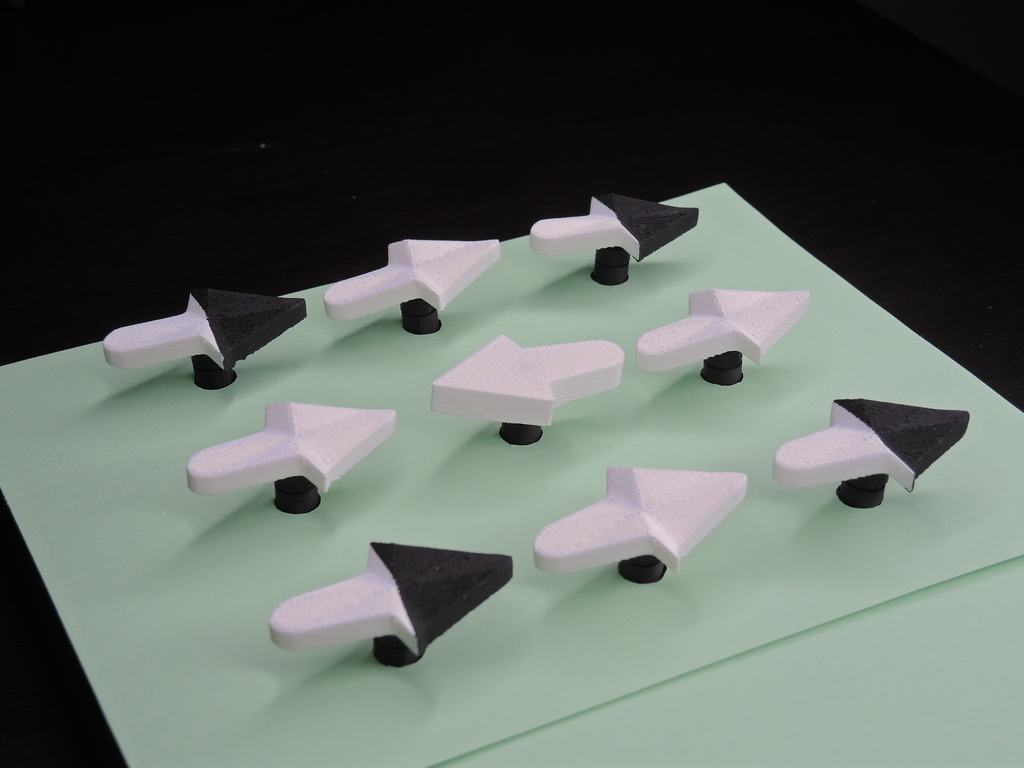
These motorized arrays were designed to showcase the Rightward Pointing Arrow Optical Illusion. A highlight video demonstrating all these arrays in action is available at https://youtu.be/sF--cz88Yu8. A video explaining how I created and built these arrays, which will be useful for assembly, can be found at https://youtu.be/elV34YB5k8k. Kokichi Sugihara, a Japanese mathematician, created this optical illusion. He is also known for other well-known illusions such as the "Ambiguous Garage Roof" and the popular "Ambiguous Cylinder Illusion." More information about him can be found in video descriptions along with links to his work. Please note that I appreciate your support and would like you to subscribe to my YouTube channel at https://www.youtube.com/potentprintables for more of my designs. This project requires additional items beyond 3D printed parts, including servos, servo motor controllers, etc. A full list of required parts is included with the STL files. The STL quantities needed are: Rightward Pointing Arrow (available at https://www.thingiverse.com/thing:2887058), Base NxM (1 unit), Legs (4 units), Motor Coupler (equal to the number of arrows), and Arrow Coupler (equal to the number of arrows). Special Assembly Instructions: - Trim one of the servo motor horns, so that only the "hub" remains. This will fit into the Motor Coupler. Use caution when doing this! - Bond this hub into the Motor Coupler using epoxy. - Bond magnets into the Motor Coupler and the Arrow Coupler, such that polarities are opposite and the two Couplers will stick together. - Bond the Arrow Coupler into the Arrow itself. - Bond Legs onto the Base of your choice. - Install heat-set inserts into the base. - Screw servo motors into the base (you can also glue them in place if you don't have heat-set inserts). - Install motor coupler onto motor and then place Arrow onto motor coupler via magnetic interface. - Hook up electronics and make the arrow dance! WARNING: Please be careful when following any of these instructions. Wear and use appropriate safety equipment.
With this file you will be able to print Motorized Rightward Pointing Arrow Illusion with your 3D printer. Click on the button and save the file on your computer to work, edit or customize your design. You can also find more 3D designs for printers on Motorized Rightward Pointing Arrow Illusion.