Mounting Plate for Rotacaster 48mm OmniWheel
thingiverse
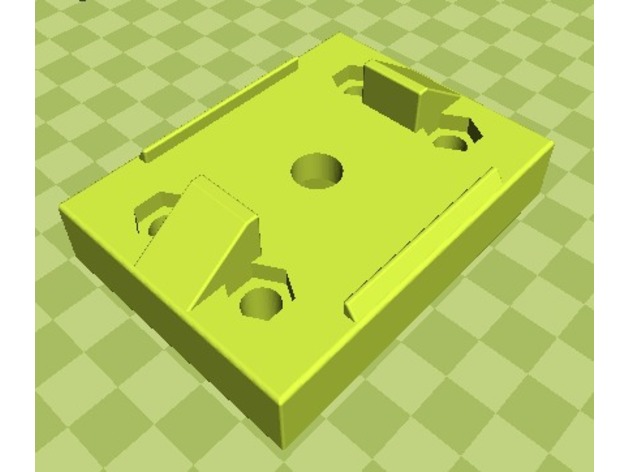
We needed a way to attach some 48mm Rotacaster wheels to a battery shelf to get it around the warehouse. We made up this little 3D printed part to fit between the steel rota caster housing and the foot of the battery shelf. It fixes together using countersunk nuts on each join. The central hole is for a 10mm bolt. The head of that bolts countersunk into the part. On each corner are 6mm holes that fulfil a similar purpose. We fixed this plate to the rota caster wheel housing and bolted it to the base of each of the four legs of our battery rack. I used a pen, some paper, some callipers and Fusion 360 to produce the model and added the triangular guides to hold the foot of the shelf in place. If you want any more information just comment and ask! More than happy to share anything that you might need :) Print Settings Printer Brand: LulzBot Printer: TAZ 6 Rafts: No Supports: Yes Resolution: 0.15 Infill: 50% Notes: I Oriented the print such that the central countersunk hole was against the print bed and printed supports only in that area. The standard supports from Cura worked perfectly and were easily removable. I used 50% infill as the shelf is holding a stack of LiPO batteries and I really didn't want any issues with it. I also printed with brims (10 lines) and used ABS Plastic (as it wont morph in a hot summer warehouse). The wheels worked perfectly and the battery shelf now gets around the warehouse just as intended. How I Designed This Step 1: Measure I used some digital callipers to measure the holes of the rotacaster mounting plate as well as the dimensions of the foot of the shelf and top profile of the plate. Step 2: Fusion 360 My first model was of my dimensions measured and was purely to see if the size of the holes I print would be accurate to the size of the screws I was using. I made a sketch profile in fusion of the mounting profile (measured from this product: http://www.rotacaster.com.au/shop-product/48mm-mounted-solutions---r2/rotacaster-48mm-double--90a--firm-polyurethane-roller---fork-mounted) I extruded that to be around 10mm thick and then made some countersunk hex-head bolts to seat in part. Step 3: Print, Measure, Print again I printed the part on quick settings and then tried to fit my bolts to the holes. They were all printing about .5mm too small. The same was true for the hexheads. So I widened the holes on each profile in fusion, I also made the entire part thicker and broader than it was as it wouldn't have been very stable if I had only used the mounting plate profile. I reprinted that part on Standard quality quick print profile for ABS in Cura and found all the dimensions were perfect. However the single bolt that held the shelf to the wheel didn't quite seem strong enough. Back to fusion! I added the triangular guide rail to the top of the part, which holds the 3mm steel of the shelf foot perfectly in place. I reprinted the part at .15 Layer height and with all the bells and whistles as a final prototype. SUCCESS, after this I multiplied the object in cura and used the same print settings to make 3 more. I got my bolts from the local hardware store. The wheels are now installed to the shelf and it can roll around the warehouse in any direction and looks incredibly stable!
With this file you will be able to print Mounting Plate for Rotacaster 48mm OmniWheel with your 3D printer. Click on the button and save the file on your computer to work, edit or customize your design. You can also find more 3D designs for printers on Mounting Plate for Rotacaster 48mm OmniWheel.