Moveable Skeleton Arm Extension
prusaprinters
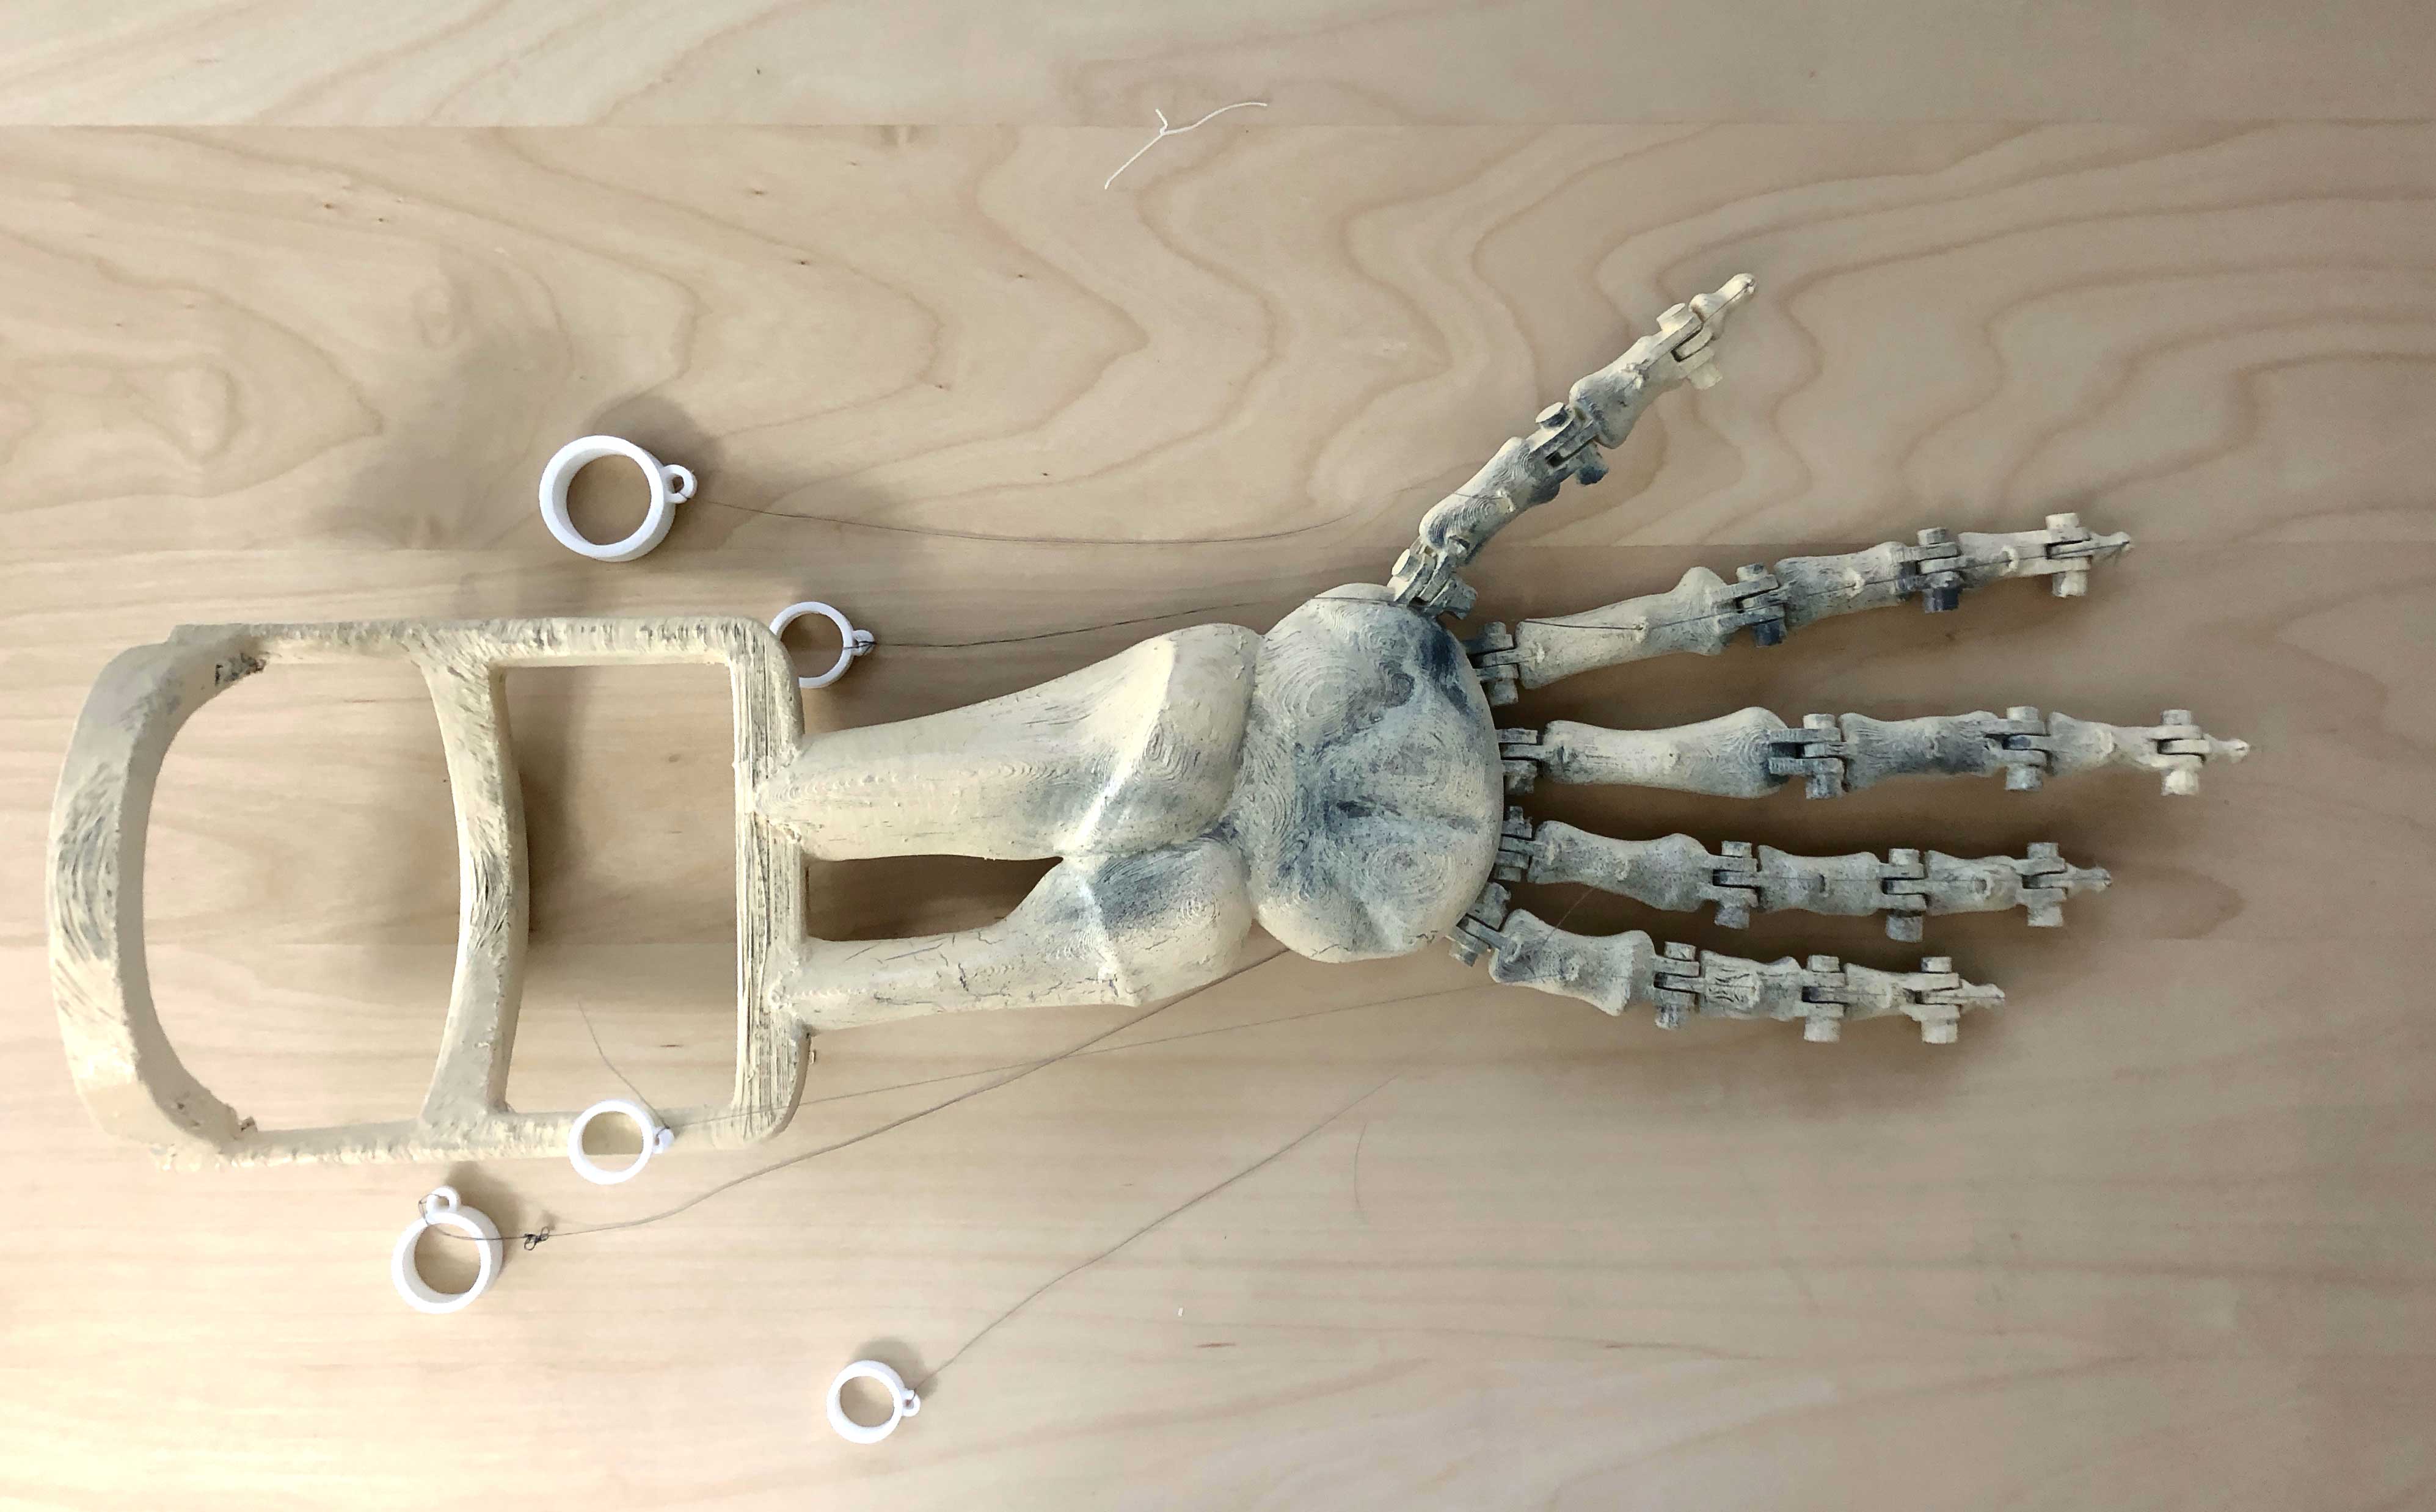
<p>Create a fun articulated skeleton hand with fingers that you can control! This is great for costumes where you’ll have a skeleton hand / arm sticking out from a sleeve (like a grim reaper). After printing and assembly, you'll be able to curl the skeleton fingers using your actual fingers hidden in the sleeve. I've included both a left arm and a right arm (same thing mirrored). The attached zip file might be easiest to navigate.</p> <p>For this project, you'll need some glue, thread or fishing line, and dental bands (I used these https://www.amazon.com/Sonic-Dental-X-Heavy-Orthodontic-Elastic/dp/B00A9IHMJA/ref=pd\_lpo\_vtph\_194\_bs\_img\_1?\_encoding=UTF8&psc=1&refRID=36EW9KM54EE32TWBVVAD&dpID=31WcGksiafL&preST=\_QL70\_&dpSrc=detail). Print out the following to complete a hand:</p> <p>1x of the following:</p> <p>Pinkie 1, Pinkie 2, Pinkie 3, Pinkie 4<br/> Ring 1, Ring 2, Ring 3, Ring 4<br/> Middle 1, Middle 2, Middle 3, Middle 4<br/> Index 1, Index 2, Index 3, Index 4<br/> Thumb 1, Thumb 2, Thumb 3, Thumb 4,<br/> Wrist,<br/> Hand Brace</p> <p>Multiple of these:</p> <p>Nut x 19<br/> Peg x 19</p> <h3>Print instructions</h3><h3>Licence: Creative Commons - Attribution Category: Props Print Settings</h3> <p><strong>Printer Brand:</strong> Prusa</p> <p><strong>Printer:</strong> <a href="http://amzn.to/2rqZ6Uo">Prusa Clone</a></p> <p><strong>Rafts:</strong> Doesn't Matter</p> <p><strong>Supports:</strong> Yes</p> <p><strong>Resolution:</strong> .2mm</p> <p><strong>Infill:</strong> 15%</p> <h3> Post-Printing</h3> <p><strong>Step 1 - Sanding</strong></p> <p>As this requires a good amount of supports, you'll want to make sure you do a good job of sanding pieces down. I wasn't too worried about getting them smooth as I wanted a more grungy look anyways, but you won't want your thread / fishing line to get caught on anything sticking out. I used a 200 grit sand paper sheet to handle all of this.</p> <p><strong>Step 2 - Painting (Optional)</strong></p> <p>Though I printed mine in white, I wanted to give it a grungy dead look, so I ended up painting over the top of it. After sanding, I applied a pretty thin coat of XTC-3D to smooth out any other issues, and then gave it a light sand after it had dried. After that, I applied a coat of sprayable primer so my paint would have a good surface to attach to.</p> <p>With my pieces ready to paint, I hit them all with a base bone yellow / cream coat, and then did some darker layers over the top to rough it up a bit. Since it's not going to really be seen up close, I wasn't too worried about the details and just wanted to give it some variation.</p> <p><strong>Step 3 - Gluing and Assembling Joints</strong></p> <p>Each of the fingers consists of 4 bones with little hinge joints between them. Each print file for a finger has a number. Index 1 connects to the wrist, Index 2 connects to Index 1, etc. The connectors should slide together so the holes line up and the blocks where the knuckle would be match somewhat. You'll want to take one of the Pegs and slide it into the hole so the finger bone has something to spin around. Take the Nut and add a little glue into the pocket in it and put it onto the other end of the Peg (that you pushed through) so it caps it and keeps the joint together. Make sure you don't accidentally glue the joint together as you want to make sure it can still rotate freely on the hinge. Repeat this for every finger, and all of the finger 1 pieces to the wrist.</p> <p>The fingers on the hand should curl nicely at this point, but we want to make sure that when they're not under tension, the fingers snap back to an open position. For each knuckle where two finger bones come tougher (or the finger to the wrist), find the little blocks that meet up, and place on of the dental bands around them (1 around both). Repeat this for every knuckle. When you've done that, you should be able to curl a finger, and when you let go, it'll snap back into an open position.</p> <p><strong>Step 4 - Threading</strong></p> <p>The last step is to use your thread or fishing line to rig this entire thing so you can curl the fingers. You'll have one line for each finger, running from the Hoop piece (which your actual finger will go through) all the way to the tip of the skeleton finger, running through the little eye lets opposite the knuckles.</p> <p>Start by threading your line through the eyelet on the hoop piece and tie it off. Next, take the other end of your line and thread it through the eye lets on the fingers, starting with the ones closest to the wrist and working your way to the tip (i.e. Index 1, then Index 2, then Index 3, then Index 4). At the tip of the finger before you tie it off, decide where the hoop should lie (and how long the lie should be) so it fits comfortably around your finger while still allowing you enough tension and range of motion to make the skeleton fingers. When you curl your own fingers, it'll pull down on the line through the eyelets curling each bone of the skeleton hand. When you've got your line length figured out, tie it off on the eyelet on the tip of the finger. Repeat this for each finger and thumb (it takes a little while, be patient).</p> <p>Once you'll all threaded, you should be able to start using it. You should be able to put your arm inside the wrist brace and wrap your palm around the middle bar for support while doing this. It'll work best hidden inside a large cloak / sleeve so your real hand isn't visible, but the skeleton hand / arm bones are. Have fun!</p>
With this file you will be able to print Moveable Skeleton Arm Extension with your 3D printer. Click on the button and save the file on your computer to work, edit or customize your design. You can also find more 3D designs for printers on Moveable Skeleton Arm Extension.