MPCNC Makita RT0701C Tool Holder
thingiverse
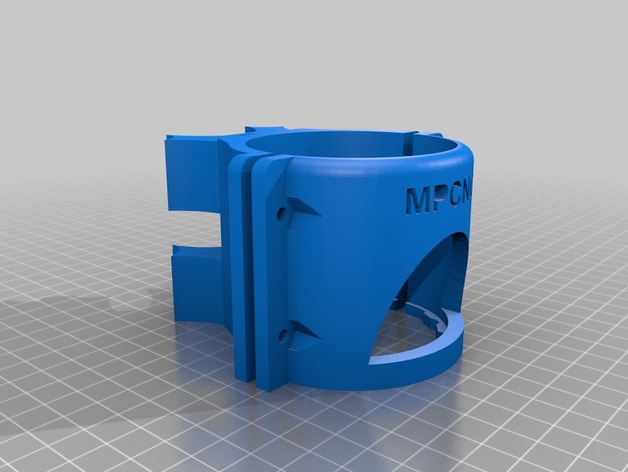
(05/03/2019) Update: Be sure to check out my Dust Shoe for this Makita Tool Holder. (10/21/2016) Update: Added an adapter plate to interface vicious1's MPCNC 2nd revision. (Original post): This is an Makita RT0701C Router tool adapter for vicious1's first revision of MPCNC 23.5mm (USA) EMT Conduit. You'll need the following screws: 8qty M4 x 25mm screws 8qty M4 nuts 4qty M3 x 20mm screws Note: The MPCNC 1st version's (pre-5/25/2016) Z-axis system had a narrower/smaller clearance design. Print Settings Printer: RichRap 3DR Rafts: Yes Supports: No Resolution: 0.3mm Layer Infill: 100% Notes: Need to print two qty of MPCNC_RT0701C_ToolHolder-_Adaptor.stl Post-Printing Trim Work Had to drill out the 8 larger (4mm) holes with 11/64" drill to accommodate 4mm screws. I prefer to drill out holes anyway, this way the holes are smoother. Installation 1) Install two MPCNC_RT0701C_ToolHolder-_Adaptor.stl to the Z-axis EMT pipes first with the M3x20mm screws. They should have 40mm separation between them (measured from top of one to top of the other) 2) Install the MPCNC_RT0701C_ToolHolder-_Back_Cover.stl using 4 qty M4x25mm screws and nuts. 3) Loosely install the MPCNC_RT0701C_ToolHolder-Front_Cover.stl using 4 qty M4x25mm screws and nuts. Notice the front cover has a key on the inside to align the router. 4) Install Router and tighten 5) Enjoy! How I Designed This Designed in Autodesk Fusion 360 Exported all solids as iges Opened in FreeCAD to rotate part and export as STL
With this file you will be able to print MPCNC Makita RT0701C Tool Holder with your 3D printer. Click on the button and save the file on your computer to work, edit or customize your design. You can also find more 3D designs for printers on MPCNC Makita RT0701C Tool Holder.