MPCNC/MPCNC Mini Syringe Extruder
thingiverse
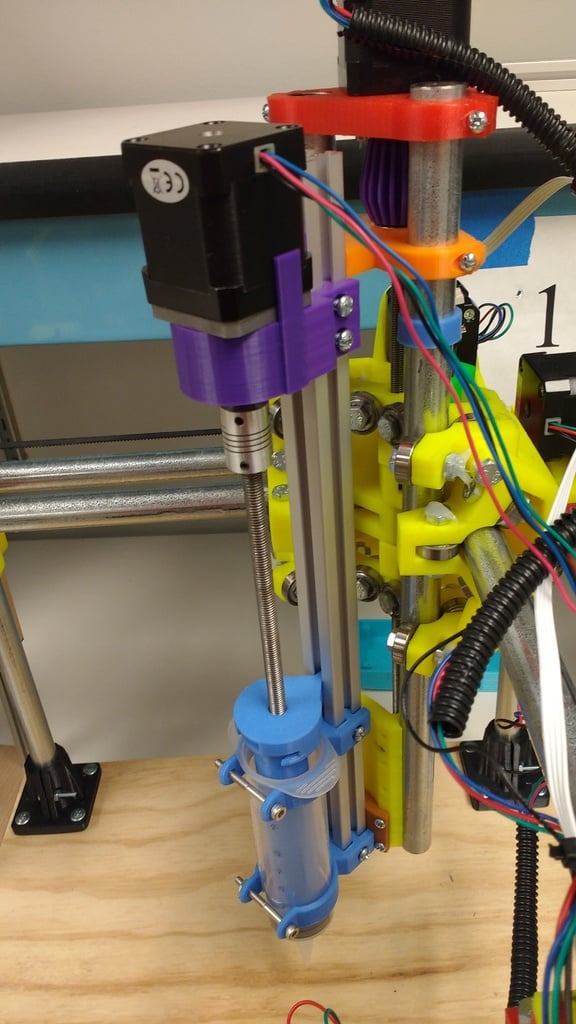
This extruder was created to be able to print in various viscous mediums, such as ceramics, pancake batter, Nutella, and frosting. It is simple to manufacture, and relies on the following non-printed parts: 1x NEMA 17 geared stepper motor (5-1 gear ratio) https://www.omc-stepperonline.com/geared-stepper-motor/nema-17-stepper-motor-bipolar-l48mm-w-gear-raio-51-planetary-gearbox-17hs19-1684s-pg5.html About 30 cm of 20 mm 80/20 T-Slot extrusion: https://8020.net/20-2020.html About 15 cm of M8 threaded rod 1 standard M8 nut (6.3 mm tall, 12.9 mm flat-to-flat) 1 8mm-8mm linear coupler with required hardware (Connect motor shaft to 8mm threaded rod, available here if you don't want to buy one: https://www.thingiverse.com/thing:2452569) 1 60 mL Luer Lock syringe (I'd suggest getting extras, they can gunk up kinda quick) http://www.vitalitymedical.com/60-ml-luer-lock-syringe.html OR 1 100 mL syringe: https://www.sunlightsupply.com/shop/product/measure-master-garden-syringes 6 8/32 x 3/4" machine bolts (Holds the fixtures in place on the 80/20) 2 8/32 x 1.5" machine bolts with nuts (Holds syringe in place) 4 M3 x 10 machine bolts (Hold the NEMA 17 5-1 motor in place) 4 M3.5 x 15 machine bolts with nuts (Mount to the standard MPCNC Universal Mount) Assembly is relatively simple, but in order to cover any potential problems, here it is in extreme detail: Choose a syringe size and an MPCNC version (Standard or Mini). Print the motor mount, the 80/20 mount for your MPCNC, and 1 plunger, 2 syringe mounts, and 1 nut trap for your chosen syringe size. **_NEW_**: Also print 8020_Stabilizer_Mini_MPCNC_20mm.stl if you are using a Mini MPCNC. This part replaces the C-Lower.stl or C-Z-Lower_080.stl component on the printer itself, and leads to a more stable extruder. This piece is optional if you don't want to modify your printer. Remove any support material from all printed parts and screw the motor into the motor mount piece. Attach the coupler to the motor shaft, and attach the threaded rod to the other side of the coupler. Slide the 8mm nut into the nut trap, and screw the nut trap onto the threaded rod, such that the flat end of the nut trap is facing the motor. Next, slide the prints onto the 80/20 T-slot as shown in the images above, and screw the 8/32 x 3/4" machine bolts into the holes that lead to the T-slot extrusion. These will leave marks on the 80/20 at the locations of each part. For added stability, drill holes at each of those locations to allow the bolts to get more purchase into the 80/20 T-slot (Do not perform this step until everything has been assembled to ensure proper spacing). Remove the support flaps from the printed plunger, and remove the rubber cap from the end of the plunger that came with the syringe. Place the rubber cap on the printed plunger, this will be a little annoying, but it can be done. Slide the printed plunger into the syringe, line the printed plunger up with the nut trap, and then snap the syringe into place in the syringe holders. With that, all you need to do is wire the syringe extruder up to your board and you're good to go! It takes the position of E0 on the standard RAMPS board, and the firmware will need to be modified to have the proper step count for the new motor (Assuming 32nd stepping, use 200 x 32 x (5 + 2/11) / 1.25 => 26530.91 steps/mm). I find that the easiest way to refill the syringe is to pack whatever medium you're intending on using into a Ziploc bag, cutting off a corner, and squeezing it into the syringe; it's slightly easier than trying to scoop Nutella directly into the syringe itself. SolidWorks files available upon request.
With this file you will be able to print MPCNC/MPCNC Mini Syringe Extruder with your 3D printer. Click on the button and save the file on your computer to work, edit or customize your design. You can also find more 3D designs for printers on MPCNC/MPCNC Mini Syringe Extruder.