MPCNC Surround
thingiverse
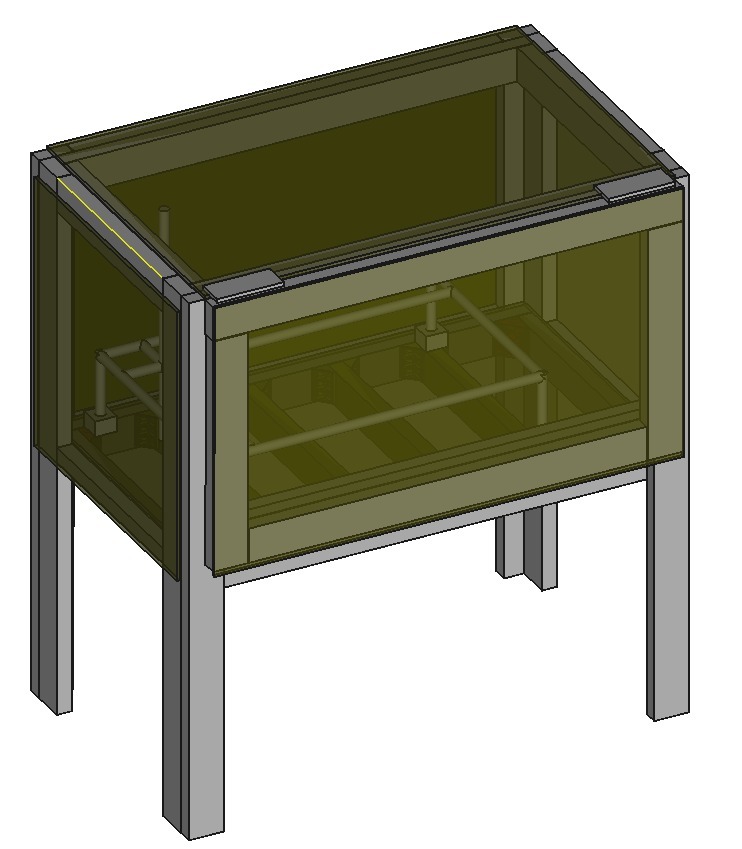
My first attempt at a MPCNC surround. Goal is to add sound proofing inside and keep the vacuum internal as well to cut down on noise and dust. I assembled the work platform and posts first. I then attached the posts with just one screw so that I could work the assembly to level as I was building the roof. Then I finished securing the legs to the work platform with multiple screws. Finally I added the trim pieces and the walls and roof sheeting. The door was assembled on the side and hung with door hinges. I attached the CAD so that you can modify the 2x4s for different sizes. Since i no longer have a saw it was really nice to have the CAD model to create my Bill of Materials (BoM). I then just had the lumber store cut everything to length for me. Wood and screws cost me around $130. UPDATE: I used layers of old towels on the sides as sound proofing and bought some sound foam for the ceiling and doors where towels would be too heavy or too hard to hang. Towels are under the floor to dampen the sound coming off the work platform. I have no problems being in the same room as the CnC as its working and my neighbors hear nothing. I do keep a fire extinguisher right next to the CnC since i stuffed it full of so much flammable material.
With this file you will be able to print MPCNC Surround with your 3D printer. Click on the button and save the file on your computer to work, edit or customize your design. You can also find more 3D designs for printers on MPCNC Surround.