MPCNC Z-Max Endstop
thingiverse
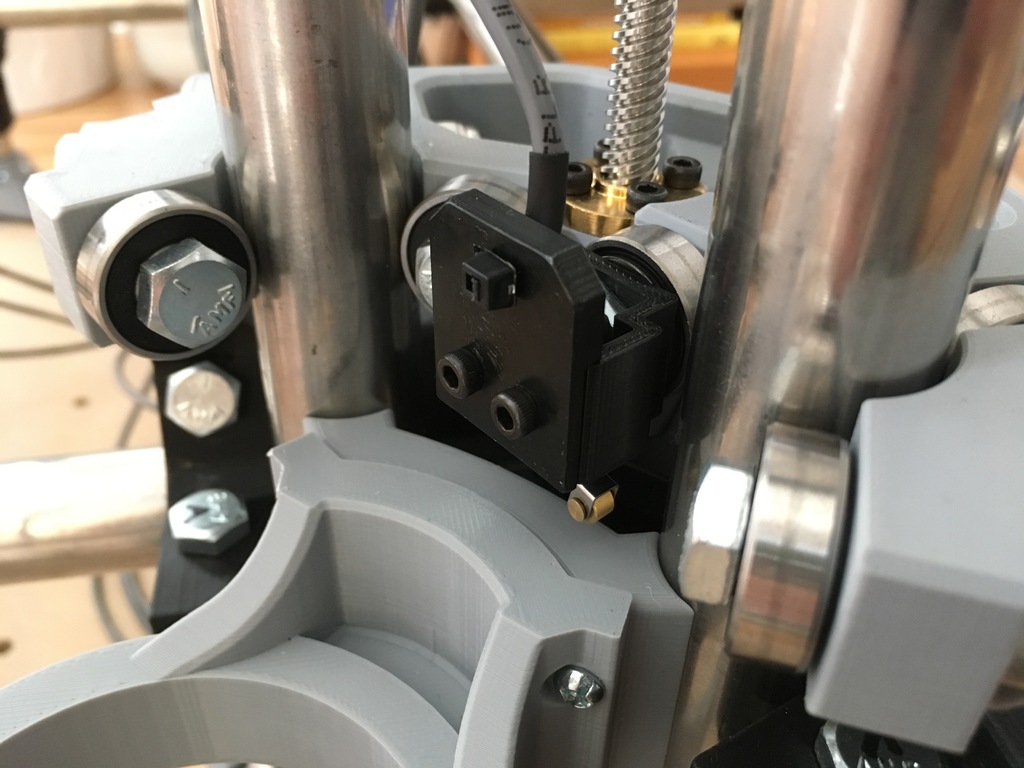
This is a Z-Max endstop I created for my MPCNC. Parts and Installation: • Print the bracket. There's a unibody and split version here. • Unibody version might be a bit tricky for installation but nothing too complicated. Once you print the single piece body and the cap, heat up the bolt end of the bracket and open it up. Once you have enough clearance, insert the bolt and close it back up. See image for reference. • If you're going the split version way, print two two halfs (those are mirror parts) and the cap • Replace the originally specified 5/16"-18 x 1.25" bolt with 5/16"-18 x 1.5" • Once the bolt is seated in the bracket, pop in the endstop with soldered wires and add the front cap. • Use two M3x12mm screws to secure the assembly together. • Don't skip the washer between the bracket and the bearing. I used a washer with OD 0.688" to prevent any interference between the bracket and the bearing. • Use a ziptie as a cable strain relief. Slip in a ziptie through the front cap and around the cable. The size of the ziptie I used was 2.5mm x 1.1mm • Add this little assembly to the XYZ part and you're done.
With this file you will be able to print MPCNC Z-Max Endstop with your 3D printer. Click on the button and save the file on your computer to work, edit or customize your design. You can also find more 3D designs for printers on MPCNC Z-Max Endstop.