MPMD Carriage for Igus Bushings
thingiverse
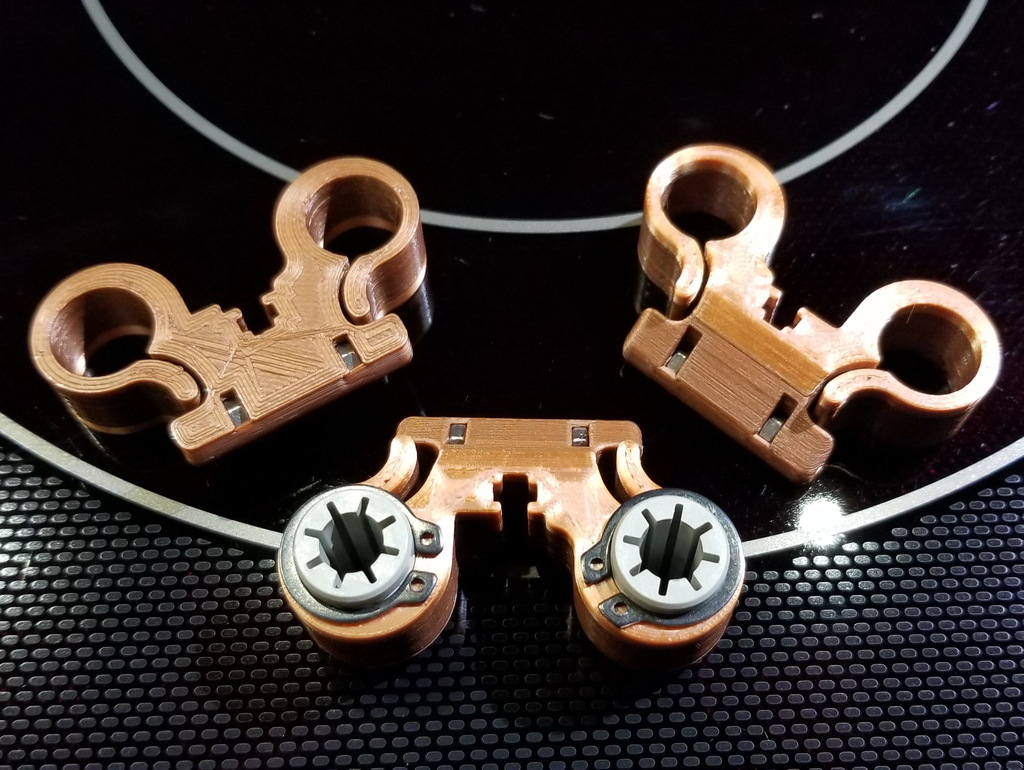
<b><u>Updates:</u></b> <b>04/03/2020</b> Uploaded a new version (V6) that has a few minor changes. 1. closed off the top end where the square bolts sit to make it look a little cleaner 2. made the push out holes for the nuts slightly larger 3. Shaved the edge of the tensioner tabs to provide a little more space for a nut on the rod bolt 4. Added an edge to the inside of the bushing sleeve that makes a circlip unnecessary. note: you may need to carefully pry the tensioner back in order allow the bushing to slide into the sleeve. Be careful not to move it too far. 5. increased the height slightly to account for the snap-on addition <b><u>Summary</u></b> I was noticing quite a bit of noise which appeared to be coming from the bearings on my MPMD. I decided to replace the bearings with IGUS bushings. I had a set of cloned bushings that I was going to use but when I went to insert them into my existing carriage I found that the outside diameter was too large and the casing of one of my carriages broke. I had previously printed out a set of carriages by bLITzJoN (https://www.thingiverse.com/thing:3731117) so I decide to use those instead. I installed the bushings and put everything together but I found that they were way to tight on the rods. I then went ahead and ordered authentic IGUS bushings. When the new bushings arrived I found that they fit quite easily into the original carriages. They were actually too loose and would slip out of the casing. I used a couple of circlips to hold them in place but the height of the casing was too high so the clip would not fit into the bushing groove properly. I used the printed carriages instead and tightened them slightly to hold in place. After reassembling the unit I checked the movement and it appeared good. I homed the machine and found that it would not home properly. I figured I had a problem with my end stops so I spent a day diagnosing the issue. It turned out that the issue was the spacing between the rods. The carriage moved easily in the centre of the rods as there was enough flex to allow movement but as the carriage moved up towards the top of the rods, where they are held in position by the end cap, the friction increased until they would not move. With the casings left loose (no compression to the bushing, they would work but the bushing would slip out of the carriage when it was lower on the rods. I tried a variety of ways to try and hold the bushing in place securely (without gluing them) and finally decided to redesign the carriage to fit my machine. The design I ended up with is somewhere between the stock carriage and bLITzJoN's. 1. decreased the height of the carriage to allow a circlip to fit above and below the bushing 2. moved the centres of the rod positions toward the center slightly to decrease the binding 3. decreased the rod hole to increase the pressure applied by the outside tensioning sleeve 4. increased the thickness of the inside (compared to bLITzJoN's) which holds the rods centre position a little more rigidly 5. used the same belt clip fastening grove that the original carriage used so you need to use the square nuts from your original carriage 6. I did not include a compression bolt. If you require compression on the bushing you can use a smaller circlip. I used a 5/8" clip to simply hold the bushing in place. It can be applied by hand. You can fit a 9/16" clip which will apply compression to the bushing. There are 2 versions included. Version 4 is what am currently using (brown in images). Version 5 has a few minor adjustments that I have not yet tested on the machine (green in images). 1. I have increased the height slightly to fit the clips a little tighter 2. I shortened the horizontal distance where the effector rods attached so you can tighten a nut and bolt directly onto the effector rod and then just screw this into the carriage. No more dropped nuts and washers. V4 is slightly longer here, so the effector rods are not parallel if you include an extra nut (which is how I currently have mine set up.) 3. adjusted the nut holes to make them a closer fit and closed off the bottom (top of carriage) to provide a little more strength where the nut sits. Note: Ensure that your printer is calibrated for proper dimensional accuracy. You may be able to scale the print but test it out first.
With this file you will be able to print MPMD Carriage for Igus Bushings with your 3D printer. Click on the button and save the file on your computer to work, edit or customize your design. You can also find more 3D designs for printers on MPMD Carriage for Igus Bushings.