MPX EasyStar FPV
thingiverse
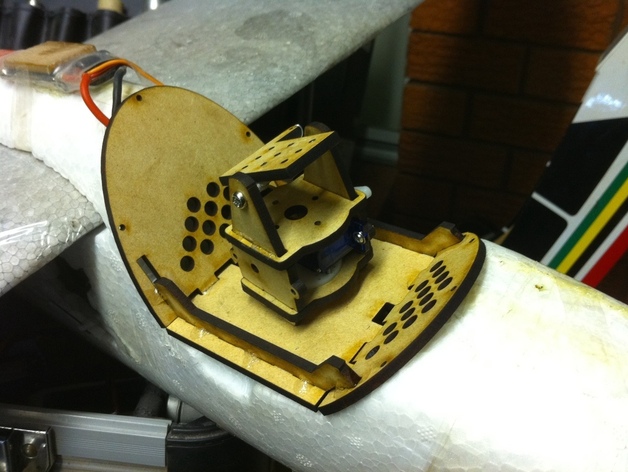
A Pan/Tilt servo mount for the Multiplex EasyStar foamy's camera is available on this website link. The EasyStar plane is ideal for First Person video flying due to its low cost, easy assembly, hand launch ability, forgiving flight, nearly indestructible nature, and long battery life with LiIon upgrades. To create a basic Pan/Tilt servo mount for your camera, cut out 3mm MDF or balsa using a laser, and assemble the side supports, cockpit rear, and cockpit front into place. Secure the assembly with CA glue to fit it into the EasyStar's cavity. Mount the pan servo underneath the cockpit base, attach the tilt sides to the pan base, and install the tilt servo. Use M3 x 6mm screws as "axles" for the camera platform, and add stiff wire from the tilt servo horn to the camera platform horn. Attach your camera with a velcro dot for a professional-looking result.
With this file you will be able to print MPX EasyStar FPV with your 3D printer. Click on the button and save the file on your computer to work, edit or customize your design. You can also find more 3D designs for printers on MPX EasyStar FPV.