MSFFB2 Joystick Extension
thingiverse
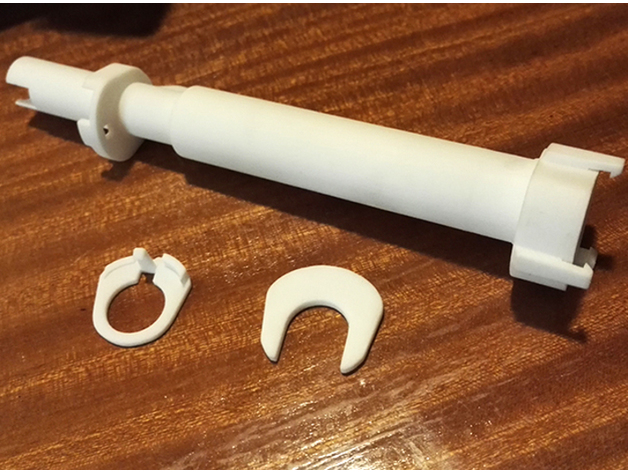
This is a printable extension for the Microsoft Sidewinder Force Feedback 2 joystick. The extension extends the stick approximately 11 cm. Custom Section Installation Dismantle the handle and remove it from the mount. Remove the spring from the chamber on the mount, making sure to reattach the chamber lid after removing the spring. Turn the base on its head, and unscrew the screws to remove the cover. There are also screws under all the rubber pads. Remove the 11-pin plug from the largest circuit board, and push it through the neck of the stick. It is a tight fit, so instead of pulling the cord try pushing with a thin pencil or a screwdriver. Fit the 11-pin cable that goes from the handle components through the extension using the same technique. Take the extension cable, attach it to the circuit board, and feed the other end through the neck of the joystick. You can now screw the cover back on. Turn the stick around and attach the cable from the handle components to the extension cable. Push the connection into the neck of the joystick, not into the extension. This is a lot simpler. Push the extension down onto the neck on the base, and clip on the cover to secure the extension. Take the spring that you removed from the chamber on the neck and place it in the chamber on the extension. Put the lid on. Push the cable into the slot on the top of the extension. Put the potentiometer on top to secure the cables. Put the left side of the handle on the stick, making sure the spring hits its slot, and place the components where they need to be. Push buttons 3 and 4 out from the inside of the handle pieces to fit the top component. Make sure the potentiometer is held in place by the handle piece. Attach the right side of the handle and screw them together. Have a coffee, and give yourself a high five! Custom Section Safety information and precautions Mounting the extension means you have to open the joystick base and detach the cable that goes through the neck. Be careful when working with the components on the inside, and make sure that the power cord and USB is unplugged before opening the stick. Be careful not to touch the power supply (the smallest circuit board near the power cord). This board is loose after you unscrew the cover, so make sure the joystick base is upside down at all times. It is smart to dismantle the handle first. This allows you to place the stick on its head. Skills and knowledge about basic electronics are an advantage. If you feel unsure about opening your stick, have someone with the required skills help you. I will take no responsibility for any damage to the joystick, or injury caused by installing this extension. Custom Section Requirements You need the Force Feedback 2 joystick to fit this extension. It may also work with other variants of Microsoft joysticks, if they have the same handle mount. You also need an extension cable to reach all the way through (The cable has a JST 2.0mm PH 11-pin plug), or you can extend the existing cable if you have the soldering skills.
With this file you will be able to print MSFFB2 Joystick Extension with your 3D printer. Click on the button and save the file on your computer to work, edit or customize your design. You can also find more 3D designs for printers on MSFFB2 Joystick Extension.