MsgTerminal_WeMos_ESP8266_OLED_MQTT
thingiverse
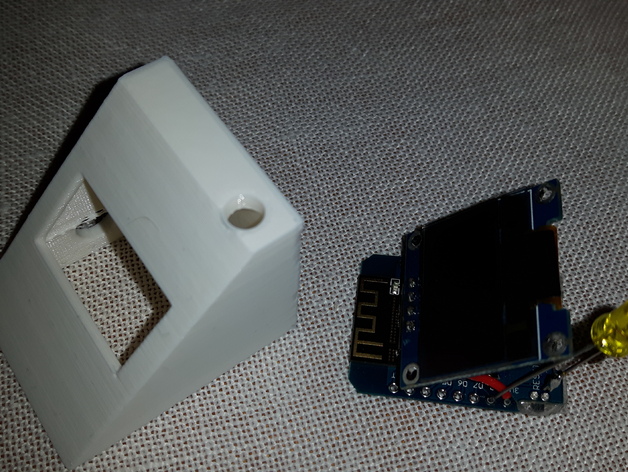
This thing uses: http://www.banggood.com/0_96-Inch-4Pin-White-IIC-I2C-OLED-Display-Module-12864-LED-For-Arduino-p-958196.html ...and:http://www.banggood.com/D1-Mini-NodeMcu-Lua-WIFI-ESP8266-Development-Board-p-1044858.html ...to display any string from a MQTT topic. Use for example https://mosquitto.org/ and http://nodered.org/ to compose/broadcast a text. The program for the ESP8266 is included, and you can change font, topic, server etc. as you like and recompile using the Arduino IDE. Print Settings Printer: N/A Rafts: Yes Supports: Yes Resolution: 0.2 Infill: 20% Post-Printing Build instructions: Solder long flexible wires (e.g silicon) between the OLED, the LED, and the ESP8266 PCB. Solder the button. Load the program into the ESP8266 using Arduino IDE and check that everything works as expected. Glue the OLED (using a heat glue gun) to the box. Mount the LED in the box. Use double-sided tape to fixate the ESP8266 to the bottom part of the box. Mount the bottom to the box using heat glue.
With this file you will be able to print MsgTerminal_WeMos_ESP8266_OLED_MQTT with your 3D printer. Click on the button and save the file on your computer to work, edit or customize your design. You can also find more 3D designs for printers on MsgTerminal_WeMos_ESP8266_OLED_MQTT.