MSI Armor deshroud 120mm fan
thingiverse
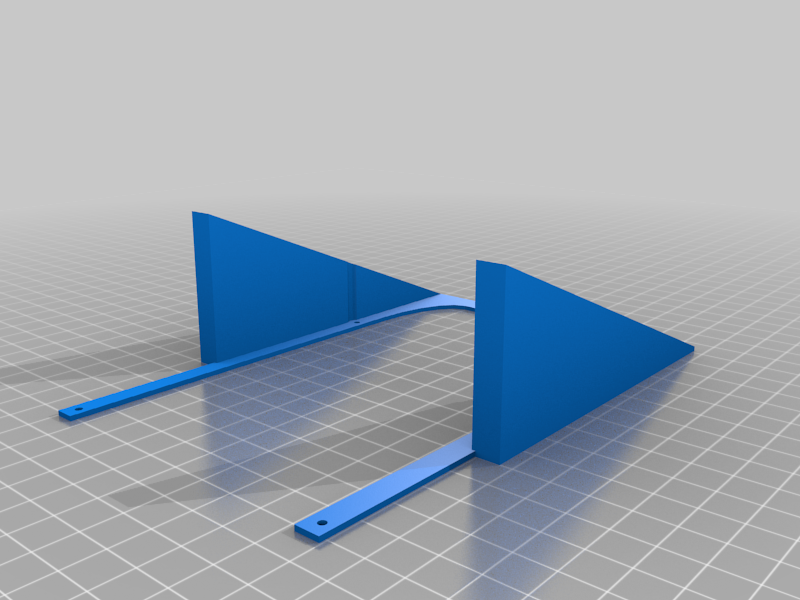
Tired of my MSI Armor cooling being barely able to handle my 1080ti. One fan started to go and inevitably broke a blade so I made a 120mm fan shroud until my replacement fans get here from China. It's big, but sits far enough back that it shouldnt interfere with shorter cards below it. Blows in at 22.5 degrees. Use a pair (or all 4) M3 screws to screw the 120mm fan on. I used M3x30 to get through a standard 25mm width 120mm fan. You'll have to figure out how to run the fan on your own (you can buy a GPU fan adapter or you can plug in to a controller or some other power source). You could probably use a brim to help it stick a bit better, mine kept lifting even with gluestick assist. Print Settings: 20% infill 0.3mm layers 0.36 line width (for more solid layers) bottom screw holes should be 2.15mm, wedge screw holes should be 2.6mm. Base screws should be (93.7mm wide edge-to-edge x 109mm long edge-to-edge, center-to-center should be around 91.55mm x 106.85mm). It should screw flat to the MSI Armor heatsink once you remove the fan shroud (re-use the 4 screws that held it on) Enjoy !
With this file you will be able to print MSI Armor deshroud 120mm fan with your 3D printer. Click on the button and save the file on your computer to work, edit or customize your design. You can also find more 3D designs for printers on MSI Armor deshroud 120mm fan.