MSP430 Nixie Clock Enclosure
prusaprinters
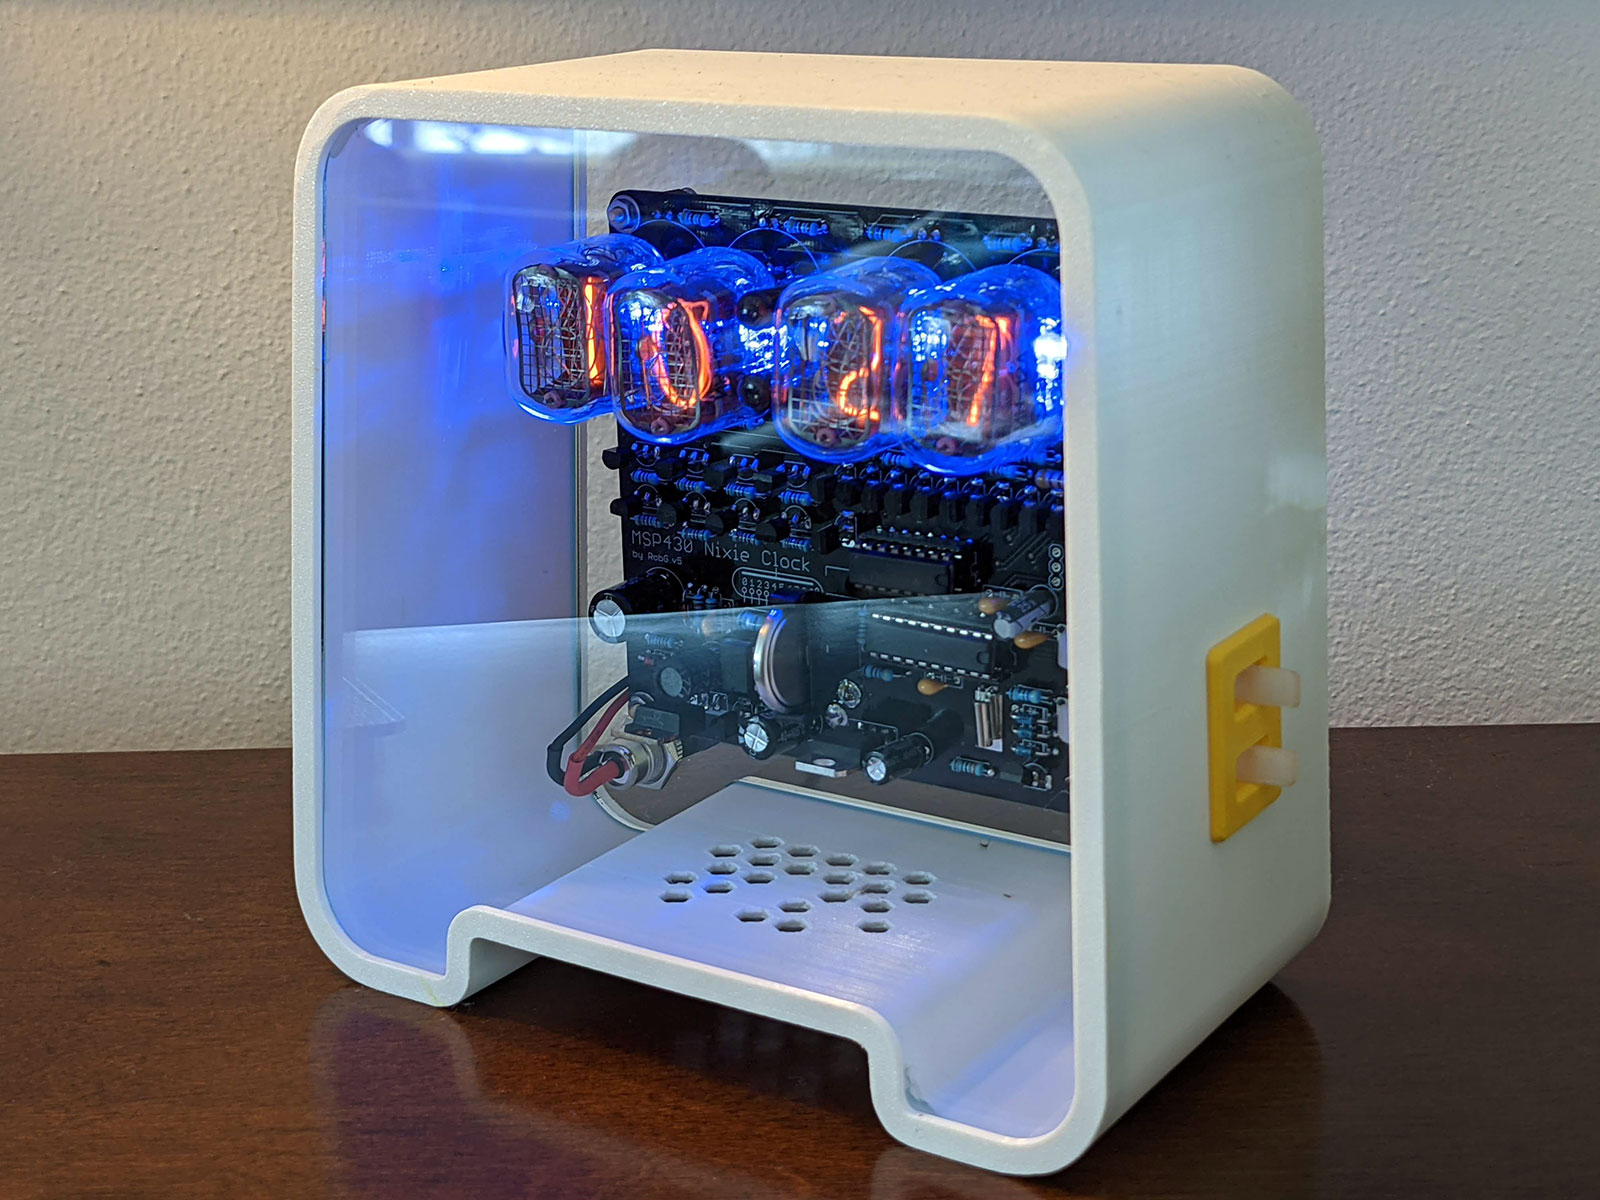
<p>Over on Tindie there's this cool <a href="https://www.tindie.com/products/robg/msp430-nixie-clock-kit/">Nixie Clock kit</a> that I like so much, I've purchased two of them (granted I killed the first one and couldn't fix it, but... moving on).</p> <p>After I assembled the kit I determined the sufficient, but plain acrylic panels you can buy with it were not going to be enough this time. I needed fancy, and fancy meant lasers would be necessary.</p> <p>For the first time I leveraged <a href="https://www.ponoko.com/">Ponoko's</a> service to do some custom acrylic panels. Because while I'd love to own a laser of my own, the costs are still too much to justify.</p> <p>I don't have comprehensive build instructions, but I'll give you some bread crumbs here and if you have questions, please feel free to message me.</p> <p><b>Parts List</b></p> <ol><li>3D printed parts.</li> <li>Acrylic panels (or substitute).</li> <li>Assembled MSP430 Nixie Clock.</li> <li>Power supply for said clock.</li> <li>DC .5mm x 2.1mm 24V <a href="https://www.amazon.com/gp/product/B07LF1193N">power socket</a>.</li> <li>DC .5mm x 2.1mm 24V <a href="https://www.amazon.com/gp/product/B079RBL339">power connector</a>.</li> <li>20GA+ wire.</li> <li>4 - M2.5x15 stand offs (brass would be best)</li> <li>4 - M2.5 nuts.</li> <li>4 - M2.5x6 screws.</li> <li>4 - M2.5 washers.</li> <li>4 - M2x12 flat head cap screws.</li> </ol><p><b>General Assembly Instructions</b></p> <ol><li>Print out the parts.</li> <li>Use the supplied DXFs to have some Acrylic panels to be made. I designed this around a material with a 3mm thickness.</li> <li>The front panel goes into the enclosure first. There are some tabs that it snaps into, but I added a drop of hot glue in four corners where I knew it couldn't be seen for an extra measure of retention.</li> <li>Attach the power socket to the acrylic panel.</li> <li>Put the power plug into the clock and wire the clock to the socket. You need to make sure there's enough wire so you can mount the clock to the back panel.</li> <li>Attach the stand-offs to the clock.</li> <li>Attach the stand-offs to the back panel.</li> <li>Set the panel with the clock into the enclosure.</li> <li>Using the retention clips, fasten the back panel to the enclosure.</li> <li>Power up and enjoy.</li> </ol><p><b>Full Disclosure</b>: I don't know who the guy is that makes this kit or whether he's a good person, or even worth your patronage. All I know is I like the kit and I've now paid full price for two of them. Then I decided to go nuts and make this enclosure.</p> <h3>Print instructions</h3><p>All print files have been sliced for <strong>PETG</strong>.</p> <p>I tried as much as possible to avoid supports, but you're going to need them to print out the housing and the button actuation arms.</p> <p>I printed the housing face down with a brim and still got a little lifting so you might try mouse ears. The lift is hardly noticeable on mine in the white material I went with.</p> <p>The actuation arms are printed with all the supports because you really want the strength in that print direction. You don't want small layers, you want layers that go the long perimeter of the object.</p>
With this file you will be able to print MSP430 Nixie Clock Enclosure with your 3D printer. Click on the button and save the file on your computer to work, edit or customize your design. You can also find more 3D designs for printers on MSP430 Nixie Clock Enclosure.