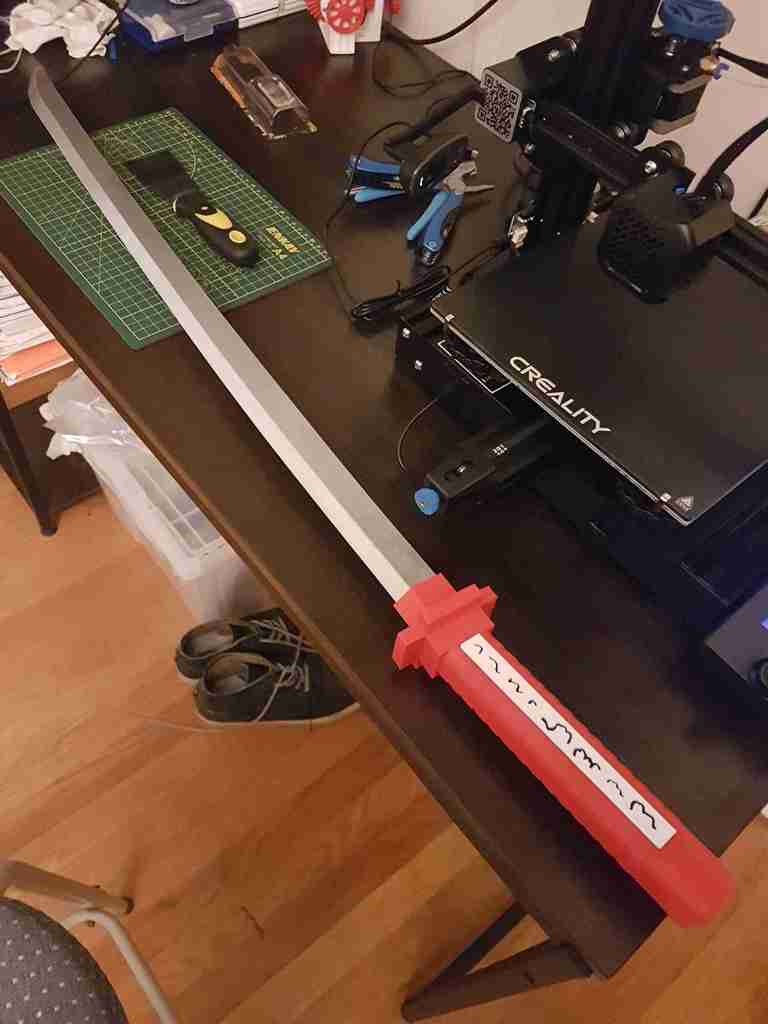
Murasame from Akame ga Kill!
prusaprinters
<p>This is a one-to-one replica of the Akame's Murasame from Akame ga Kill</p> <p>If you want to print this, I strongly recommend only doing so if you have a print volume of at least 220x220x250 mm.</p> <p>Also big note: I kind of messed up with how Blade1 fits into the handle, because it doesn't fit. I just sanded down the thing with my dremel until it finally fit, but feel free to edit the stl beforehand if you don't wanna go through what I did. I'm super lazy to go back to this project, and want to move on with my other projects, so sorry if this makes me sound like a bad designer!</p> <p>For the handle, I printed with 70% infill with a brim.</p> <p>For the rest of the blade and the inscriptions, I scaled the model down to 99% in the slicer.</p> <p>*Blade1 should be 70% infill as well just to make sure the sword has a good sense of balance when you hold it</p> <p>Blade2-Blade5 should be 15% infill, and the infill for the inscriptions shouldn't matter.</p> <p>The handguard extension can be printed normally at 100% scale and 20% infill and a brim. I already oriented the model in a way that the bottom is the side that sticks to the handguard.</p> <p>Ignore the FullBlade file (unless you have one of those fancy belt 3D-printers, then that would totally be cool)</p> <h3>Print Settings</h3> <p><strong>Printer Brand:</strong></p> <p>Creality</p> <p class="detail-setting printer"><strong>Printer: </strong> <div><p>Ender 3</p></div> <p><strong>Rafts:</strong></p> <p>No</p> <p class="detail-setting supports"><strong>Supports: </strong> <div><p>No</p></div> <p><strong>Resolution:</strong></p> <p>0.2 mm layer height</p> <p class="detail-setting infill"><strong>Infill: </strong> <div><p>Varies</p></div> <p><strong>Filament:</strong> Inland PLA Red, Silver, White Post-Printing =============</p> <p><strong>Step1: Gluing (possibly also sanding)</strong></p> <div><p>I used gorilla epoxy for all my gluing. simply just start gluing the blades together in the order of 1-5. (gluing 1 and 2 together, 2 and 3 together, and so on)</p> Also, I kind of messed up with the Blade1 file and it doesn't really fit into the handle if you try. I just used my dremel and sanded it down until it fit. <p>For the handle and inscription, it should be straight forward how those fit together.</p> <p><strong>Step2: Gap filling and painting</strong></p> <p>This is where most of your time is gonna be spent with this project.</p> <p>I used bondo body filler to fill in the gaps between the blade sections.</p> <p>After that, just sand everything down slowly going from 150 grit to 800 grit sand paper. I recommend doing this until you can barely still see the layer lines of the print.</p> <p>Once that's done, start spray painting. I used universal primer as a first coating, and then I smoothed that out even more by sanding. Then just do a layer of metallic finish spray paint, and you're done!</p> <p>You don't need to do anything really with the handle or the inscriptions cuz those look fine as is (at least that's just my opinion). Feel free to do the same process with those if you feel like doing extra polishing on it.</p> <p><strong>Step3: Assembly!</strong></p> <p>Alright first MAKE SURE before you glue the blade and the handle together that you insert the handguard extension into the blade before you put it all together with glue.</p> <p>So just slather the Blade1 section in epoxy, and just stick it in the handle. The handguard extension should be already on the blade portion, so just epoxy that to the handle and you're all set!</p> </div></p></p></p> Category: Scans & Replicas
With this file you will be able to print Murasame from Akame ga Kill! with your 3D printer. Click on the button and save the file on your computer to work, edit or customize your design. You can also find more 3D designs for printers on Murasame from Akame ga Kill!.