Muzata LED Channel inserts
thingiverse
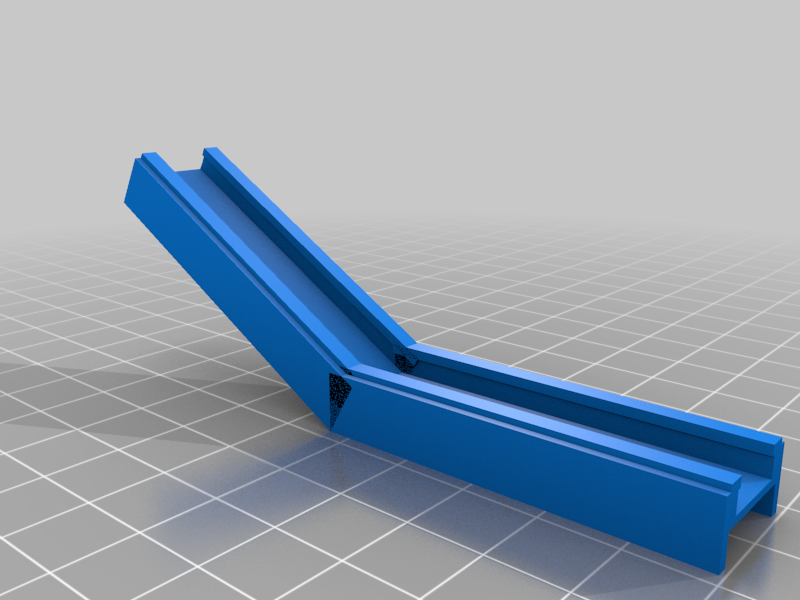
I had these sitting on my hard drive and decided to share them. This is an insert I created to use in Muzata U103 channel so that I could run power (for power injection) and data (for bringing back the DO from the end of the LED strip) lines in parallel with the LED strips. I made it so that the wires ran under the LED strip and the strip itself would "snap" fit into a lip on the bracket insert. That way I did not need to use the adhesive backing and could remove/replace without needing to worry about that. I used standard 10mm IP65 LED strips. I was able to fit a pair of 14ga wires (power) + 1 20ga wire (data) under the insert. The inserts need to literally be inserted, you cannot "snap" them in after putting up the channel. They ride under the lip in the channel and are a relative snug fit on purpose, although they are loose enough to slide as needed. Just no movement up or down in/out of the Muzata channel. I was able to thread a pull string along as I put the channel up (with the inserts inside). Then I just pulled the wire through the channel using the pull string. Make sure not to use string that will cut the inserts on the angles. They sell a type of twine that is made for pulling wire in PVC conduit that is designed not to cut into the conduit on curves. That is what you need to use, if going this route. We put strips on the screen enclosure beams over our pool, so the ends terminated "in open air", which made bringing the data lines back and adding PI challenging, so I came up with this idea for running those in parallel under the LED strips. I have included the Fusion 360 files in case anyone wanted to modify for their needs. I will add that it was the very first model I created in any CAD program, much less having used Fusion 360 at all. So the timelines in the .f3d files are a bit of a mess. As I already finished using it and did not need to go back, I never cleaned them up, and at this point don't intend to. The angle version .f3d file is 1 file for both angle STLs attached. You just need to adjust the angle in the Fusion file (timeline) and re-generate the STL as needed. The STLs (and design files) are oriented with the top of the insert, where the LED strip fits in, to be facing down. That is because of how we installed the channel above the pool, with the beam connectors angles, etc, being what they are. So when looking at it you can tell the LED side being the one with a lip on it. The side for the wire is just "straight/flat".
With this file you will be able to print Muzata LED Channel inserts with your 3D printer. Click on the button and save the file on your computer to work, edit or customize your design. You can also find more 3D designs for printers on Muzata LED Channel inserts.