My AM8 Build
thingiverse
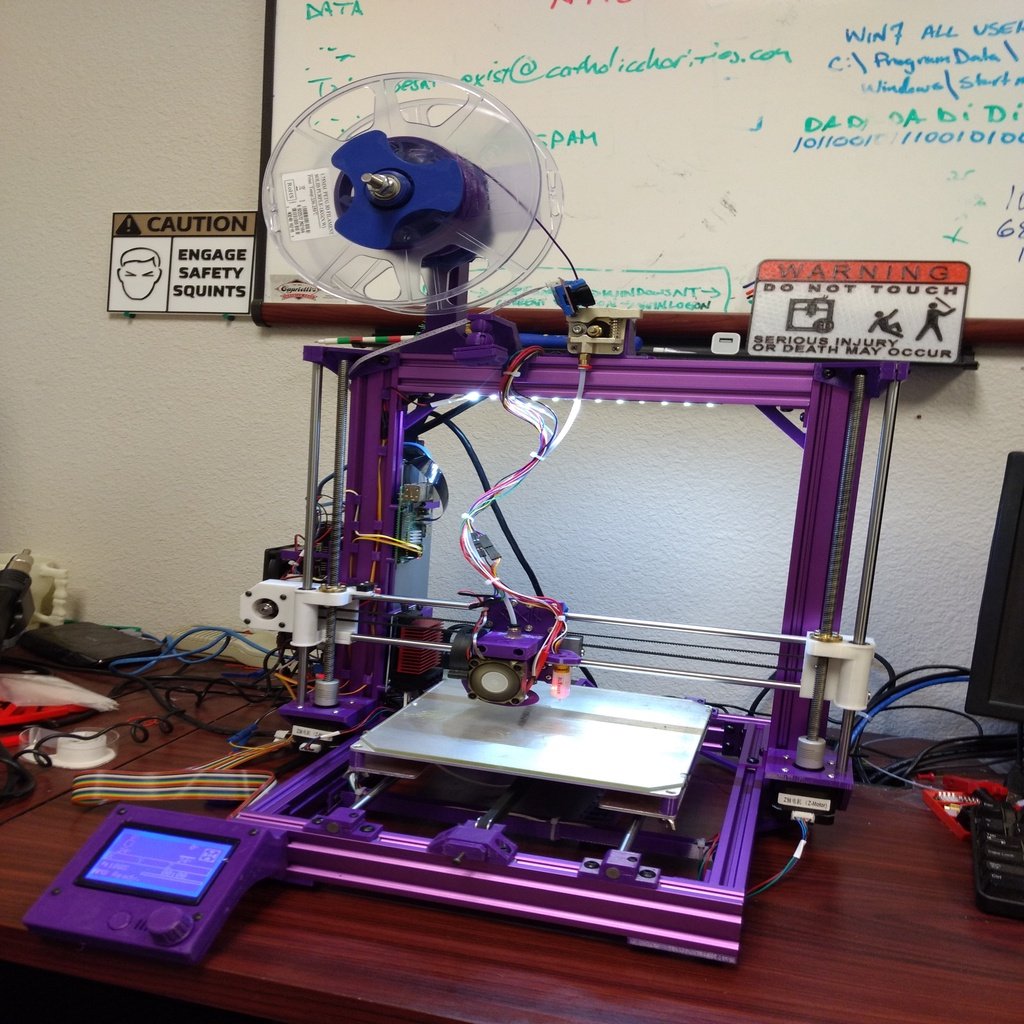
This is a document dump of everything that went into converting my (already heavily-modified) Anet A8 to (an improved version of) an AM8. I retained the A8 upgrades that made sense to keep, while taking the opportunity to improve on the original's hodgepodge aesthetic by standardizing on one color: purple. I ordered my frame kit here: https://all3dmakers.com/collections/bear-upgrade-kit/products/am8-color-frame-upgrade-for-the-anet-a8 It drop-shipped from Hong Kong, but still only took maybe three or four days to arrive in Las Vegas. With one of these in hand and a printout of all of the STLs in this post, you can upgrade your printer. (I'd recommend getting some additional M5x8 and M5x10 button-head screws and M5 hammer nuts, as I ran out of the included hardware. I've also had a Hypercube build in the works for a while now, so I just raided what I needed from that.) I printed the plastic bits in eSun solid-purple PETG: https://amzn.to/2DR27Aw Some signficant differences between the stock A8 (or AM8) and mine: * Re-ARM and RAMPS 1.6 instead of the A8 motherboard (mine croaked about one month in) * Toshiba FlashAir SD card plugged into the Re-ARM (through an adapter) is visible on my LAN as a WebDAV share, making firmware upgrades easy (the no-name cards are anywhere from more troublesome to impossible to get working, while this was easy) * 200W bed heater, switched by a fairly large MOSFET board * HP 750W server power supply * 5V buck converter to power a Raspberry Pi 3 B+ running OctoPrint and a BLTouch * bowden extruder and E3D-knockoff hotend with 3D Passion titanium heatbreak (works like the full E3D kit, costs a fraction as much) * BLTouch bed sensor (don't buy the knockoffs; they're imprecise hot garbage) * self-rewinding spoolholder to keep your filament from getting tangled I've included the original AM8 build document in this package for reference; it'll mostly still apply here. The printer's not 100% done yet, but it's to a point where it's running and able to upgrade itself again. The last photo shows an underbed Y-axis cable chain that I got dialed in once the printer was reassembled...you can find it at https://www.thingiverse.com/thing:4037725. Notes ===== Most parts are printed with the PrusaSlicer defaults for PETG, including 20% infill. For load-bearing parts like belt tensioners, you might want to go to 60-80% infill and/or higher extruder temperature. I ended up printing the spoolholder nut scaled 101% on X and Y so it'd spin onto the axle somewhat freely. 102% might be even better. This scaling wasn't necessary when I've printed this part previously in ABS or PLA. Since holes in PETG tend to print a bit on the small side, you might want to chase the holes for the Y- and Z-axis rods with an 8-mm drill bit.
With this file you will be able to print My AM8 Build with your 3D printer. Click on the button and save the file on your computer to work, edit or customize your design. You can also find more 3D designs for printers on My AM8 Build.