My Brain

My Brain

thingiverse

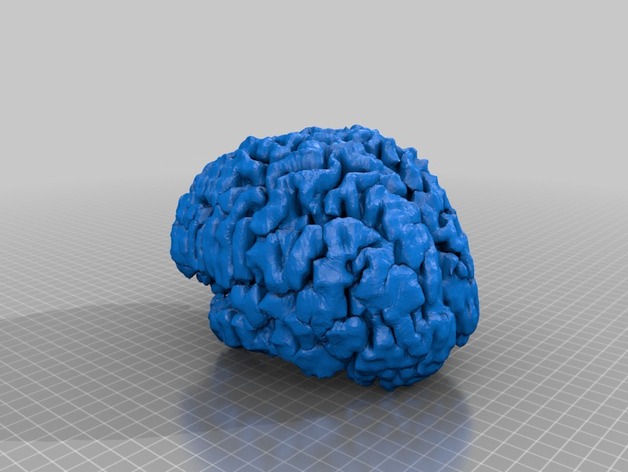
This is a model of my brain made directly from a recent MRI. Each hemisphere is also available separately. Print Settings Rafts: Doesn't Matter Supports: Doesn't Matter How I Designed This Open Source 3D Printing of the Brain Dave Weissbohn and Jeff Burdick This is a draft of the process I used to turn a recent MRI into a 3D printable model. Jeff is contributing the actual 3D printing portion of the project and he will be hosting the final writeup. In July of 2015, I had an MRI of my brain after discovering that my mother had several lesions on her brain indicating a type of genetic small vessel disease. Despite not yet having a definitive diagnosis for my mother, my MRI came back clean indicating that, so far, I was okay. Regardless of that or any future outcome, the idea struck me that not only might it be just neat to have a 3D model of my brain, but that others might find medical benefits from having the ability to make a 3D printed model of their brain. I also wanted to make sure that as much of the process is as open source as possible. While others have made 3D prints of their brains, I found that there weren't any "start to finish" writeups available. This project aims to remedy that problem. So, with all of that being said, let's get to work. Requirements Intermediate computer knowledge. Ability to change file permissions Ability to use the terminal. Ability to install software. A T1 weighted MRI scan of your brain. A Linux or Mac OS X computer or VM. 3D Slicer http://download.slicer.org/ FreeSurfer https://surfer.nmr.mgh.harvard.edu/fswiki/Download You may also need a copy of DCMTK - DICOM TOOLKIT http://dicom.offis.de/dcmtk.php.en Software Versions Used for this Writeup OS X El Capitan 10.11.1 3D Slicer 4.4.0 FreeSurfer 5.3.0 DCMTK 3.6.0 High Level Process Get an MRI and obtain the DICOM files. Using 3D Slicer, locate the specific DICOM files needed for 3D conversion. Using FreeSurfer, make a 3D model (VTK file) of each hemisphere of the brain. Using DCMTK, Decompress the DICOM files (if necessary). Convert the PIAL files to VTK files. Using 3D Slicer, view the 3D models (VTK files) and save them in a format friendly to a 3D printer (STL files) Low Level Process STEP 1: Get an MRI and obtain the Dicom files. There's not a whole lot that can be said about actually getting an MRI. If you have a legitimate medical concern, your doctor may order one for you. If not, you may be able to find a research project that will give you one in exchange for your time and data. Your mileage may vary depending on a wide variety of factors. Please don't lie to your doctor to get an MRI. It's fraudulent and it could be slowing down the process for people who actually need an MRI. Once you get your MRI, someone should contact you in a few days to let you know the results. At that time, go to wherever you had the MRI performed and ask for a copy of the results. They will give you a disc containing, among other things, a lot of DICOM (DCM) files. The hospital that did my MRI offers the first copy of the results for free. STEP 2: Using 3D Slicer, locate the specific DICOM files needed for 3D conversion. Begin by opening 3D Slicer. In the left-hand pane, click 'Load DICOM Data'. In the resulting DICOM Browser window, click 'Import' and navigate to the directory containing your DCM files. Click 'Import'. Slicer will ask if you want to copy the files or just add links. Either should work. I choose 'Add Link'. When the import is complete, the bottom pane of the DICOM browser should contain a variety of data. You want to look in the SeriesDescription column for something including 'T1'. Mine was labeled 'Ax T1 SE'. Select yours when you find it. Check the 'Advanced' box and click 'Examine'. Hovering your cursor over the first entry will tell you how many DCM files make up the set, and which file is the first file in the set. Mine was made of 26 files starting with 'view0279.dcm'. Make a directory anywhere you like and copy the files you identified in step 6. I copied view0279.dcm through view0304.dcm to a folder called 'T1' on my desktop. Close 3D Slicer STEP 3: Using FreeSurfer, make a 3D model (VTK file) of each hemisphere of the brain. Install FreeSurfer and the license file using the instructions provided by the software creators (https://surfer.nmr.mgh.harvard.edu/fswiki/Installation). At least in OS X, the permissions on /Applications/freesurfer are set incorrectly. Since this isn't a massively critical directory, I granted my currently logged in user full RW rights to the directory and all sub directories. If I ever decide to track down the exact permissions I'll update this guide. In a terminal, run the following commands: recon-all -i /PATH/TO/DICOM/FILES/name_of_first_dicom_file.dcm -subjid -all Mine looked like this: recon-all -i /Users/Dave/Desktop/T1/001.dcm -subjid dave -all If everything works, come back tomorrow. The process took my computer just under 13 hours on a 1.7Ghz dual core i7. You may get the following error: ERROR: the pixel data cannot be loaded as it is JPEG compressed. If so, continue below. If the process finishes correctly, proceed to STEP 5. NOTE: If you try to run the recon-all command a second time with the same subjid, you will have to delete the existing folder from /Applications/freesurfer/subjects or FreeSurfer will give you an error. Using DCMTK, Decompress the DICOM files (if necessary). If your MRI files are JPEG compressed like mine were, you will need to decompress them before running recon-all. DCMTK comes with a lot of tools. All you need is dcmdjpeg. It is located in DCMTK's /bin/ folder Instructions for using the tool are provided here: http://support.dcmtk.org/docs/dcmdjpeg.html I only used the -v flag, and ran the tool once for each DCM file. If you plan on doing this a lot you could probably script the process instead of manually running the command once per file. Once you have converted your files, put them in a separate folder (so recon-all doesn't get confused), and run recon-all against the first DCM file in the new set. STEP 4: Convert the PIAL files to VTK files. After a succesful run of recon-all, navigate to /Applications/freesurfer/subjects//surf/ Locate the two files 'lh.pial' and 'rh.pial' and run the follwing command against each to convert them to a VTK file: mris_convert /PATH/TO/lh.pial /PATH/TO/lh.pial.vtk STEP 5: Using 3D Slicer, view the 3D models (VTK files) and save them in a format friendly to a 3D printer (STL files). Open up 3D Slicer and click 'Load Data'. Click 'Choose Files to Add' and choose both of your VTK files. Click OK. Make sure your brain looks okay and click 'Save' in the top left of the window. In the save dialog, uncheck everything except the two vtk files and change the file format to STL. Choose the destination directory and click 'Save'

Download Model from thingiverse

With this file you will be able to print My Brain with your 3D printer. Click on the button and save the file on your computer to work, edit or customize your design. You can also find more 3D designs for printers on My Brain.