My K-cup coffee filter shaper
thingiverse
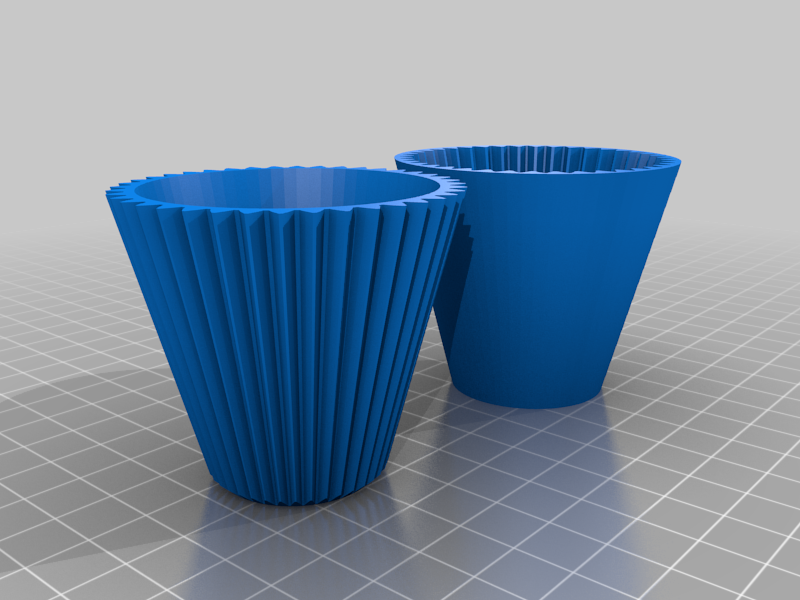
This die perfectly shapes standard filter papers to fit My K-cup. The mesh screen in the my K-cup filter is pretty fine but performance benefits greatly from an additional paper filter. 1. Place the filter paper between the two halves of the die and gently press the upper half into the lower. Be careful as too much force can tear out the bottom of the filter. It's beneficial to remove and insert the upper half a couple of times during the process to release the tension on the paper as you seat it fully. 2. Tear the excess filter paper toward the centre of the die to remove it. The teeth will assist in cutting it. 3. The filter is perfectly formed and sized. 4. ...but wait a minute, it's a lot easier to fill if you leave the paper assembled in the die. Load it with you favourite ground coffee 5. Now remove the top half of the die and the coffee will fall through the hole at the bottom to be left behind in the filter paper. 6. Gently remove the paper containing the coffee and place it into the My K-Kup filter container. 7. Assemble into the My K-Cup. 8 Brew and enjoy!
With this file you will be able to print My K-cup coffee filter shaper with your 3D printer. Click on the button and save the file on your computer to work, edit or customize your design. You can also find more 3D designs for printers on My K-cup coffee filter shaper.