My Servo Bot
thingiverse
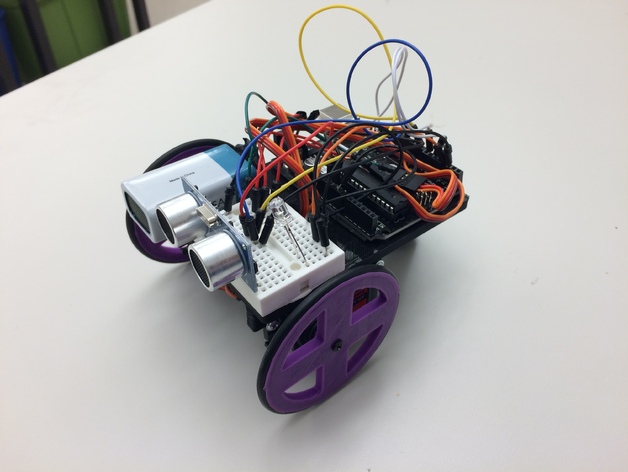
This is an Arduino-Powered Servo Bot I Designed for an Engineering Summer Camp ------------------------ **Build Your Bot** Print the chassis and wheels on your favorite 3D printer. You won't need any support material for this design. Next, press a standard-sized marble into the hole to serve as the bot's third wheel. Since the marble won't be spinning, you don't have to worry about it causing any issues on the slippery surface. To give your robot some real traction, order an O-ring and use it as tire tread. Make sure to install the servos with their output shafts pointing towards the rear of the chassis. Note the position of the breadboard and the 9V battery, which powers the Arduino board. The 4AA holder is dedicated solely to powering the servos. Be sure to install it correctly to avoid any problems. **Download the Code** I've attached a basic code snippet that will get your bot moving forward until it reaches a certain distance, then back up and continue on its way. To complete the setup, you'll need two 9V battery clips to deliver power to the board. I used a ranger finder HC-SR04 for this project. For added versatility, consider using a continuous rotation standard-sized servo for the motors. The code also features an output for two status LEDs, so your bot will have a clear visual indicator of its progress.
With this file you will be able to print My Servo Bot with your 3D printer. Click on the button and save the file on your computer to work, edit or customize your design. You can also find more 3D designs for printers on My Servo Bot.