My version of the LYMAN FILAMENT EXTRUDER
thingiverse
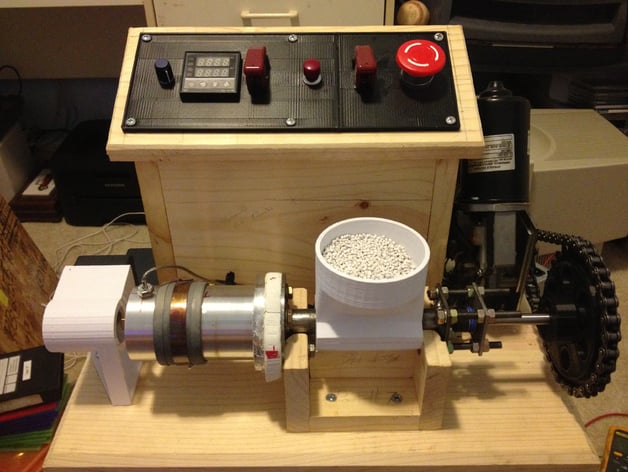
The Lyman Filament Extruder has undergone modifications in this version. Key features include a larger hot end with a 350-watt heater, an automatic timing system, fan ducting, modified sprockets, and a hopper with adjustable motor speed on the control panel. The extruder operates by turning on the cooling fan when the main switch is flipped, followed by pressing the red momentary pushbutton to activate a 1-second timer that latches on and initiates the motor timer set for 20 minutes. This version was created using mostly free or "broken" parts collected by the builder. While it's not a complete step-by-step guide, the STL and SketchUp files are included to provide inspiration for those interested in building an extruder. The Rev B hot end has been added, along with changes such as using studs for easier mounting, eliminating the need for an insulator due to air being a good insulator, and addressing filament twisting and jamming issues by adding two guides at the outlet. A list of parts used in this version can be found in the original Lyman extruder, with specific items such as the heater (P/N G1442594), PID (eBay Item # 150853795607), thermocouple (eBay Item # 400352110948), and voltage regulator (eBay Item # 160739335951) being noted. Adjustments to the motor speed control panel were made using a 10K POT from Radio Shack, allowing for a larger turn radius of usable adjustments.
With this file you will be able to print My version of the LYMAN FILAMENT EXTRUDER with your 3D printer. Click on the button and save the file on your computer to work, edit or customize your design. You can also find more 3D designs for printers on My version of the LYMAN FILAMENT EXTRUDER.