MyPie Catapult: introduction to mechanics and physics
thingiverse
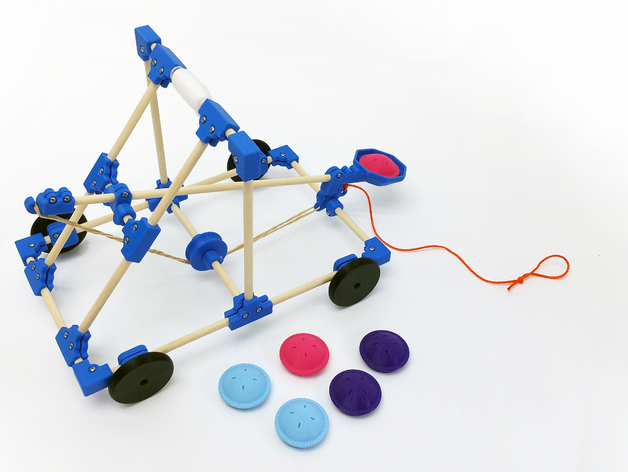
A fun and adaptable pie-shooting catapult. It's perfect for mechanics, design, and introductory projectile motion lessons. ***see MyPie_Assembly_Instructions - Explore_Making.pdf in Thing Files*** How I Designed This The MyPie catapult was designed by 12-year-old Maya from her pen and paper drawings. Maya envisioned her design on paper, and Noah brought it to life using SolidWorks. Some of Maya's pen and paper designs had to be altered to be easily printable by a desktop 3D printer. To do this we removed any overhangs and steep angles. This ensured that the shapes printed at angles less than 45 degrees meant parts wouldn’t need support structures and would print quickly and reliably. Custom Section Overview & Background Maya saw a small wooden catapult for sale at the store. She wanted to buy it, but decided that she could design a better one herself. She designed and drew the MyPie Catapult. Maya recruited her uncle Noah to turn Maya’s drawings into 3D printable parts, and made them on his 3D printers. The catapult works well as a teaching tool. First, having students follow directions and then design and run experiments using the catapult. It is natural for students to try to make changes to get the pies going farther and faster. Depending on the class, it can be a good introduction to projectile motion. The parts are designed so that students can take the catapult apart and design something new as an extension activity. Objectives Follow instructions to create a functional catapult Demonstrate understanding of projectile motion to change the arc and speed of the projectile Design and build a new functional project (extension activity) Audiences grade 5 to adult Subjects Physics, Math, Design, Mechanics Skills Learned (Standards) Follow instructions to build a functional product Document the process of creating a MyPie catapult and any alterations done Change elastic type, placement or other parameters to impact projectile Lesson/Activity Students can work in groups of 2 or 3, promoting teamwork and reducing material costs. If teams used, we recommend having the students switch roles every 5 to 10 minutes so all students assemble, read, and document. One suggestion for homework is the documentation of their process. We've worked hard to create a step-by-step assembly guide. Please also see the Resources section and the Thing files. You can extend the lessons by including challenges for the students (e.g. how far can you launch the pies?). We do a second extension activity where students have to create a new functional product with the catapult pieces and only allowed to add one more 3D printed piece. Duration One hour is sufficient for the basic activity. The extensions can take several hours depending on the depth and number of extensions added. Preparation Materials: 3D printed parts (as uploaded here) wood dowels elastic bands 42 x #2 screws (#2x3/8 inch Pan-Head Phillips) razor blade or Exacto knife ruler screwdriver string padding and zip ties Rubric/Assessment Students could be assessed on the following: Documentation of the process Completed catapult that flings pies a certain distance Understanding of the relationship between elastic size and power of projectile Handouts and Assets MyPie Catapult Assembly instructions Hardware Kits can be ordered from ExploreMaking (email for details) 3D Printed Parts plus Hardware Kits can be ordered from ExploreMaking (email for details)
With this file you will be able to print MyPie Catapult: introduction to mechanics and physics with your 3D printer. Click on the button and save the file on your computer to work, edit or customize your design. You can also find more 3D designs for printers on MyPie Catapult: introduction to mechanics and physics.