Namco GunCon 2 - Rotatable Lightgun Wall Mount
thingiverse
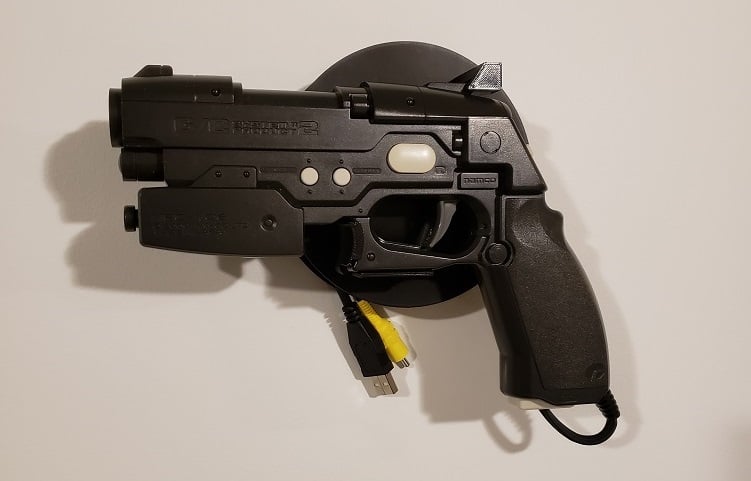
*NOTE - I consider this to be "prototype" quality. If someone with more time and skill than me took this concept and really polished it up, I'd love that. Otherwise, here's my good enough prototype :)* This is a wall mount for a Namco GunCon2 for Playstation2. The main body is a cable spool and gun holder that attaches to the gun. There is also a pin to attach to the wall. The cable spool then attaches to the pin on the wall. It is easy to slide the spool on and take it back off. # Print Instructions: Be sure to use supports for the wall pin and the gun holder. Take care to clean the supports and leave a smooth finish on the gun holder. I set this up so the gun points to the left to hide the screw holes. If you want to point it to the right, just mirror the gun holder and adapter plate. I used a 0.4mm nozzle, 0.25mm layers, and 20% infill. If you're printing my other gun mounts, note that the cable spool for this one is a little larger to accommodate for the bigger cord. It is smaller than the GunCon 1 spool. # Assembly Instructions: Glue the two halves of the cable spool together. The bumps and dimples make this easy to do. I just dab some super glue in each dimple, then press the two halves together. Glue the gun holder to the cable spool adapter plate. The gun holder should fit pretty snug onto the adapter plate. Note that the gun holder can flex a bit, so be sure to not flex it while gluing. Glue the gun holder and adapter plate to the front of the cable spool. There's a bump on the inner circle of the cable spool that aligns with a groove on the adapter plate. This helps get consistent alignment between gun mounts. I typically just glue between the gun holder and the spool and then between the spool and adapter plate at the dimple and groove. # Placing the gun in the mount: I first place the backend of the gun into the hammer slot. Then the trigger handle holder should flex a little and snap into place. This one can be kind of finicky, but I promise it can be put in without a great deal of force. Try different angles of inserting the hammer first. Once the gun is in there, I wrap the cord into the spool. I bring the cord toward the front of the gun and have it start at the back of the spool going counter-clockwise. I adjust the slack as necessary so the console plug ends up where I want it. Then I use the cable clip to lock the cord into place with another part of the cord. For the wall pin, I use two pieces of small 3m adhesive strips. https://www.amazon.com/Command-Damage-Free-Poster-posters-Packaging/dp/B0751VFF2X/ref=sr_1_4 Be sure not to leave the pull tab sticking out the top or you will see it after the gun is mounted on the wall. Once the gun is attached to the spool and the wall pin is on the wall, it's easy to just slide the spool onto the wall pin with the approximate angle you want. There should be enough friction that you can then make any minor adjustments to get the perfect angle.
With this file you will be able to print Namco GunCon 2 - Rotatable Lightgun Wall Mount with your 3D printer. Click on the button and save the file on your computer to work, edit or customize your design. You can also find more 3D designs for printers on Namco GunCon 2 - Rotatable Lightgun Wall Mount.