nanoleaf aurora wall mounts
thingiverse
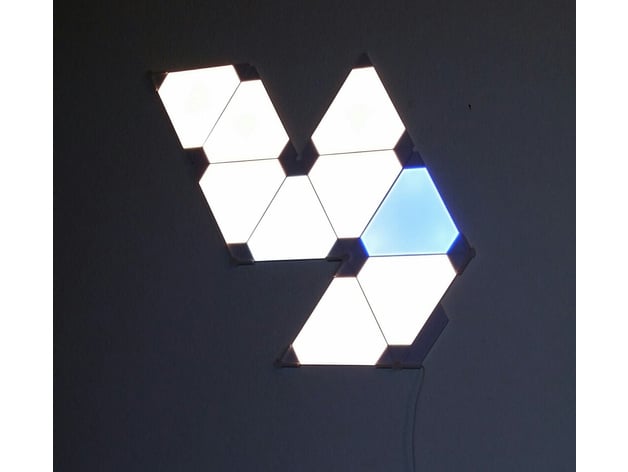
The mounts are intended to hold the nanoleaf aurora LED lights on a wall. These use sewing pins at 30-degree angles (similar to ook picture hangers). It is my belief that these are strong enough to hold the lights while being easy to move without leaving large holes in the wall. See the Instructions section for details on which things you need to mount your aurora. UPDATED 1-29-17 : Added "universal" mounts. Print Settings Printer: Ord Bot Hadron - Custom Rafts: No Supports: No Resolution: 0.25 layer height, 4 solid surfaces, 1mm walls Infill: 15%...20% (doesn't matter) Notes: I use a small nozzle (0.4mm) and 0.25mm layers. I also use 4 solid layers top/bottom and 0.5-1.0mm walls. The holes do not close for me but if you have a larger nozzle this might be a problem. I suppose you could drill them? For what its worth: I use a home built ordbot hadron printer with a home built extruder. The nozzle is pretty standard and I use the cheapest filament I can buy (usually $17/kg ABS). I have been slicing with an older version of cura with good success. Instructions Ok, I'll try and explain my naming and how the tiles work. First there are 2 basic orientations. A triangle with the flat base and a peak pointing up. You can arrange 5 other tiles around this tile. The short summary is that the tiles "point" up or down. A triangle pointing right or left. I used orientation #1. In this orientation I place a mount at every tile corner. My mounts have an "up" and "down" because of the angle of the pin that holds them into the wall. Once you place a pin/mount there can be from 1-6 triangle panels around it. The panels are labeled A through F based on where they are positioned around that center pin. A - the tile north/east pointing 'up' (2-oclock position) B - the tile north of the pin pointing down (12 oclock position) C - the tile north/west pointing 'up' (10 oclock position) D - the tile south/west pointing 'down' (8 oclock position) E - the tile south of the pin pointing 'up' (6 oclock position) F - the tile south/east of the pin pointing 'down' (4 oclock position) Remember there will be a mount pin at every corner intersection of every panel. using the above list if a pin has 3 panels above it (A,B,C positions) it will be the 3-abc thing. The 3 panels to the right would be the 3-fab thing. Note that I did not make non-contiguous tiles (yet). Universal Mounts. I keep wanting to be able to rotate a mount when we change the tiling design, but the original mounts do not rotate. (ok you can force them but dont!) So I designed a mount that can be rotated to all 6 positions (still in the up/down orientation). The pin hole in this mount is a 6-way manifold. The apex of this manifold is unsupported. Make sure you print it without support. It is so small that in practice it worked for me, but the pins were tight because of the blob that will get xtruded in the center. You could always use a small drill to clear it. There are 6 things in the universal u/d set: aurora_mnt_ud1.stl - a single corner tile ... aurora_mnt_ud6.stl - a central 6-corner tile. Image showing unsupported manifold apex.
With this file you will be able to print nanoleaf aurora wall mounts with your 3D printer. Click on the button and save the file on your computer to work, edit or customize your design. You can also find more 3D designs for printers on nanoleaf aurora wall mounts.