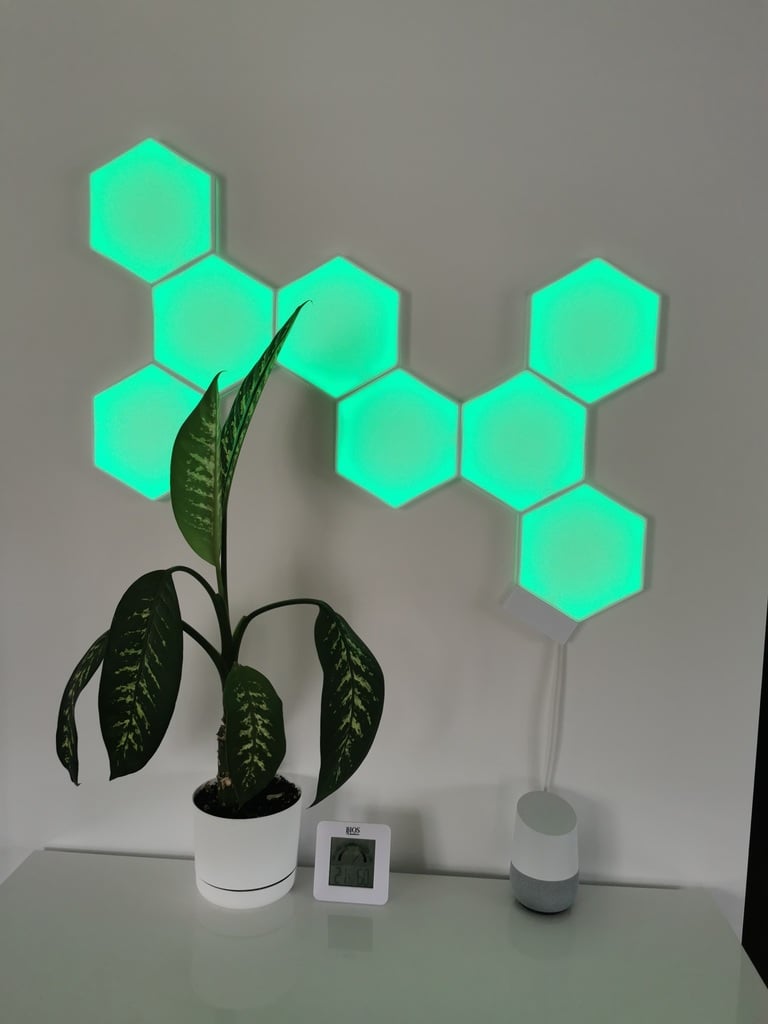
Nanolfeaf Replica (no visible LED)
thingiverse
# **Sound reactive smart Nanoleaf Replica - Wled **  I liked most designs out here, but I didn't want to be able to see each individual LED. I also wanted to create this exact configuration, so it's not much modular, but with some twerk it can be done. I also wanted a perfect spacing for the LEDS within the Ender 3 print area. Please note that this is NOT a step by step tutorial and you should have some basic electronic knowledge. I'm not the best myself, so please be indulgent. I was mainly inspired by [Surrbradl08](https://www.thingiverse.com/surrbradl08/designs) and I followed his really nice [turorial](https://github.com/NimmLor/esp8266-nanoleaf-webserver/blob/master/gallery/rgb_preview2.gif?raw=true). Plase refer to this page for more hardware and wiring details. ## BOM : - 1x [ESP8266 V3](https://www.aliexpress.com/item/4000160133215.html?spm=a2g0o.productlist.0.0.656a5e45PQeJSv&algo_pvid=45a127ce-ff13-42c8-bf67-d928587d5fdf&algo_exp_id=45a127ce-ff13-42c8-bf67-d928587d5fdf-0&pdp_ext_f=%7B%22sku_id%22%3A%2210000000516093098%22%7D) (V2 or any other ESP would work fine, but you'll need to change the electronic box to make it fit. Please also note that an ESP32 would give you more sound feature as the ESP8266 is limited) - 5 meters of IP30 LEDs WLED compatible : [compatibility list](https://github.com/Aircoookie/WLED). I recommand used the typical [WS2812](https://www.aliexpress.com/item/2036819167.html?spm=a2g0s.9042311.0.0.40614c4dY780NO) - A massive [5V - 20 amp Power supply](https://www.aliexpress.com/item/1005002553164891.html?spm=a2g0s.9042311.0.0.40614c4dY780NO) - [LED wire](https://www.aliexpress.com/item/1005002571762503.html?spm=a2g0s.9042311.0.0.40614c4dY780NO) (I used 18 AWG, but for the length between each panel I think I could've use something smaller) : - [Logic level shifter](https://www.aliexpress.com/item/1972789887.html?spm=a2g0s.9042311.0.0.40614c4dY780NO) (not alway necessary, but for the pirce it's a no brainer) - [MAX4466 Microphone](https://www.aliexpress.com/item/32863665925.html?spm=a2g0s.9042311.0.0.40614c4dY780NO) - From the power supply to the panels I used [14awg speaker wire](https://www.amazon.ca/gp/product/B07588K6PB/ref=ppx_yo_dt_b_asin_title_o00_s00?ie=UTF8&th=1) - 1000 uF Capacitor (I run without it, but it's good to have one) ## Printing : I uploaded G-Codes for an Ender 3 as a reference. Main frame can be printed with almost filament Diffuser were made from [White PLA 4043D](https://filaments.ca/products/standard-pla-4043d-white-1-75mm?_pos=1&_sid=dd3efa5d3&_ss=r&variant=32337037459541) on a textured sheet. Here are few tips - Bed calibration is crucial as the first layer should perfect. - 4x perimeters, 100% infill with **monotonic** infill - 0.2mm layer to have exactly 3 layers - Increase the overlap to avoid holes between the perimeter and the infill. My setting :  ## Assembly : This is honestly not the easiest thing to assemble, but with some patience you can achieve it. Panels are snapped together, but I added some instant glue to have a permanent assembly. I soldered LEDs in place : some dexterity required :) . ## Wiring : Some are better than me to do wiring diagram, please find the complete diagram for the LEDs and the logic level shifter : [HERE](https://www.vincenzocaputo.com/langolo_dei_lettori/ambilight-con-un-wemos-d1-mini-guida-alla-realizzazione-fai-da-te-449). The Microphone : must be soldered to +3.3v, ground and the pin A0 of the ESP. ## Programming : 1. Download the latest ESP8266 Wled Sound reactive binary [HERE](https://github.com/atuline/WLED/releases/download/v0.12.0/soundReactive_WLED_0.12.0_ESP8266.bin) 2. Flash using ESPHome (pretty straight forward, other tool can be used) 3. Connect to the WLed wifi acces point and configure your Wifi 4. Configure your LED in ''LED Preferences'' 4. Enjoy ! ###### Disclaimer : Like I said in the beginning, I'm not the ultimate reference in electronic and I only want to share my design of these Nanoleaf replica. I strongly suggest to put the power supply into an UL certified case to minimize the risk of electric shock / fire. In all circumstances, I am not responsible of what could happen if you follow this tutorial.
With this file you will be able to print Nanolfeaf Replica (no visible LED) with your 3D printer. Click on the button and save the file on your computer to work, edit or customize your design. You can also find more 3D designs for printers on Nanolfeaf Replica (no visible LED).